
To clean a carburetor without causing damage, start by ensuring the engine is off and cool. Carefully remove the carburetor, noting how parts are assembled, and use a non-abrasive cleaner with a soft brush to gently clean jets and passages. Don’t force any parts apart, and inspect for wear or damage, replacing components as needed. Once reassembled, make precise adjustments to idle and fuel mixture. Keep these tips in mind, and you’ll be on your way to a smoother engine—more helpful steps await you.
Key Takeaways
- Turn off and cool the engine before starting, then carefully disassemble the carburetor, noting part placement.
- Use non-abrasive cleaner and a soft brush to gently clean jets and passages, avoiding forcing or damaging parts.
- Inspect and replace worn or damaged components like the float and needle valve to ensure proper function.
- Reassemble carefully, ensuring all parts fit correctly and connections are secure to prevent leaks.
- After reassembly, start the engine, adjust the idle and mixture screws, and verify smooth operation without forcing components.
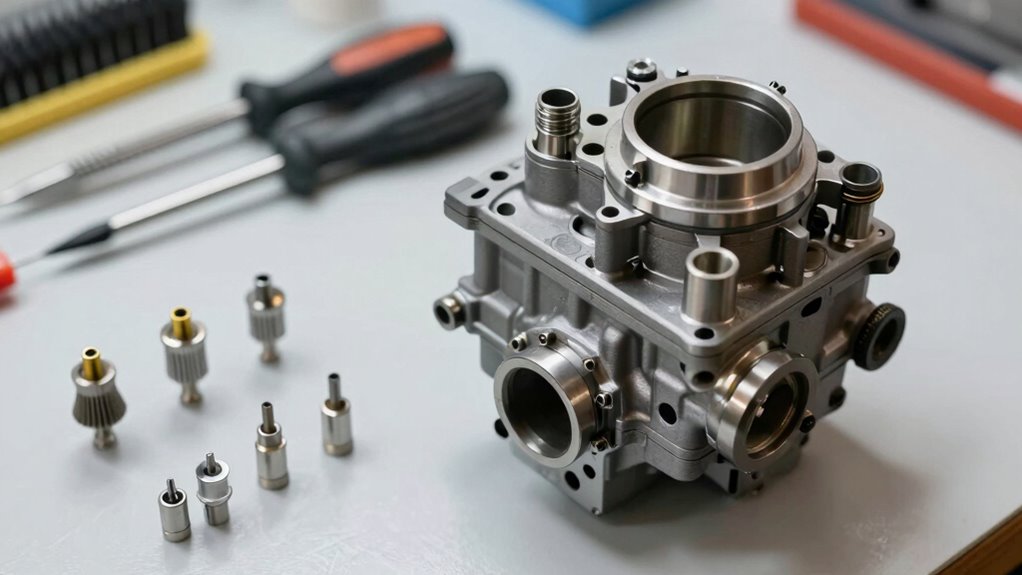
If your engine isn’t running smoothly or has trouble starting, a dirty carburetor might be the culprit. Over time, debris, varnish, and old fuel can clog the tiny passages inside, disrupting the fuel mixture and causing performance issues. Before attempting any cleaning, make sure the engine is off, cool, and you have the necessary tools ready. You’ll want to remove the carburetor carefully, taking note of how all parts fit together. Once removed, avoid forcing or damaging components, as this can make the problem worse.
Start by disassembling the carburetor, paying close attention to the jets, float bowl, and passages. These are critical areas where grime tends to build up. Use a carburetor cleaner spray and a soft brush to loosen dirt—don’t use anything too abrasive, as it might scratch delicate surfaces. Focus on cleaning the jets thoroughly because clogged jets directly impact the fuel mixture, causing poor idling or stalling. After cleaning, inspect the float and needle valve for wear or damage, replacing them if necessary.
Disassemble the carburetor, clean jets thoroughly, and inspect the float and needle valve for wear or damage.
While cleaning, it’s a good idea to check the idle adjustment screw. If your engine is idling too high or too low, you might need to tweak this screw after reassembling the carburetor. Proper idle adjustment ensures your engine runs smoothly at low speeds, preventing stalling and rough idling. Once everything is cleaned and inspected, reassemble the carburetor carefully, making sure all parts fit correctly. A loose or improperly assembled unit can lead to leaks or uneven fuel flow.
When reinstalling, reconnect the carburetor to the fuel lines and air filter, and double-check all connections. Before starting the engine, consider adjusting the fuel mixture screw slightly to optimize performance and emissions. If your engine still runs rough after cleaning, it might be worth checking the throttle linkage or replacing worn parts. Keep in mind that a well-maintained carburetor provides a balanced fuel mixture, which is essential for smooth operation and good fuel economy.
Finally, after reassembly, start your engine and listen carefully. It should idle steadily and accelerate smoothly. If it doesn’t, revisit your idle adjustment, ensuring the screw is set to the recommended position for your engine. Regular cleaning and adjustments can prevent many carburetor problems, keeping your engine running like new without risking further damage. Additionally, understanding the importance of carburetor maintenance can help you avoid costly repairs in the future. Proper maintenance also involves understanding how fuel quality impacts carburetor performance and longevity.

Gumout 800002230 Carb and Choke Cleaner Jet Spray – 16 oz.
Helps overcome: hard starting, rough idling, stalling, high exhaust emissions
As an affiliate, we earn on qualifying purchases.
As an affiliate, we earn on qualifying purchases.
Frequently Asked Questions
Can I Clean a Carburetor Without Removing It From the Engine?
You can clean a carburetor without removing it from the engine, but it’s often more effective with carburetor removal and some engine disassembly. Start by carefully disconnecting the carburetor, then use carburetor cleaner spray to flush out dirt and deposits. Avoid forcing parts or rushing, and guarantee you keep track of all components. While cleaning in place is possible, removing the carburetor provides better access for a thorough, safe clean.
What Tools Are Essential for Cleaning a Carburetor Safely?
For carburetor maintenance, you’ll need essential cleaning tools like a carburetor cleaner spray, soft-bristle brushes, and compressed air. These tools help remove dirt and varnish safely without damaging delicate parts. Use the spray to dissolve buildup, gentle brushes to scrub small passages, and compressed air to blow out debris. With these cleaning tools, you can maintain your carburetor effectively, ensuring smooth engine performance without risking damage.
How Often Should I Clean My Carburetor?
You should clean your carburetor every 1 to 2 years for maximum engine performance. Regular carburetor maintenance prevents buildup of debris and varnish, ensuring smooth operation. If you notice engine stalling, poor acceleration, or difficulty starting, it’s a sign it’s time for a cleaning. Keeping your carburetor in good shape helps maintain engine efficiency, improves fuel economy, and extends the lifespan of your equipment.
Is It Safe to Use Household Cleaners on a Carburetor?
Using household cleaners on a carburetor is like pouring acid on delicate machinery—you risk corrosive damage. These cleaners often contain harsh chemicals that can harm the metal parts and gaskets. Instead, opt for specialized carburetor cleaner, which is designed to dissolve dirt without damaging components. Always follow the instructions carefully, and avoid household cleaners to keep your carburetor working smoothly and safely.
What Are Signs of a Carburetor That Needs Cleaning?
You’ll notice signs your carburetor needs cleaning if your engine stalls, idles roughly, or has trouble starting. Poor engine performance, such as power loss or hesitation, often points to fuel system issues. Additionally, you might see black smoke or experience increased fuel consumption. These symptoms indicate debris or varnish buildup in the carburetor, which affects fuel flow and engine performance—so cleaning it can restore smooth operation.

ApplianPar Carburetor Repair Rebuild Kit for Yamaha YZ450F 2003-2009 YZ250F 2003-2013
Fit for Honda CRF250R 2004-2009 2012-2017, CRF250X 2004-2009 2012-2017V, TRX450R 2006-2009, TRX450ER 2006-2009 2012-2014, CRF450R 2002-2008, CRF450X 2005-2014V
As an affiliate, we earn on qualifying purchases.
As an affiliate, we earn on qualifying purchases.
Conclusion
Cleaning your carburetor properly can extend your engine’s life and boost performance. Remember, over 80% of engine issues stem from carburetor problems, so taking the time to clean it correctly makes a big difference. By following these steps carefully, you’ll prevent damage and keep your engine running smoothly. Regular maintenance isn’t just a DIY task; it’s a smart way to save money and avoid costly repairs down the line.

NYTKL 3PCS Carbon Dirt Cleaning Brush, Carburetor Cleaner Density Nylon Tube Brush for Drill, Car Engine Carbon Dirt Jet Remove Cleaning Brushes for ATV Motorcycle Moped Welder
Effective Cleaning: The densely packed bristles effectively capture fine particles and stubborn dirt, leaving no residue behind. Specially…
As an affiliate, we earn on qualifying purchases.
As an affiliate, we earn on qualifying purchases.

Toolwiz Pilot Screw Adjustment Tool with 110° Angled Head, 16.34"
Save Time & Effort: Toolwiz pilot screw adjusting tool is specifically engineered to simplify the adjustmest of the…
As an affiliate, we earn on qualifying purchases.
As an affiliate, we earn on qualifying purchases.