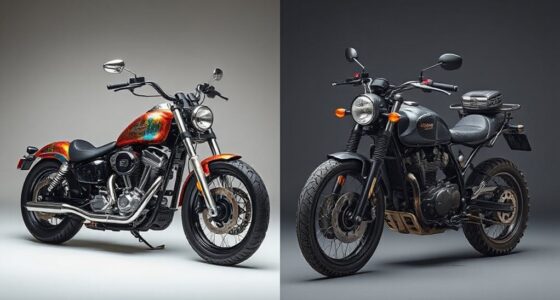

To add style and sound to your classic, start by planning your exhaust route to guarantee proper clearance and avoid interference with other components. Choose durable materials like stainless steel and select performance mufflers that match your desired sound. Gather essential tools, safely remove the old system, then flexibly fabricate and weld your custom pipes. Use sturdy mounts and supports for long-lasting durability. Want a professional finish and the perfect sound? Keep exploring for detailed tips.
Key Takeaways
- Choose high-quality, durable materials like stainless steel to enhance appearance and sound quality.
- Plan exhaust routing carefully to ensure proper clearance, avoid heat damage, and achieve desired aesthetic placement.
- Use custom bends and brackets for tailored fit, optimizing both style and acoustic performance.
- Incorporate performance mufflers and soundproofing techniques to achieve the desired exhaust note and reduce noise.
- Ensure secure mounting with vibration-absorbing hangers and supports for long-lasting, stylish, and functional exhaust system.
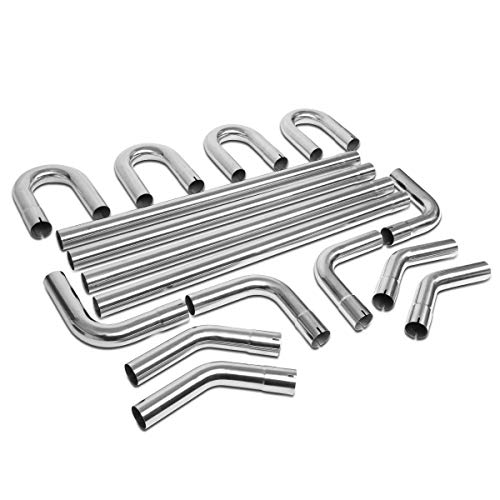
DNA Motoring ZTL-25SS 16 Pcs 2.5 Inches Stainless Steel DIY Custom Exhaust Tubing Mandrel Bend Pipe Straight & U-Bend Kit, Universal Fit
Specification: 18-Gauge Piping Walls ; Inlet / Outlet Size (IN): 2.5"OD
As an affiliate, we earn on qualifying purchases.
As an affiliate, we earn on qualifying purchases.
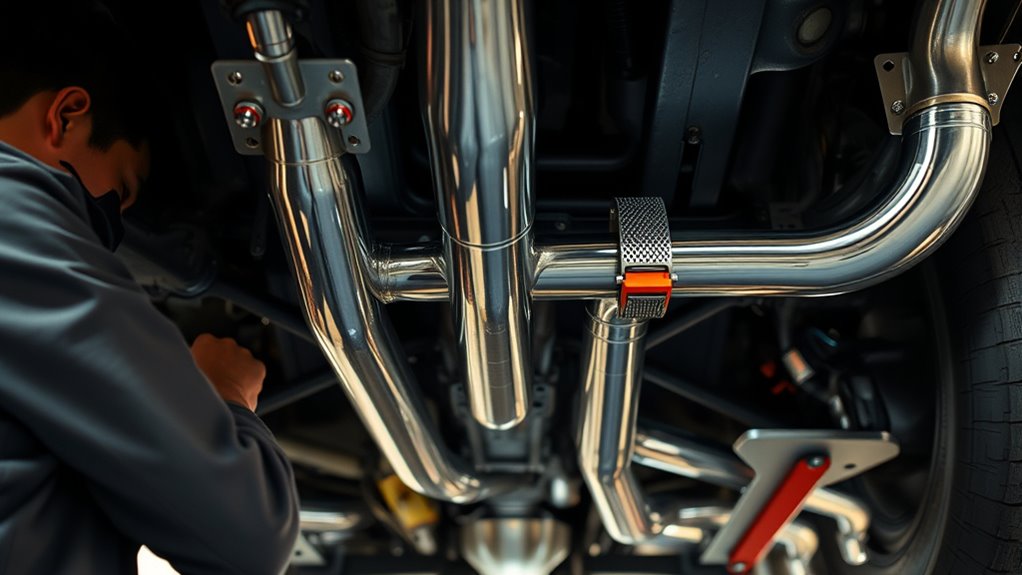
Planning Your Custom Exhaust Route
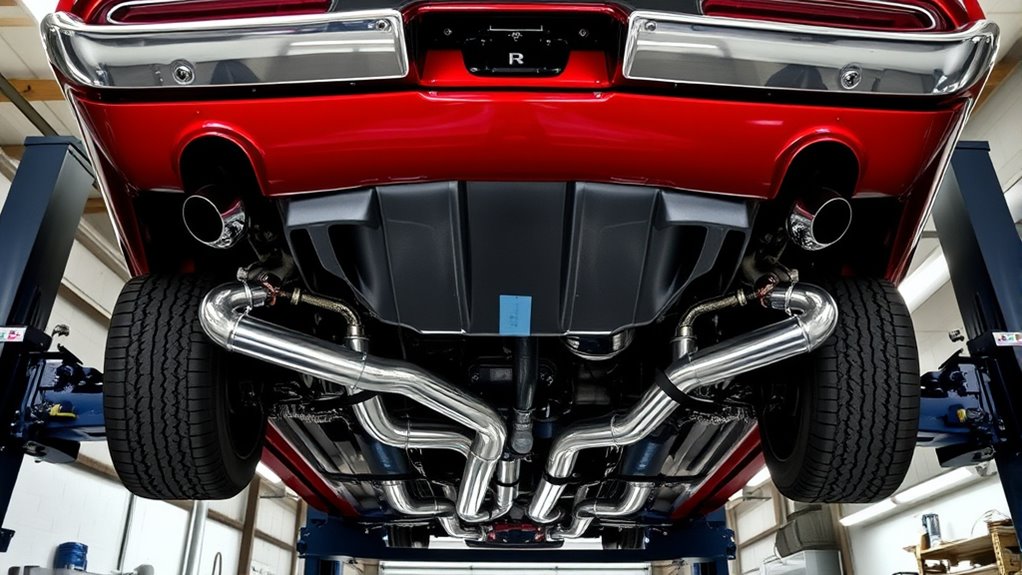
Planning your custom exhaust route is a crucial step that guarantees proper fit, performance, and safety. You need to carefully map out the path of your exhaust pipes to avoid interference with essential components like the axle, shock absorbers, gas tank, and leaf springs. Prioritize clearances to prevent rattles, heat damage, or restrictions on movement. Use simple pipe bends—15°, 30°, 45°, 60°, and 90°—to facilitate easier fabrication and installation. Think about aesthetic placement of tailpipes, aiming for a balanced look that complements your vehicle’s style. Incorporate custom cross braces and mounting brackets with rubber isolators to reduce vibration and allow proper support. Additionally, understanding exhaust flow dynamics can help optimize your system’s performance and sound quality. Considering European cloud innovations in your planning can inspire advanced materials and design techniques for durability. Incorporating proper routing techniques can prevent future issues related to heat buildup or component interference. Proper planning also involves considering net worth and potential modifications to your vehicle to enhance both style and functionality. For example, factoring in thermal management can help prevent heat damage to nearby components. By planning meticulously, you’ll ensure your exhaust system not only fits perfectly but also functions reliably and safely over time.

Universal Exhaust Muffler with Aggressive Sound, Anti-corrosive Muffler, Chamber Performance Mufflers for Cars, Trucks(2.5" center in | 2.5" center out | overall 13")
Please measure the exhaust pipe size and space before purchasing to ensure smooth installation.
As an affiliate, we earn on qualifying purchases.
As an affiliate, we earn on qualifying purchases.
Selecting the Right Materials and Components
Choosing the right materials and components is vital for ensuring your exhaust system’s durability and appearance. You need to pick options that match your vehicle’s needs, whether that’s stainless steel for rust resistance or cost-effective mild steel. By selecting suitable exhaust parts and materials, you’ll improve performance, longevity, and the look of your custom setup. Additionally, considering safe installation practices will help prevent issues and extend the life of your exhaust system. Being aware of ventilation considerations can also enhance safety during installation and operation, especially in enclosed spaces. Incorporating proper maintenance routines can further preserve your exhaust’s condition over time and prevent corrosion or damage. Regular inspections and cleaning methods tailored for your chosen materials will help maintain optimal performance and appearance over the years. Paying attention to material compatibility is essential to avoid adverse reactions and ensure the longevity of your exhaust components.
Materials for Durability and Appearance
Choosing the appropriate materials for your custom exhaust system is crucial to guarantee both durability and appearance. Stainless steel is a top choice because it resists rust and keeps its shine over time, making it ideal for longevity and aesthetic appeal. Mild steel is more affordable but requires coatings or paints to prevent corrosion, especially if your vehicle is exposed to the elements. Rubber isolators and hangers help absorb vibrations, extending the lifespan of your pipes and joints. Proper clearance around heat-sensitive parts, like the gas tank and suspension, protects your investment from heat damage. Custom stainless tubing can also be made removable for easier maintenance and to keep your system looking sharp. Additionally, selecting high-quality materials ensures your exhaust not only performs well but also maintains a sleek appearance. When selecting components, consider the corrosion resistance and how they will withstand environmental factors over time. Incorporating material compatibility into your planning can further enhance the durability and effectiveness of your exhaust system. For added longevity, choosing materials that are weather-resistant can help your system withstand harsh conditions and extend its service life. Moreover, using appropriate fastening methods can prevent leaks and improve overall system integrity.
Choosing Suitable Exhaust Components
Selecting the right exhaust components is essential for guaranteeing your custom system performs reliably and looks great. You want materials that handle heat, resist corrosion, and match your desired sound and style. Consider these options:
- Stainless steel: Durable, corrosion-resistant, ideal for longevity and a sleek look. Its performance in extreme conditions makes it a popular choice among enthusiasts seeking a long-lasting solution. Additionally, stainless steel’s ability to withstand harsh environmental conditions helps maintain its appearance and function over time.
- Mild steel: Cost-effective but needs coatings to prevent rust, suitable for budget builds.
- Aluminized steel: Offers a balance between cost and corrosion resistance, good for outdoor exposure.
- Performance mufflers: Choose based on sound preference—deep, aggressive, or quieter tones.
Matching components to your goals ensures a reliable setup that maintains style and sound. Proper material choice impacts durability, maintenance, and overall performance of your custom exhaust system. Material selection is crucial for ensuring your exhaust system withstands environmental conditions and maintains its aesthetic appeal over time. Additionally, understanding corrosion resistance helps in selecting materials that will last longer in various climates.

12 Ton Hydraulic Pipe Bender, Manual Copper Pipe Bender, 90°-180° Adjustable Rollers Hydraulic Tubing Bender with 6 Dies for Steel Iron Metal Ratcheting
12 Tons Hydraulic Pipe Bender: 12 Ton, Stroke: 5.12 (130 mm), Adjustable Height: 12.9 (330 mm) in Minimum,…
As an affiliate, we earn on qualifying purchases.
As an affiliate, we earn on qualifying purchases.
Gathering Essential Tools and Equipment

Before starting your custom exhaust project, you need to gather the right tools and equipment. Basic hand tools like socket wrenches and clamps are essential for simpler tasks, but more advanced work requires drills, saws, and welders. Don’t forget safety gear and proper vehicle supports to guarantee your work is safe and efficient. Incorporating visual cues can also help you better understand the sound modifications and ensure a professional finish. Additionally, understanding sound vibrations can help you select the most effective exhaust components for the desired sound and performance. Being aware of modern kitchen technology concepts like automation and precision can inspire innovative approaches to customizing your exhaust system. Recognizing the importance of soundproofing materials can further enhance the quality of your exhaust sound and reduce unwanted noise. Moreover, exploring sound analysis techniques can provide valuable insights into achieving the perfect acoustic balance for your custom exhaust.
Basic Hand Tools
When starting a custom exhaust installation, having the right basic hand tools is vital to guarantee a smooth and efficient process. These tools help you make precise cuts, secure fittings, and ensure proper alignment. Key tools include a socket wrench set for loosening and tightening bolts, screwdrivers for clamps and brackets, pliers for gripping and bending, and a hacksaw for cutting pipes to length. Additionally, a tape measure helps with accurate measurements, and a rubber mallet can assist in fitting parts without damage. Keep in mind, having a work light and gloves improves safety and visibility. Ensuring you understand proper tool usage can prevent damage and make the job safer. Using the right filtration and pump protection for your spray guns can also help maintain a clean work environment and prevent debris from damaging components. Equipping yourself with these essentials ensures you can handle most tasks confidently, making the installation faster and more manageable. Proper tools are the foundation of a successful exhaust upgrade.
Welding Equipment Access
Access to quality welding equipment makes a significant difference in the success of your custom exhaust installation. Reliable welders guarantee strong, leak-proof joints that withstand heat and vibration. Without proper tools, fabricating brackets or joining sections becomes difficult, risking structural issues. You’ll need a welder suitable for exhaust materials, along with safety gear like gloves and a mask. Here’s a quick overview of essential equipment:
| Tool | Purpose |
|---|---|
| MIG/TIG Welder | Fusing exhaust pipes and brackets |
| Angle Grinder | Cutting and smoothing metal |
| Clamps & Fittings | Holding parts in place during welding |
Having these tools accessible helps you work efficiently, ensuring your custom exhaust is durable and professional-looking.
Lifting and Safety Gear
Lifting and safety gear are essential for a safe and efficient custom exhaust installation, especially when working underneath the vehicle. You need the right equipment to prevent accidents and make the process smoother. Always use a sturdy jack and reliable jack stands to elevate your car securely. Wearing gloves protects your hands from sharp edges and hot surfaces, while safety glasses shield your eyes from debris and sparks. A mechanic’s creeper or mat makes sliding underneath more comfortable. Don’t forget a face mask if welding or grinding. Here’s what you should have on hand:
- Jack and jack stands
- Safety glasses or goggles
- Work gloves
- Mechanic’s creeper
Using proper gear keeps you safe, reduces injury risk, and improves your efficiency during installation.
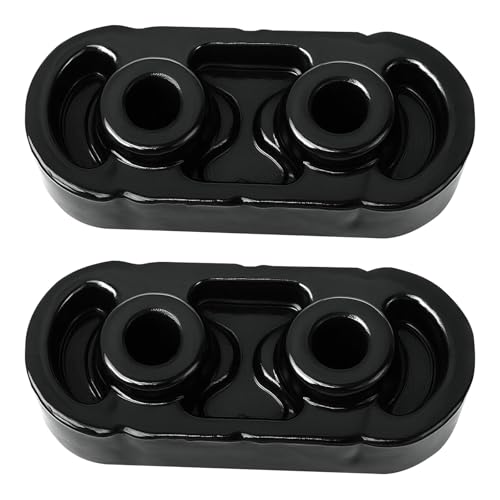
Exhaust Muffler Hanger Insulator Vibration Dampening Rubber 15092802 for Chevy Express Suburban Silverado 1500 2500 3500 HD for Yukon Savana Sierra 2001-2015 Built-in Iron Frame Hanger (2pcs)
For Cadillac Escalade 2002-2015, ESV 2003-2015, EXT 2002-2013 etc,Replacement part 15092802 15740212 25956663
As an affiliate, we earn on qualifying purchases.
As an affiliate, we earn on qualifying purchases.
Removing the Old Exhaust System Safely

Removing the old exhaust system requires careful preparation to guarantee safety and prevent damage. First, ensure the vehicle is securely lifted with safety supports or a hoist, providing stable access underneath. Spray rusted bolts and clamps with penetrating oil and let it sit for a few minutes; this will loosen corrosion and make removal easier. Use appropriate tools like socket wrenches and a saw if needed, especially for stubborn or rusted parts. Be cautious of hot surfaces; wait until the exhaust cools completely before beginning work. Keep track of all hardware and mounting points, as some parts may be reused or replaced. Work slowly and steadily, avoiding excessive force to prevent damaging surrounding components or breaking bolts. Proper preparation guarantees a smooth, safe removal process.
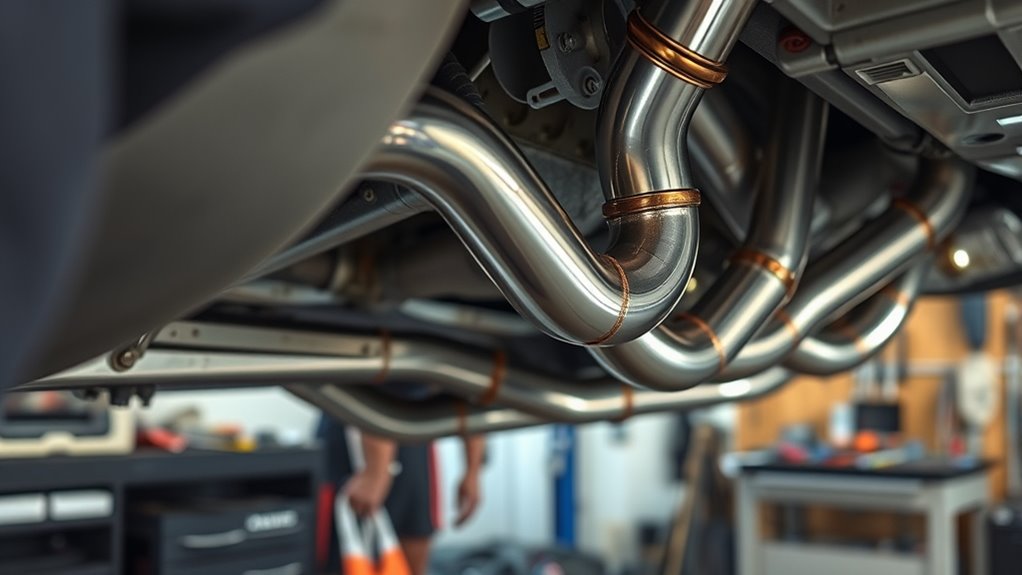
Fabricating and Fitting Custom Pipe Sections

Fabricating and fitting custom pipe sections begins with precise measurements of your exhaust layout. You’ll want to verify the distances between connection points and plan your routing to avoid obstacles. Once you have your measurements, cut your pipes accurately using a pipe cutter or saw. Make sure to match bends to your desired angles, like 15°, 30°, or 45°, for smooth flow and fit. When fitting, keep these tips in mind:
Start with precise measurements, cut accurately, match bends, and dry-fit to ensure a seamless exhaust system.
- Dry-fit all sections before welding to check alignment
- Use clamps to hold pipes in place during adjustments
- Smoothly bend pipes to avoid kinks that restrict airflow
- Double-check measurements as you go to prevent errors
Proper fabrication ensures your exhaust not only looks great but performs efficiently without leaks or interference.
Welding and Securing Connections
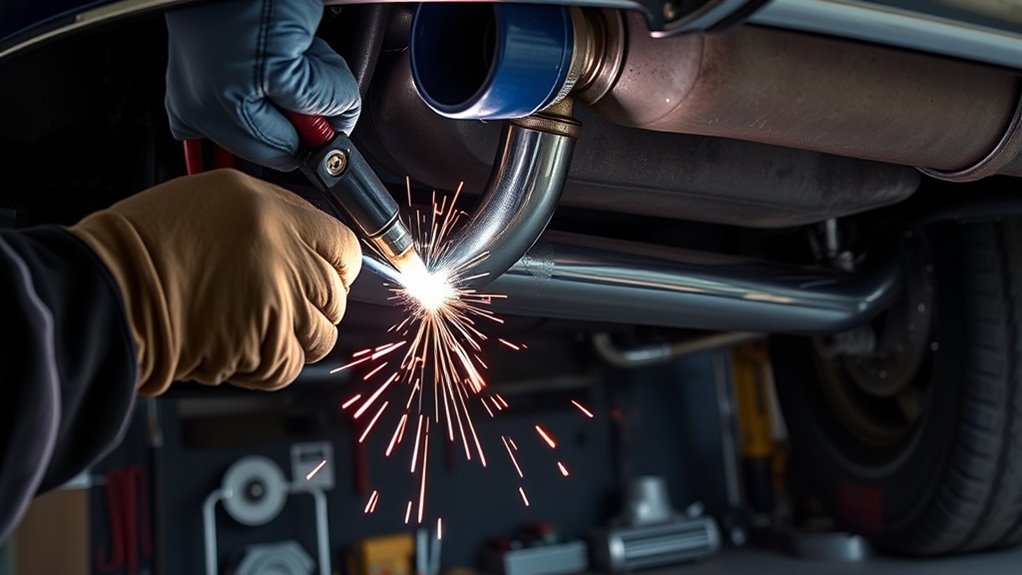
Welding and securing connections are critical steps to guarantee your custom exhaust system is both durable and leak-free. Proper welds ensure the joints can withstand engine vibrations and heat without failure. Use a quality welder suited for exhaust materials, such as TIG or MIG, and clean the surfaces thoroughly before welding. Focus on creating smooth, consistent weld beads that fully fuse the pipe and flange surfaces. For flange connections, ensure proper alignment before welding to prevent leaks. Once welded, inspect each joint for gaps or weak spots, and consider applying high-temperature paint or coating to prevent rust. Secure all sections with clamps and brackets, and double-check that everything fits tightly before final tightening. Proper welding and securing provide a solid foundation for your exhaust’s performance and longevity.
Mounting and Support Strategies for Durability
To guarantee your custom exhaust system remains durable over time, selecting effective mounting and support strategies is essential. Proper support prevents sagging, reduces vibrations, and extends the lifespan of your setup. Use high-quality brackets and mounting hardware designed for exhaust systems. Incorporate rubber isolators to absorb vibrations and allow for thermal expansion. Ensure brackets are securely attached to solid points on the vehicle frame, avoiding weak spots. Consider using adjustable supports to fine-tune positioning and clearance. Properly placed cross braces increase stability and prevent stress on welds and joints. Regularly inspect supports for wear or damage, replacing any compromised parts promptly. Keep these strategies in mind to maintain both the performance and longevity of your custom exhaust system.
- Use durable, heat-resistant brackets and clamps
- Incorporate rubber isolators for vibration absorption
- Attach supports to strong, stable frame points
- Install cross braces for added stability
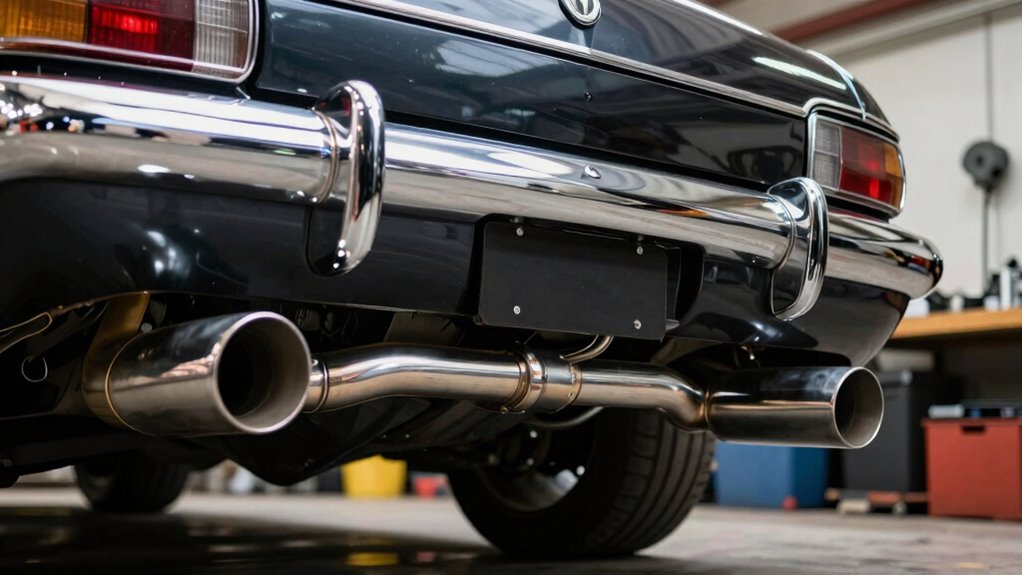
Achieving the Desired Sound and Performance
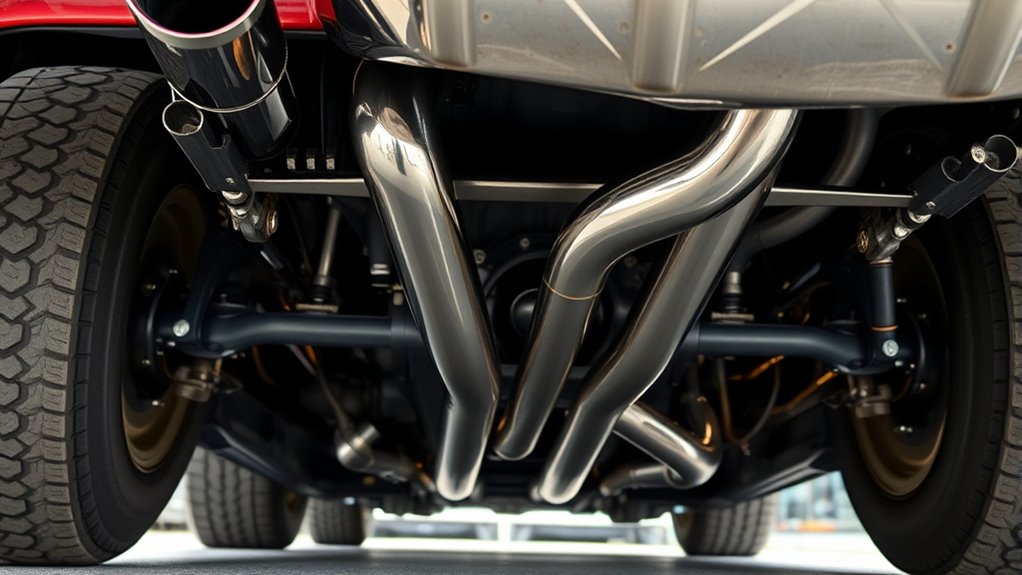
Achieving the desired sound and performance from your custom exhaust system starts with selecting the right components and configuring them properly. Choose mufflers and headers that match your preferred tone—whether deep and throaty or sporty and aggressive. Adjust pipe diameter and bends to influence exhaust flow, which impacts both power and sound. Larger diameters typically boost performance but can increase volume, so balance these factors based on your goals. Installing a crosspipe or X-pipe helps smooth exhaust pulses, refining tone and improving flow. Proper routing away from heat-sensitive components guarantees reliability and safety. Fine-tune your setup by experimenting with muffler types and pipe configurations until you find the perfect blend of sound and performance that elevates your classic’s personality.
Troubleshooting Common Installation Challenges

Installing a custom exhaust system often presents challenges like rusted bolts, tight clearances, and frame inconsistencies that can complicate the process. You might encounter seized bolts that require penetrating oil, heat, or specialized tools to loosen. Clearance issues near suspension components or gas tanks may force you to modify pipe routes or bend sections carefully. Frame irregularities can mean you need to adjust or re-fabricate mounting points. To overcome these hurdles, consider:
Anticipate rusted bolts, tight spaces, and frame quirks; adapt with patience, tools, and careful planning.
- Using heat and penetrating fluid for stuck bolts
- Carefully measuring and mocking up before final tightening
- Bending or trimming pipes for better clearance
- Fabricating custom brackets or supports when factory mounts don’t fit
Being prepared with the right tools and patience guarantees a smoother installation, even when obstacles arise.
Frequently Asked Questions
How Do I Ensure Proper Clearance From Heat-Sensitive Components?
To guarantee proper clearance from heat-sensitive components, you should carefully route your exhaust pipes away from the gas tank, suspension parts, and frame rails. Use flexible rubber isolators and mounting brackets to maintain distance and absorb vibrations. Regularly check clearances during installation and make adjustments as needed. Avoid tight bends near heat sources, and consider heat shields or wraps for added protection, keeping everything safe and functioning efficiently.
What Are the Best Practices for Aligning Exhaust Pipes Accurately?
Did you know proper alignment reduces exhaust leaks by up to 90%? To align your pipes accurately, start by mocking up the system with finger-tight fittings. Use a straightedge or string to check for proper routing, guaranteeing pipes follow the intended path. Make small adjustments before fully tightening, and double-check clearances from suspension and bodywork. Proper alignment ensures ideal flow, reduces vibrations, and enhances your classic’s performance and sound.
How Can I Prevent Exhaust Leaks After Installation?
To prevent exhaust leaks after installation, make certain all joints and flange connections are tightly sealed with high-quality gaskets. Use proper welding techniques to create secure, leak-proof butt joints and flange connections. Double-check all clamps and hangers, tightening them to prevent movement that could cause leaks. Applying a high-temperature sealant or exhaust paste around connections can provide extra assurance. Regularly inspect for signs of leaks and promptly address any issues.
Which Welding Techniques Are Most Effective for Exhaust Systems?
You should use TIG welding for exhaust systems because it delivers clean, precise, and strong welds ideal for thin stainless steel tubing. Use proper technique, like maintaining consistent heat and filler rod feed, to guarantee leak-proof joints. For thicker pipes, MIG welding can be effective, but always clean surfaces beforehand. Practice proper safety and welding settings to achieve durable, professional results that prevent leaks and withstand heat and vibration.
How Do I Choose the Optimal Muffler for Sound and Performance?
You might think picking a muffler’s just about noise, but it’s really about balancing sound and performance. For a deeper, aggressive tone, go for a free-flowing, high-flow muffler; if you want refinement, choose one that dampens noise without sacrificing power. Remember, larger diameters boost performance but can increase volume. Test different options to find the perfect harmony of raw sound and ideal horsepower, because subtlety’s overrated in the quest for that perfect exhaust note.
Conclusion
By planning carefully, choosing quality materials, and executing precise installation, you’ll enhance your classic’s style and sound. Focus on proper fitting, secure welding, and solid mounting to guarantee durability. Test and tweak to achieve your perfect performance and tone. Embrace the process, enjoy the craftsmanship, and take pride in transforming your ride. With patience and attention to detail, you’ll create a custom exhaust that turns heads, sounds great, and lasts for years to come.