
To wire a custom bike from scratch, start by planning your layout to position components like your ignition, lights, and gauges, and determine the shortest, safest routes for wiring. Choose high-quality insulated cables rated for your system’s voltage and current needs. Be sure to securely insulate and organize connections with soldered joints, crimps, and protective tubing. Carefully verify component compatibility and safety features such as fuses and relays, then test your work thoroughly. If you continue, you’ll discover detailed steps to build a reliable harness from scratch.
Key Takeaways
- Plan component placement and wire routes to ensure efficient, organized wiring harness construction.
- Use high-quality, insulated cables rated for motorcycle electrical loads and connect with proper crimp or solder joints.
- Keep wiring neat, secured, and away from hot or moving parts using zip ties and protective tubing.
- Incorporate fuses and relays compatible with system components to ensure electrical safety.
- Test continuity and voltage at each connection before final assembly to verify proper wiring and troubleshoot issues.
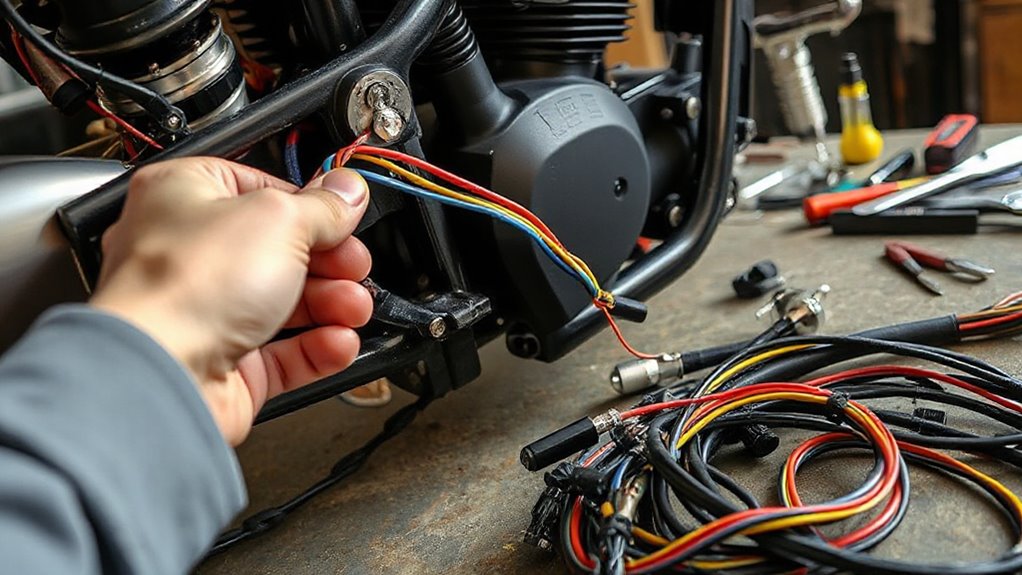
Wiring a custom bike from scratch might seem intimidating, but with the right approach, you can create a clean and reliable electrical system tailored to your ride. The key is understanding the basics of harness building, which involves organizing, connecting, and protecting your electrical components properly. First, you’ll want to plan your wiring layout carefully. Map out where each component — such as the ignition switch, lights, and gauges — will go, and determine how they’ll connect. This planning helps guarantee component compatibility and minimizes the risk of wiring errors down the line.
When selecting your wiring, opt for high-quality, insulated cables suited for motorcycle use. You need wires that can handle the current loads of your electrical accessories and resist heat and abrasion. Be mindful of electrical safety throughout the process. Proper insulation, secure connections, and avoiding exposed wiring prevent shorts, fires, and electrical failures. Use soldering or high-quality crimp connectors to make solid, corrosion-resistant connections. Always double-check that wires are routed away from moving parts, hot surfaces, and sharp edges to prevent damage.
Component compatibility is vital when building your harness. Make sure all parts — switches, relays, fuses, lights, and sensors — are designed to work together and match your bike’s voltage and current requirements. Incorrect component pairing can lead to overheating, blown fuses, or even damage to your bike’s electrical system. Before installing anything, review the specifications and verify that each component is rated appropriately for your setup. This step saves you time and money and guarantees safety and functionality.
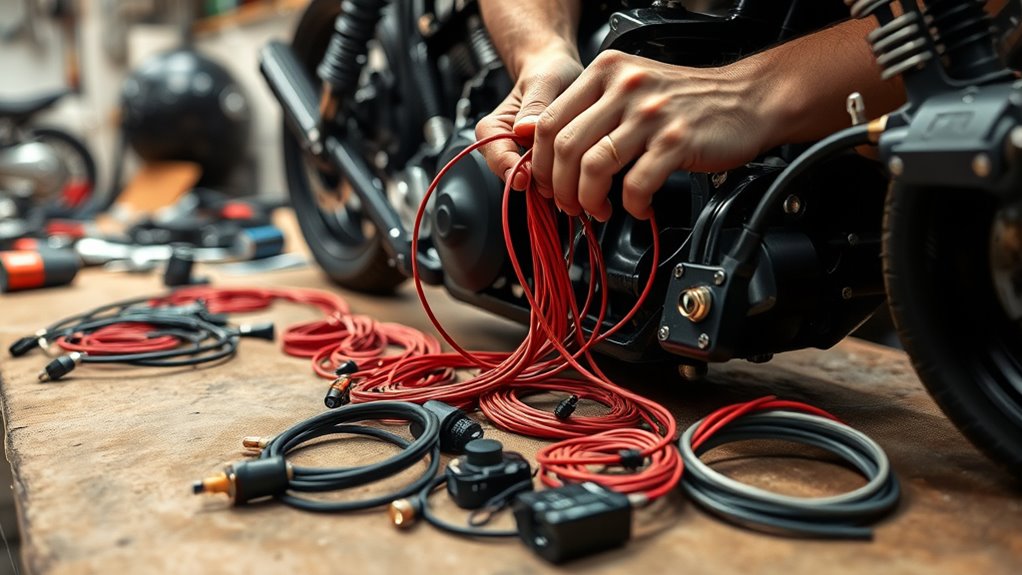
As you assemble your wiring harness, organize wires neatly using zip ties, split loom tubing, or cable channels. This not only improves the appearance but also makes future troubleshooting easier. Keep your wiring loom close to the frame and avoid tight bends, which can stress the wires and cause breaks. When connecting wires, solder and heat shrink for the most durable and weatherproof joints. Be diligent about checking each connection for proper contact and insulation.
Additionally, understanding electrical safety principles and best practices is crucial to prevent hazards and ensure your system’s longevity. Testing your wiring before final assembly is essential. Use a multimeter to verify continuity and proper voltage at each point. Power up the system gradually, checking for correct operation and no unexpected shorts. If issues arise, trace your wiring carefully to identify and fix faults. Remember, taking your time and following a systematic approach will lead to a safer, more reliable electrical system, making your custom bike not only look great but also perform safely and dependably on the road.

NAMZ Custom Cycle Complete Bike Wiring Harness Kit NCBH-01-A
The perfect start for any project bike or Factory model re-wire
As an affiliate, we earn on qualifying purchases.
As an affiliate, we earn on qualifying purchases.
Frequently Asked Questions
What Tools Are Essential for Wiring a Custom Bike?
You’ll need essential tools like wire strippers, crimping pliers, and screwdrivers to start wiring your bike. Make sure you have color coding for different wire functions to stay organized. Wire connectors are vital for secure connections, so keep a variety handy. A multimeter helps test the system, ensuring safety and proper operation. With these tools, you can efficiently build a reliable, well-organized wiring harness for your custom bike.
How Do I Identify the Correct Wires for Each Component?
You’re on the right track to identify wires correctly. Start by matching wire color codes to standard conventions, like red for power and black for ground. Use component labeling as your roadmap, ensuring each wire connects to the right part. Don’t guess—consult wiring diagrams and manuals. This way, you won’t be chasing rainbows, and your wiring will be spot on, giving your bike a safe and reliable electrical system.
Can I Upgrade My Wiring Harness Later?
Yes, you can upgrade your wiring harness later. To do so, you’ll need to upgrade connectors for better reliability and expand circuits to add new components. Make sure you carefully plan your upgrades, follow proper wiring standards, and use compatible parts. This approach guarantees your bike’s electrical system remains safe and efficient as you customize or add new features over time.
What Safety Precautions Should I Follow During Wiring?
Prioritize protection, practice patience, and prevent problems by following safety precautions during wiring. Always wear protective gear like gloves and safety glasses to shield yourself from shocks or sparks. Confirm circuit safety by disconnecting the battery before starting, working in a well-ventilated area, and double-checking connections. Properly handle tools, avoid shortcuts, and stay focused to prevent accidents and ensure a safe, successful wiring process.
How Do I Troubleshoot Electrical Issues on My Bike?
When troubleshooting electrical issues on your bike, start by testing the battery to verify it’s delivering proper voltage. Check all fuses and replace any that are blown, as faulty fuses can cause power loss. Inspect wiring connections for corrosion or loose contacts, and use a multimeter to trace voltage through circuits. This systematic approach helps you identify and fix issues quickly, keeping your bike running smoothly.

NAOEVO 18 Gauge Wire 90ft, 18 AWG Wire 6 Colors 15ft Each Spool, Flexible Silicone Tinned Copper Electrical Cable, Wiring kit for Breadboard/Automotive/DIY/Battery, 200℃
NAOEVO Silicone Wire Kit : 18 gauge silicone stranded copper wire, 15ft/4.6m each spool. 6 different colors (red,…
As an affiliate, we earn on qualifying purchases.
As an affiliate, we earn on qualifying purchases.
Conclusion
Building your own bike wiring harness might seem intimidating, but it’s entirely doable with patience and care. Think of it like assembling a puzzle—each wire and connector has its place, creating a reliable electrical system. Some say a custom harness offers better performance than stock wiring, and while that’s true if done right, it’s your attention to detail that truly makes the difference. Trust the process, and your bike will run smoothly for miles to come.

Feggizuli 320pcs Double Bullet Wire Connectors, 3.9mm 3.5mm Male and Female Bullet Terminal Connectors with Insulation Sleeve, Crimp Terminal Automotive Electrical Connectors Motorcycle Connector Kit
[Quick Connection] Just prepare a crimper, then you can crimp the male and female bullet connectors and connect…
As an affiliate, we earn on qualifying purchases.
As an affiliate, we earn on qualifying purchases.

EXTRACTME 12V Fuse Block, Universal 20A Motorcycle Fuse Relay Box Kit with LED Warning Indicator, Motorcycle Accessory Power Supply Unit 4 Circuits, Fuse Box Battery for 12 Volt Automotive Vehicles
12V Fuse Block – Total output up to 20A. By drawing mains power directly from the battery, the…
As an affiliate, we earn on qualifying purchases.
As an affiliate, we earn on qualifying purchases.