To rebuild and adjust your drum brakes for reliable stopping, start by inspecting the drums for warping or wear, then replace or resurface if needed. Remove old brake shoes and hardware, thoroughly clean the backing plate, and install new shoes according to manufacturer specs. Adjust the shoes using the star wheel to ensure they lightly contact the drum, providing responsive braking. Keep practicing these steps to ensure your brakes stay safe and effective every time you hit the road.
Key Takeaways
- Inspect and resurface or replace the drum to ensure smooth contact with brake shoes.
- Remove old hardware, clean the backing plate, and install new or inspected brake shoes properly.
- Adjust shoes using the star wheel to ensure they lightly contact the drum for effective braking.
- Check for uneven wear, cracks, or scoring on the drum surface and address issues accordingly.
- Regularly inspect, adjust, and maintain drum brakes to ensure reliable stopping performance.

Rebuilding and adjusting drum brakes is vital for maintaining safe and reliable vehicle performance. When you’re working on your brakes, it’s important to start with a thorough inspection of the drum surface. This step guarantees that the drum isn’t warped, scored, or worn beyond specifications, which can compromise braking effectiveness. During the drum surface inspection, look for any signs of uneven wear, cracks, or grooves. If you notice any damage, replacing or resurfacing the drum might be necessary to achieve smooth contact with the brake shoes.
Once you’ve inspected the drum surface and confirmed it’s suitable, you can move on to brake shoe replacement if needed. Brake shoes are the components that press against the drum to slow your vehicle. Over time, they wear down, become glazed, or develop cracks, reducing braking power. Replacing worn brake shoes is essential for safety and restoring proper braking performance. When replacing the brake shoes, make sure to remove all the old hardware, clean the backing plate thoroughly, and install the new shoes precisely according to the manufacturer’s specifications. Proper installation ensures even contact and prevents squealing or uneven wear.
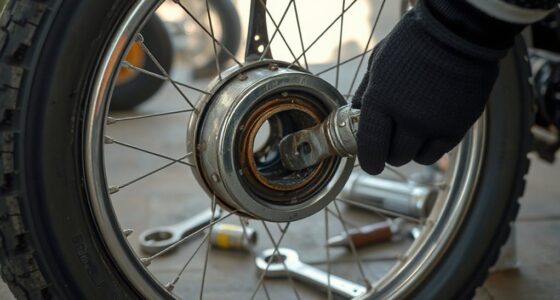
Adjusting the drum brakes properly is the final step to guarantee they function at their best. After installing new brake shoes, you’ll need to adjust the shoes so they sit correctly against the drum. Some vehicles have an automatic adjuster, but many require manual adjustment. To do this, you typically turn the star wheel located near the bottom of the brake assembly, expanding or retracting the shoes until they lightly contact the drum. You want the shoes to be close enough to engage promptly when you press the brake pedal but not so tight that they cause excessive friction or heat. Regular inspections and adjustments help prevent costly repairs and ensure your brakes remain responsive and safe.
Frequently Asked Questions
How Often Should Drum Brakes Be Inspected?
You should inspect your drum brakes at least every 12,000 miles or once a year, whichever comes first. During inspections, check the brake fluid level and look for signs of wear in the brake shoes and drum surfaces. Also, test the parking brake to guarantee it holds properly. Regular inspections help catch issues early, ensuring your brakes stay reliable and safe, especially when the parking brake is engaged.
Can I Replace Drum Brakes Myself?
Yes, you can replace drum brakes yourself if you’re comfortable working on cars. Start by safely lifting your vehicle and removing the wheel. Then, inspect and replace the brake shoes, making certain the parking brake cable is properly adjusted. Don’t forget to check the brake fluid level and adjust the parking brake for reliable stopping. Follow a detailed guide and use the right tools to ensure a proper, safe installation.
What Are Signs of Worn Drum Brake Components?
Imagine your brake pedal pulsating like a heartbeat or hearing squeals and grinding noises whenever you brake. These signs point to worn drum brake components. You might also notice brake noise, such as squealing or grinding, and pedal pulsation indicating uneven wear or warped drums. If you experience these issues, it’s time to inspect your drum brakes—they’re telling you they need attention before more serious damage occurs.
How Do I Know When to Replace the Drum Itself?
You should replace the brake drum when the drum surface condition shows deep grooves, excessive scoring, or cracks, which compromise safety. Check the brake drum thickness; if it’s below the manufacturer’s minimum specifications, it’s time for a replacement. Use a micrometer to measure thickness and compare it to the specs. Worn or damaged drums can cause uneven braking, so replace them promptly to ensure reliable stopping.
What Tools Are Needed for Rebuilding Drum Brakes?
To rebuild drum brakes, you’ll need basic tools like a jack, jack stands, a brake caliper repair kit, screwdrivers, pliers, a brake spring tool, and a rubber mallet. Make sure to also have brake cleaner and new brake fluid on hand. These tools help you disassemble, clean, and reassemble the drum components, ensuring proper caliper repair and brake fluid refill for reliable stopping.
Conclusion
By rebuilding and adjusting your drum brakes properly, you guarantee your vehicle stops like a superhero saving the day. Don’t underestimate the importance of regular maintenance — neglecting these vital steps can turn your reliable ride into a ticking time bomb. Taking the time to get your brakes right isn’t just smart; it’s indispensable for your safety and peace of mind. So, roll up your sleeves and give your brakes the attention they deserve — your life might depend on it.