
To adjust valves on older motorcycles, start by gathering the right tools and ensuring the engine is completely cool. Rotate the engine to TDC, then measure the clearance between the cam lobes and valves using a feeler gauge—refer to your manual for proper specs. If adjustments are needed, remove and replace shims or turn screw-type valves carefully. Proper timing alignment is essential for smooth operation. Keep everything within specifications, and you’ll maximize engine longevity—more details await to guide you through each step.
Key Takeaways
- Gather proper tools, ensure engine is cold, and remove the valve cover in a cross pattern before measuring clearance.
- Use a feeler gauge to check valve gaps at TDC, referring to specific model specifications for correct clearance.
- Decide between shim replacement or screw-type adjustment, handling shims carefully and recording sizes for accuracy.
- Align timing marks on the flywheel or alternator with reference points to ensure proper valve timing before adjustment.
- Regularly inspect valve clearances and cam components, tightening cam caps to specified torque and verifying timing after adjustments.
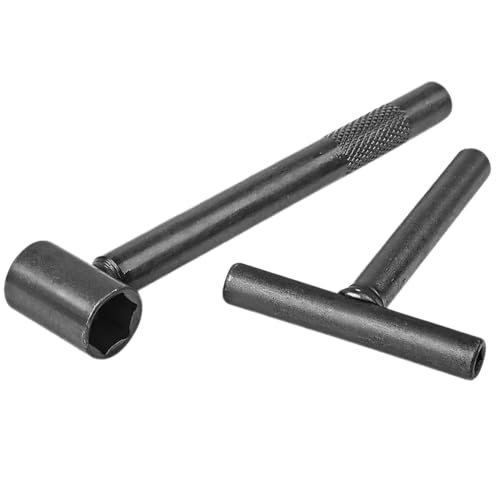
2Pcs Motorcycle Scooter Valve Tool, Valve Screw Repair Wrench, Adjusting Square Hexagonal Hole Tool, Tappet Engine Adjustable Wrenches
Package: 1pcs square hole tool and 1pcs hexagonal hole tool
As an affiliate, we earn on qualifying purchases.
As an affiliate, we earn on qualifying purchases.
Essential Tools and Preparation Steps

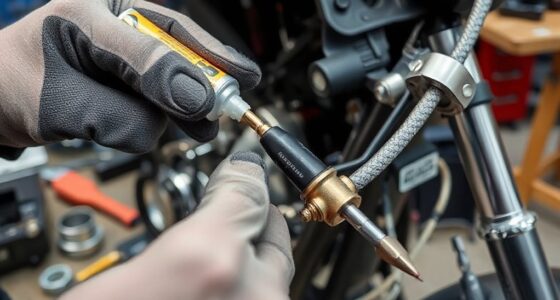
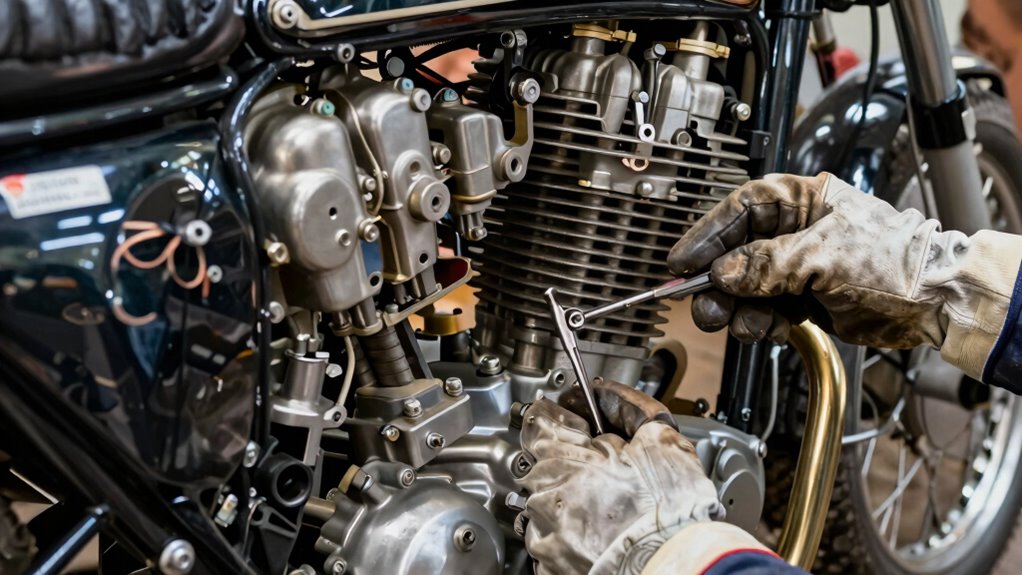
Before you begin valve adjustment, gather the essential tools and prepare the engine properly. You’ll need a socket set, screwdrivers, needle nose pliers, and feeler gauges. Make sure the engine is completely cold to get accurate measurements. Start by removing the valve cover or cylinder head cover, loosening bolts gradually in a cross pattern to prevent damage. Use a crankshaft or alternator nut to rotate the engine to top dead center (TDC), ensuring proper valve positioning. It’s also wise to have a notebook or chart to document clearance measurements and valve positions. Double-check that all tools are clean and in good condition before starting. Proper preparation helps guarantee a smooth, accurate valve adjustment process and prevents potential damage to engine components. Additionally, understanding the engine’s timing is crucial for proper valve clearance adjustments. Familiarizing yourself with valve clearance specifications specific to your motorcycle model can help ensure optimal engine performance. Confirming the correct torque settings for the valve cover bolts is also essential to prevent leaks and ensure a secure fit. Moreover, inspecting valve train components for wear or damage before adjustments can help identify other potential issues early.

Mutt Tools 2pc Feeler Gauge Set – Premium Straight & Angled Feeler Gauges for Valves – Inch and Metric Measurement – Gap Tool for Automotive
PRECISION MEASUREMENT: Premium metric feeler gauge set with both straight and angled designs; Includes 32 blades in both…
As an affiliate, we earn on qualifying purchases.
As an affiliate, we earn on qualifying purchases.
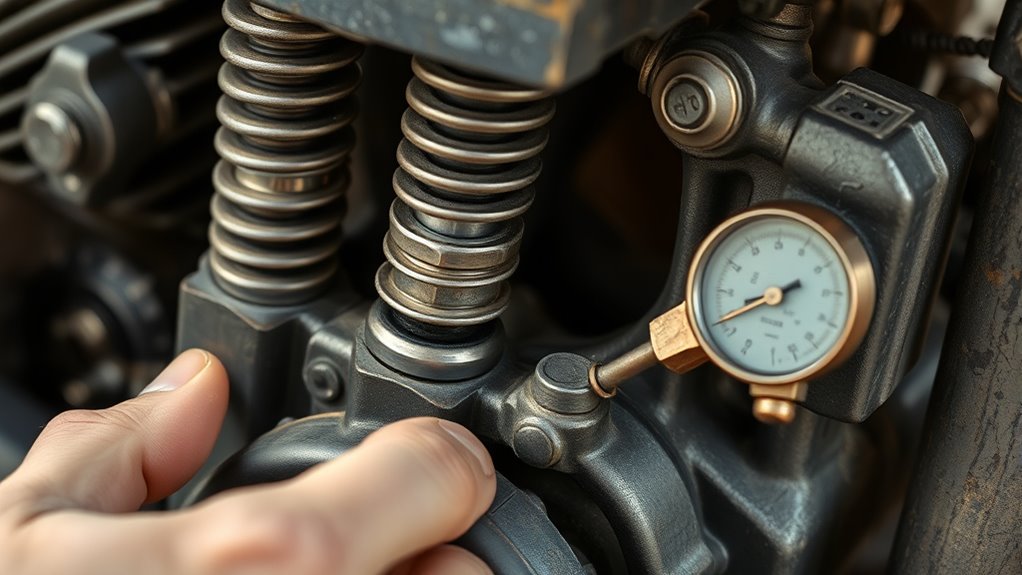
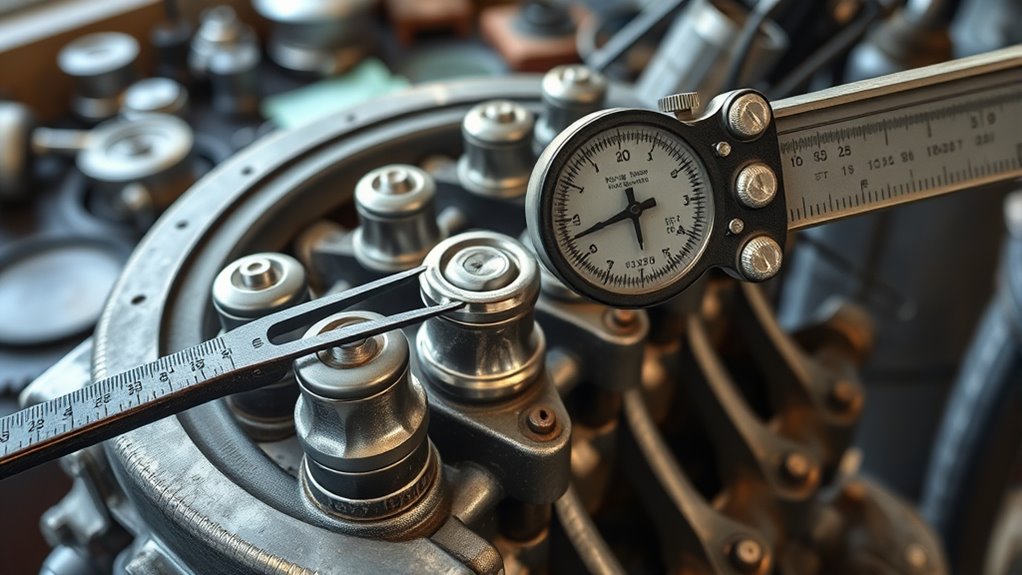
Techniques for Measuring Valve Clearance
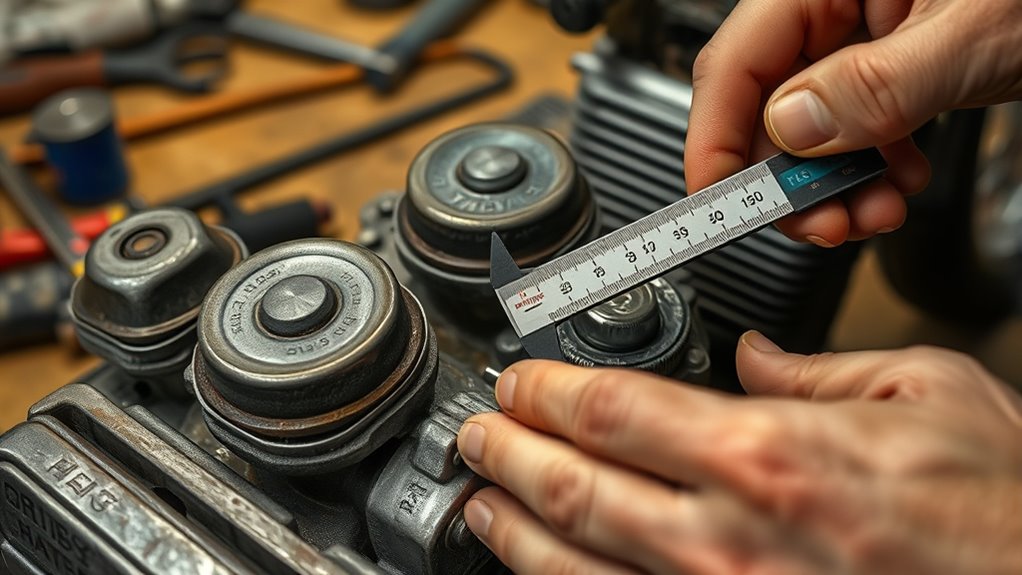
To accurately measure valve clearance, you need to position the engine so that the cam lobes for the cylinder you’re checking face outward or are at top dead center (TDC). This ensures the valves are fully closed, providing an accurate reading. Next, use a calibrated feeler gauge to measure the gap between the camshaft lobe and the valve bucket or shim. The gauge should slide with slight drag. Keep these tips in mind:
- Rotate the engine smoothly to TDC, ensuring no sudden movements.
- Measure both intake and exhaust valves systematically.
- Record each measurement carefully on your chart or notes.
- Incorporate connected equipment or digital tools when possible to enhance measurement accuracy and record-keeping.
- Understanding the valve clearance specifications specific to your motorcycle model can help achieve better engine performance and longevity.
- Familiarizing yourself with the correct measurement techniques can prevent inaccurate readings that may lead to engine issues.
- Regular inspection and maintenance of the filtering systems help keep the engine running smoothly and prevent damage.
- Ensuring proper jewelry materials and careful handling during maintenance can help avoid accidental damage or contamination.

Orion Motor Tech 3.6 Pentastar Timing Tool Kit, Camshaft Holding Tools Compatible with VW Chrysler Dodge Jeep Ram Wrangler, 3.6L Camshaft Phaser Timing Chain Lock Tool Kit for 10200A 10202A 10369A
COMPLETE KIT: Orion Motor Tech's 3.6 Pentastar timing tool kit includes 3 timing chain holders, left and right…
As an affiliate, we earn on qualifying purchases.
As an affiliate, we earn on qualifying purchases.
Methods for Adjusting Valves
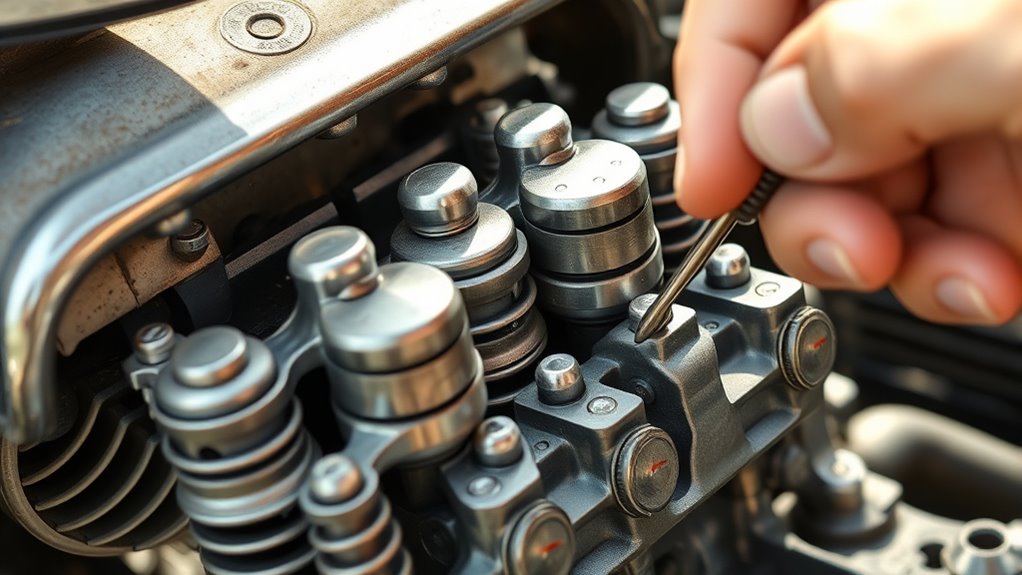
When adjusting valves, you’ll need to decide between shims and screw-type mechanisms. Removing and replacing shims requires careful handling to maintain original positions, while screw-type valves involve loosening nuts and turning adjusters for the correct clearance. Both methods demand precision to make certain your engine runs smoothly and efficiently. Free Floating techniques can be beneficial when working with older motorcycles to achieve optimal results. Additionally, understanding the valve clearance specifications for your specific engine model ensures proper adjustments and prevents potential damage. Proper engine maintenance practices are essential for extending the life of your motorcycle and maintaining peak performance.
Shim Removal and Replacement
Removing and replacing shims is a critical step in valve adjustment, especially for engines that use shim under bucket designs. To do this effectively, you’ll need a few tools: a magnetic pickup tool, a feeler gauge, and a small flat screwdriver. Start by carefully removing the valve cover to access the shims. Use the magnetic tool to lift each shim out, noting its original position. When installing new or replacement shims:
- Ensure the shim matches the original size unless a change is needed for clearance.
- Lubricate the shim with engine oil before installation.
- Double-check the shim’s seating to prevent misalignment.
- Be aware that proper handling and understanding of valve clearance are essential to prevent engine damage.
- Proper handling of shims and an understanding of engine specifications help ensure the longevity of your engine components.
- Additionally, understanding correct shim installation techniques can streamline the adjustment process and reduce the risk of errors.
- Paying attention to proper torque settings during reassembly ensures components remain secure and functions correctly.
- Familiarity with shim removal and replacement methods can make the process more efficient and reduce the likelihood of mistakes.
Always record shim sizes and positions. Proper handling guarantees accurate valve clearance and prevents damage during reassembly, keeping your engine running smoothly.
Screw-Type Valve Adjustment
Adjusting screw-type valves involves a straightforward process that requires careful attention to detail. First, loosen the locking nut on the adjuster, then turn the screw to set the correct clearance with a feeler gauge. Once the proper gap is achieved, re-tighten the locking nut to lock the adjustment in place. It’s essential not to change the clearance while tightening. Always double-check the measurement after tightening. Properly torque camshaft bolts and verify the timing marks before completing the job. The following table highlights key aspects of screw-type adjustments:
| Step | Action | Tips |
|---|---|---|
| Loosen Lock Nut | Use wrench to hold nut | Keep the nut from turning while adjusting |
| Turn Adjustment Screw | Set desired clearance | Use feeler gauge for accuracy |
| Re-tighten Nut | Secure the setting | Avoid overtightening |
| Final Check | Confirm clearance | Re-measure before finishing |

Hot Cams 9.48mm Complete Shim Kit HCSHIM02 for Arctic Cat DVX 400 ATV Honda TRX ATV Kawasaki KFX ATV Suzuki LT-R ATV Yamaha YFZ ATV, Regular
9. 48mm Complete shim kit 1. 20-3. 50mm in . 05mm increments with 3 shims in each size,…
As an affiliate, we earn on qualifying purchases.
As an affiliate, we earn on qualifying purchases.
Typical Valve Clearance Specifications
Typical valve clearance specifications vary depending on the engine make and model, but most engines have standard ranges to guarantee proper valve operation. Knowing these ranges helps you avoid issues like engine noise or valve damage. Generally, intake valves have clearances around 0.008–0.012 inches (0.20–0.30 mm), while exhaust valves are slightly larger. Staying within these tolerances ensures smooth engine performance and longevity. Proper application of valve adjustment techniques is essential for maintaining optimal engine function. Regularly checking and adjusting valve clearances according to manufacturer specifications can prevent costly repairs down the line. Additionally, understanding the importance of correct clearance helps in diagnosing engine issues early. Keeping an eye on engine performance can alert you to potential valve clearance problems before they cause serious damage. Key points to remember: – Exceeding clearance causes noisy operation and power loss. – Too tight can lead to valve seat damage or burnt valves. – OEM manuals specify exact tolerances and suggested adjustment intervals. Always refer to your motorcycle’s manual for precise specs, and don’t guess—accurate measurements are critical.
Ensuring Proper Engine Timing and Alignment

To guarantee proper engine timing and alignment, start by carefully aligning the timing marks on the flywheel or alternator with the manufacturer’s reference points. Remember to rotate the engine in the correct direction, usually counterclockwise, to maintain proper tension on the timing components. Additionally, paying attention to wave and wind conditions can help in diagnosing and fine-tuning the timing for optimal engine performance. Ensuring the relationship between components is precise can prevent potential engine issues and improve longevity. Regularly inspecting the storage conditions of your parts can help maintain their quality and prevent degradation. Furthermore, understanding how AI discoveries influence modern diagnostics can lead to more accurate adjustments during maintenance. Proper timing belt tension is also crucial and should be checked regularly to avoid slipping or premature wear. Finally, tighten the camshaft caps following the specified sequence to prevent warping and ensure everything stays correctly aligned during operation.
Aligning Timing Marks
Aligning timing marks is a critical step in ensuring your engine runs smoothly and efficiently. Proper alignment guarantees the valves open and close at the right moments, preventing engine damage. To do this accurately, you should:
- Rotate the engine to bring the crankshaft to Top Dead Center (TDC), matching the timing mark.
- Confirm the alignment of timing marks on the flywheel or alternator with the corresponding pointer or notch.
- Double-check that camshaft timing marks align with their reference points to verify correct valve timing.
Ensure the engine is stationary at TDC before starting. Use a mirror or flashlight if necessary to see marks clearly. Precise timing mark alignment is essential for ideal performance and avoiding costly rebuilds.
Correct Engine Rotation
Rotating the engine to the correct direction is essential for maintaining proper engine timing and ensuring accurate valve adjustments. Many older motorcycles require rotation clockwise, so verify your specific model’s instructions. Use a socket or wrench on the crankshaft or alternator nut to turn the engine smoothly. Rotate the engine slowly, observing timing marks and valve positions. Avoid turning the engine backward, as it can disrupt timing components or cause damage. Confirm that the engine reaches top dead center (TDC) for the cylinder you’re working on, aligning timing marks precisely. Proper rotation maintains chain tension and keeps components aligned. Before proceeding, double-check that the engine is at the correct point and that all timing marks are aligned, ensuring your valve adjustment is accurate and safe.
Camshaft Cap Tightening
Ensuring proper engine timing and alignment depends heavily on correctly tightening the camshaft caps. Proper torque prevents camshaft warping and maintains accurate valve timing. Use a torque wrench set to the manufacturer’s specifications, and tighten caps in a crisscross pattern to distribute pressure evenly. Before tightening, verify that the camshaft is correctly positioned at TDC for the cylinder you’re working on. Keep these points in mind:
- Always tighten caps gradually in small increments to avoid uneven stress.
- Follow the specified torque sequence to prevent camshaft misalignment.
- Double-check timing marks after tightening to ensure proper alignment.
Taking your time and using the correct torque pattern ensures the camshaft caps stay secure, preserving engine timing and performance.
Common Troubleshooting and Maintenance Tips
Regularly checking and adjusting your valve clearances is essential for maintaining engine performance, but troubleshooting common issues can save you time and prevent costly repairs. If you notice engine noise, rough running, or power loss, start by checking valve clearances again. Worn shims or cam lobes often cause discrepancies, so inspect these components carefully. If valves are tight, you might hear ticking; if too loose, rattling occurs. Ensure all timing marks align after adjustments.
| Issue | Possible Cause | Solution |
|---|---|---|
| Engine noise | Excessive valve clearance | Recheck and modify clearances |
| Power loss | Worn shims or valves | Replace worn components |
| Rattling during run | Loose valve adjustments | Tighten valves properly |
| Poor idling | Incorrect timing or clearance | Verify timing and clearances |
| Engine overheating | Valve seat damage or incorrect clearance | Inspect and repair seats |
Tips for Accurate and Safe Valve Adjustment
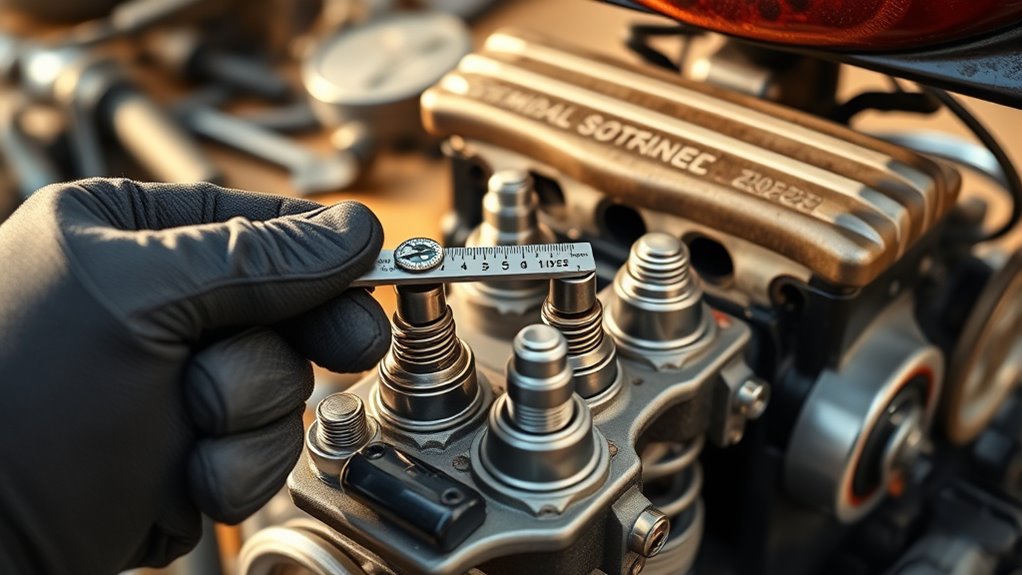
To achieve accurate and safe valve adjustments, you need to follow proper procedures and pay close attention to detail. Start with a cold engine to ensure correct clearance measurements. Use a calibrated feeler gauge, checking for slight drag between the cam lobe and valve bucket. Rotate the engine carefully, confirming you’re at top dead center or cam lobes are facing outward. To avoid mistakes, keep track of your measurements and note the valve positions.
Remember these tips:
- Gradually loosen bolts in a cross pattern to prevent cover damage
- Double-check valve clearances after the first ride-in period
- Use the correct torque specifications for camshaft bolts
Sticking to these practices guarantees safe, accurate adjustments and prolongs your engine’s life.
Frequently Asked Questions
How Often Should I Check and Adjust My Motorcycle’s Valves?
You should check and adjust your motorcycle’s valves every 3,000 to 16,000 miles, depending on your bike’s manual. Regular inspections help prevent noisy operation, power loss, and valve seat damage. Keep an eye on engine performance and listen for unusual sounds. Following the manufacturer’s recommended intervals guarantees your engine runs smoothly and lasts longer. Don’t forget to recheck valve clearances after riding a short distance post-adjustment.
Can I Perform Valve Adjustments Without Removing the Engine?
You can perform valve adjustments without removing the engine, but it’s tricky. While some models allow access through the valve cover or side panels, others require partial disassembly or even engine removal for full access. You’ll need the right tools, patience, and familiarity with your motorcycle’s design. Carefully follow your service manual, and remember that precise measurements are key to ensuring proper clearance and engine longevity.
What Are the Signs of Incorrect Valve Clearance During Operation?
If your valve clearance is off, you’ll notice engine noise, like ticking or tapping sounds, during operation. You might also experience reduced power, rough idling, or stalling. Increased fuel consumption and overheating can occur if clearances are too tight. Conversely, excessive clearance may cause loud valve noise and uneven engine performance. Pay attention to these signs, and recheck your clearances regularly to keep your motorcycle running smoothly.
Which Types of Valves Are Easier to Adjust: Bucket or Screw-Type?
Bucket valves are easier to adjust because they involve simply swapping shims or measuring and setting clearances without removing the camshaft. Imagine sliding a thin shim out and replacing it, like swapping a gear, with minimal fuss. Screw-type valves, on the other hand, require loosening nuts, turning adjusters, and re-tightening, making adjustments more complex and time-consuming. With bucket valves, you get smoother, quicker access, simplifying the process.
Is Special Training Required to Properly Perform Valve Adjustments?
You don’t necessarily need special training to perform valve adjustments, but it helps to have a good understanding of your motorcycle’s engine and proper techniques. If you’re comfortable using basic tools, following manufacturer instructions, and carefully measuring clearances, you can do it yourself. However, if you’re unsure or unfamiliar with engine mechanics, seeking guidance or professional help guarantees accurate adjustments and prevents potential engine damage.
Conclusion
Regular valve adjustments are essential to keep your older motorcycle running smoothly. Did you know that neglecting valve clearances can reduce engine efficiency by up to 15%? By following proper techniques and using the right tools, you can prevent costly repairs and extend your bike’s lifespan. Stay consistent with maintenance, and you’ll enjoy reliable performance and a smoother ride every time. Keep your engine in top shape, and it’ll reward you mile after mile.