
If your old bike runs rough, your carburetor might be clogged or worn out. Common signs include sputtering, poor acceleration, and black smoke. You can fix this by inspecting and cleaning jets, floats, and gaskets, and replacing any damaged rubber parts. Proper adjustments to mixture and idle speed also help restore smooth performance. Keep going to find out detailed steps that can get your bike running like new again.
Key Takeaways
- Dirty or clogged jets and passages restrict fuel flow, causing rough running and poor acceleration.
- Worn or hardened rubber parts like gaskets and float valves lead to leaks and inconsistent fuel delivery.
- Old, contaminated fuel can cause varnish buildup inside the carburetor, resulting in sputtering and poor performance.
- Incorrect idle and mixture adjustments can cause engine hesitation, rough idling, and unstable RPMs.
- Lack of regular cleaning and maintenance allows debris and rust to impair carburetor function, worsening engine roughness.

SOKOSEY Carburetor Cleaning Kit, Carbon Dirt Jet Remove Cleaner, 26 Cleaning Wires Set, 20 Cleaning Needles 10Nylon Brushes 2 Sharp Pick, For Motorcycle ATV Moped Welder Carb
Package Includes: set of 6 carburetor cleaner kit, 20 cleaning needles + 10 nylon brushes + 26 cleaning…
As an affiliate, we earn on qualifying purchases.
As an affiliate, we earn on qualifying purchases.
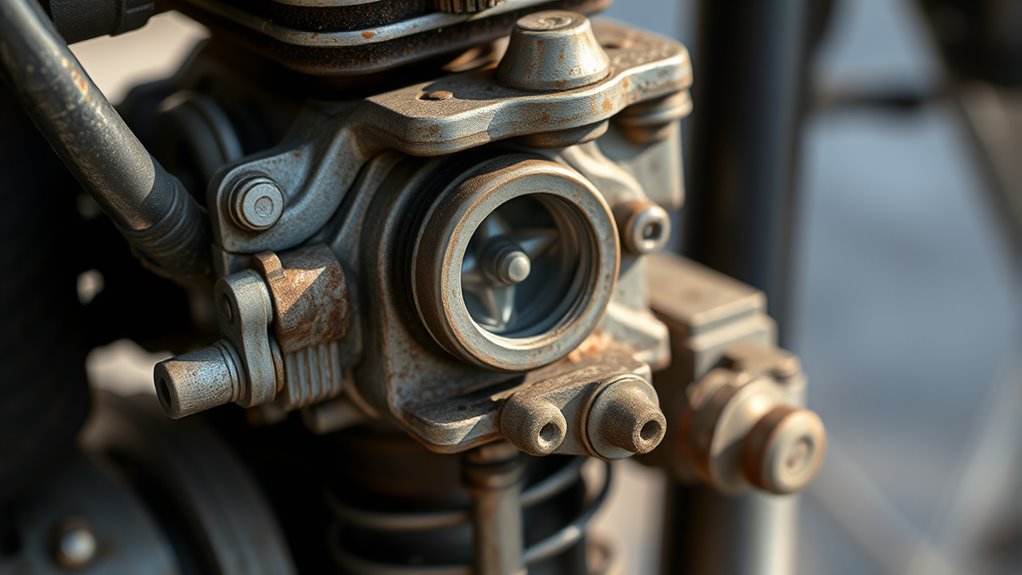
Recognizing the Signs of a Faulty Carburetor

A faulty carburetor often reveals itself through a range of noticeable engine issues that you can recognize with careful observation. If your bike cranks but doesn’t start, or sputters when you try to fire it up, a carb problem is likely to blame. Excessive black smoke from the exhaust and a strong fuel smell point to a rich-running carburetor flooding the engine. Fouled spark plugs, showing black or greasy deposits, are another sign. You might also notice a rough idle, poor acceleration, or inconsistent engine response. Difficulties in starting, combined with unstable RPMs, often stem from clogged jets or faulty float valves. Recognizing these symptoms early helps prevent further damage and guides you toward effective troubleshooting and repair. Understanding how modern engine components work can assist in diagnosing carburetor issues more accurately. Additionally, taking the time to inspect fuel delivery systems can help identify underlying causes of carburetor problems. Being familiar with engine operation principles can further aid in pinpointing the root cause of the malfunction.

Carburetor Kit for Most Carburetor Bowl Chamber Float Pin Gasket Seal Needle Carburetor Repair and Rebuild Accessories and Parts Electric Start Kit for GX240 GX270 GX340 GX390 and More
Package Contents: You will receive a set of carburetor kit, including 1 carburetor chamber bowl, 1 carburetor bowl…
As an affiliate, we earn on qualifying purchases.
As an affiliate, we earn on qualifying purchases.
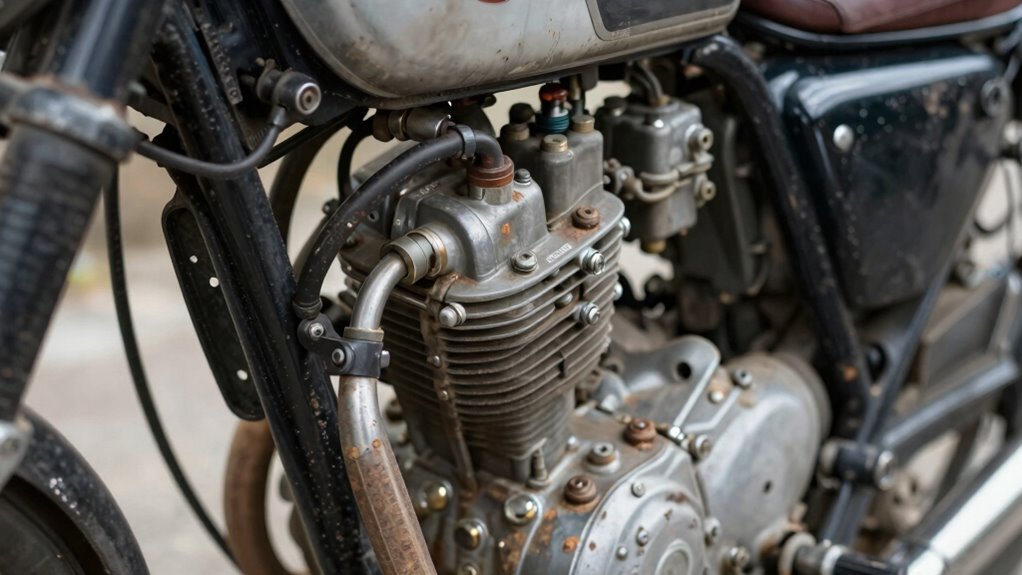
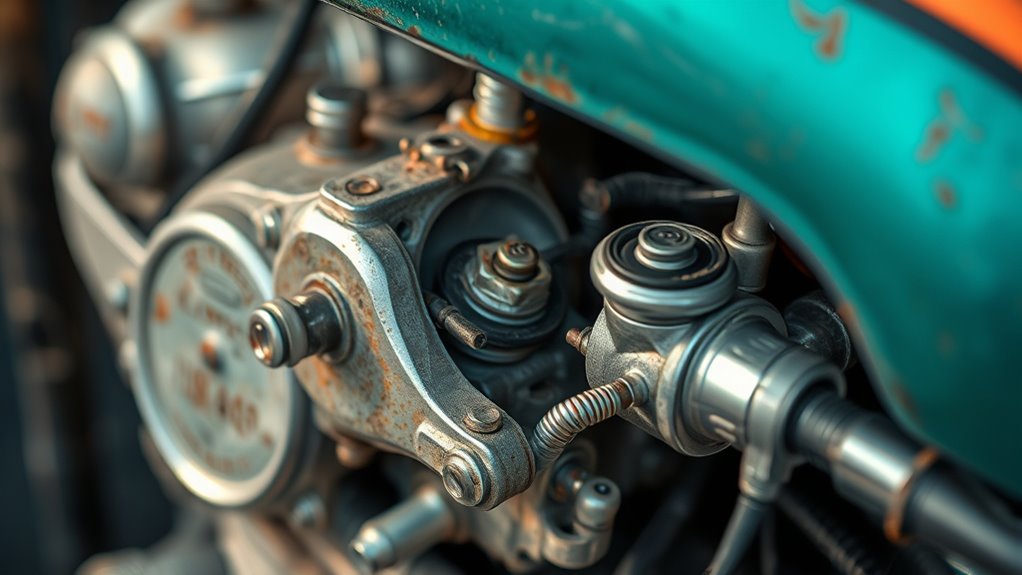
Common Causes of Rough Engine Performance

Rough engine performance often stems from issues within the carburetor that disrupt the proper fuel-air mixture. One common cause is debris or rust buildup in the float bowl, which can jam the needle valve and cause flooding or fuel starvation. Clogged jets and passageways reduce fuel flow, resulting in lean running or sputtering. Worn or hardened rubber components, like float valves and gaskets, fail to seal properly, causing inconsistent fuel delivery. Old or contaminated fuel can gum up internal parts, hindering performance. Additionally, vacuum-operated fuel valves may gum or fail, restricting fuel flow. These issues lead to symptoms like rough idling, poor acceleration, and engine stalling, all stemming from imbalanced or inconsistent fuel supply caused by carburetor problems. Sometimes, ethnicity-related factors can also influence the availability of parts or maintenance knowledge, impacting repair outcomes. Proper cleaning and replacement of worn parts are essential for restoring smooth engine operation, especially when carburetor maintenance is neglected over time. Regular inspection and preventive care can help avoid these common issues and keep your bike running smoothly.

VM22 Carburetor Repair Kit Gasket Floats Jets Motorcycle Carburetor Repair Kit Motorbike Repairing Part Compatible with YM YBR125 JYM125
Compatible With: The VM22 Carburetor Repair Kit is designed compatible with YM YBR125 JYM125 motorbikes, ensuring compatibility and…
As an affiliate, we earn on qualifying purchases.
As an affiliate, we earn on qualifying purchases.
Diagnosing Carburetor Problems Effectively
Start by inspecting the carburetor visually for signs of dirt, leaks, or damaged parts. Using starter fluid can quickly reveal if fuel isn’t reaching the engine properly—if the engine runs better with it, your carb could be the culprit. Combining these methods to accurately diagnose whether the carburetor needs cleaning or repair is essential, especially since appliance maintenance plans can help ensure all engine components stay in good condition over time. Additionally, considering the use of professional cleaning products can assist in restoring optimal carburetor function and prevent future issues. Paying attention to fuel quality and storage can also prevent clogs and impurities that impair performance. Proper maintenance of fuel and carburetor components can also help prevent problems caused by contaminants and ensure smoother operation. Understanding cryptid mysteries and their folklore can also highlight the importance of thorough inspection techniques in uncovering hidden problems.
Visual Inspection Techniques
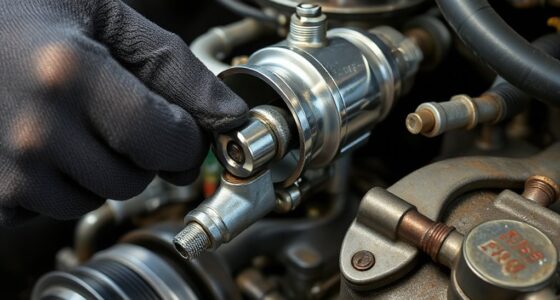
Have you ever wondered how to quickly identify carburetor issues without diving into complex diagnostics? The key is a thorough visual inspection. Start by removing the carburetor and examining it closely. Look for signs of rust, debris, or varnish buildup inside the bowl and jets. Check for cracked or hardened rubber parts like float valves, gaskets, and diaphragms—they should be flexible and intact. Inspect the float for damage or misalignment, and ensure the float needle moves freely. Examine fuel passages for blockages or corrosion. Also, look for fuel leaks, especially around the bowl gasket or needle valve. A detailed visual check can reveal many common problems, guiding you on what needs cleaning, repair, or replacement before testing further. Incorporating attention to detail during inspection ensures you don’t overlook subtle issues that could cause rough running.
Using Starter Fluid
Wondering how to quickly determine if your carburetor is the culprit behind starting issues? Using starter fluid is a straightforward test. Spray a small amount into the intake while cranking the engine. If the engine sputters to life or runs better momentarily, your carburetor is likely the problem. A proper understanding of arcade game evolution can also help you recognize signs of wear or outdated components in your carburetor system. Imagine:
- The engine roars to life with just a quick spray, confirming fuel delivery issues.
- The bike stalls immediately after the spray runs out, indicating a carb problem.
- The smell of fuel intensifies, and black smoke appears from the exhaust.
- Spark plugs are blackened or wet, showing flooding due to carburetor faults. Additionally, inspecting fuel flow and ensuring the carburetor is clean can prevent many common issues. Regular maintenance and understanding air-fuel mixture are essential for diagnosing and fixing carburetor problems effectively. This simple test helps you pinpoint whether your carburetor is starving or flooding the engine, guiding your next repair steps.
Furthermore, being aware of mechanical wear in carburetor components can help you anticipate future issues and plan maintenance accordingly. Regularly monitoring credit card security measures can also protect your investment from potential cyber threats.

ZCZQC 2pcs 398188 281144 Carburetor Float Valve Needle Seat Kit Briggs Stratton 398188 Fuel Supply System Carburetors
Replacement Part Numbers: 398188, 281144.
As an affiliate, we earn on qualifying purchases.
As an affiliate, we earn on qualifying purchases.
Step-by-Step Solutions for Clogged Jets and Floats
Clogged jets and float issues are common causes of carburetor trouble, but they’re also among the easiest problems to fix with a systematic approach. First, remove the carburetor from your bike. Disassemble it carefully, noting how parts fit together. Soak the jets and float bowl in carb cleaner for at least 30 minutes to loosen varnish and debris. Use a fine needle or compressed air to clear out any clogs in the jets and fuel passages. Inspect the float and needle valve for damage or sticking; replace them if necessary. Reassemble the carburetor, ensuring all parts are correctly seated and gaskets are sealed. Finally, reinstall the carburetor and test your bike for smooth running. Regular cleaning prevents future clogging and keeps your engine running *efficiently*.
Replacing Worn Rubber Components and Gaskets

When cleaning and inspecting the carburetor, it’s common to find rubber components like gaskets, float valves, and diaphragms that have become hard, cracked, or worn out over time. These parts are essential for sealing fuel passages and maintaining proper airflow. If they’re damaged, you’ll notice fuel leaks, poor throttle response, or difficulty starting. To fix this, you need to replace these worn rubber components and gaskets. Visualize this process with these images:
- Cracked gasket peeling away from the carburetor body
- Hardened diaphragm stiff and brittle to touch
- Fuel seeping from a torn float valve seal
- Old gasket material crumbling during removal
Replacing these parts ensures airtight seals and smooth fuel delivery, restoring your bike’s performance. Always use quality replacement kits to guarantee a proper fit and seal. Proper maintenance of these rubber components can also prevent issues with your carburetor’s airflow and fuel efficiency.
Cleaning and Rebuilding Your Carburetor

Cleaning and rebuilding your carburetor is an essential step to restore peak fuel flow and engine performance. First, carefully disassemble the carb, noting how parts fit together. Soak all metal components in carb cleaner to remove varnish, debris, and gum buildup. Use compressed air to clear clogged passages and jets, ensuring unobstructed fuel flow. Inspect rubber parts like gaskets and diaphragms; replace any worn or cracked components. Reassemble the carb carefully, paying attention to proper alignment. Proper cleaning and rebuilding restore smooth operation and prevent rough running. Regular maintenance, including airless paint sprayer cleaning, can further extend the lifespan of your carburetor and engine. Additionally, understanding modern kitchen technology concepts can inspire innovative solutions for maintenance and repairs. Regularly checking and adjusting the carburetor settings can also maintain optimal engine performance. Incorporating preventive maintenance practices can help identify issues early and avoid costly repairs down the line. For optimal results, familiarize yourself with the fuel delivery system and how it interacts with the carburetor. Here’s a quick overview:
| Step | Task | Tip |
|---|---|---|
| 1 | Disassemble | Keep parts organized |
| 2 | Soak and clean | Use carb cleaner and compressed air |
| 3 | Reassemble | Confirm all parts fit correctly |
Adjusting Mixture and Idle for Optimal Performance

To get your bike running smoothly, you need to set the proper idle speed first. Then, carefully adjust the fuel mixture to make certain it’s neither too rich nor too lean. If you’re working with multiple carbs, synchronization is key to balanced performance across all cylinders. Additionally, using a vetted espresso machine can serve as a helpful analogy for understanding how precise adjustments lead to optimal results. Proper maintenance and understanding of your carburetor’s operation are essential for maximizing your bike’s performance and avoiding future troubles.
Setting Proper Idle Speed
Ever wonder how to guarantee your old bike runs smoothly at idle? You need to set the proper idle speed first. Adjust the idle screw so the engine runs steady without stalling or surging. Then, fine-tune the mixture screw to ensure the engine isn’t running too rich or too lean. Proper idle speed keeps your bike responsive and prevents stalling when stopping or at low RPM.
Picture this:
- A smooth engine hum with minimal vibration
- No hesitation or sputtering during acceleration
- Consistent RPMs that stay steady
- Spark plugs that stay clean and dry
Start by turning the idle screw gradually until you find that sweet spot where the engine runs smoothly. Small adjustments make a big difference in performance and longevity.
Adjusting Fuel Mixture Correctly
Adjusting the fuel mixture correctly is essential for your bike’s smooth performance and efficient fuel use. Start by warming up the engine to its normal operating temperature. Then, locate the mixture screw, usually found near the carburetor’s body. Turn the screw slowly clockwise to make the mixture leaner or counterclockwise to enrich it. Make small adjustments—about a quarter turn at a time—while listening to the engine’s response. Aim for a steady, smooth idle with minimal sputtering or stalling. Once you find the ideal setting, recheck your idle speed to ensure it’s correct. Proper mixture adjustment prevents fouled spark plugs, black smoke, and rough running. Fine-tuning your carburetor improves acceleration, fuel economy, and overall engine longevity.
Synchronizing Multiple Carbs
Synchronizing multiple carburetors is essential for guaranteeing your bike runs smoothly and performs at its best. When properly synchronized, each carburetor delivers the right amount of fuel and air at the correct time, leading to a balanced engine response. Imagine:
- Turning the adjustment screws and hearing a subtle change in engine sound
- Watching the RPMs stabilize as each carb’s throttle plate aligns perfectly
- Feeling the engine respond smoothly without hesitation or roughness
- Seeing the idle speed settle into a steady, controlled rhythm
To achieve this, you’ll need a synchronization tool, patience, and a steady hand. Carefully adjust each carb’s throttle screw and synchronize the slides so they open simultaneously. Fine-tuning ensures even fuel distribution and ideal idle.
Knowing When to Seek Professional Repair Services

Recognizing when to seek professional repair services is essential, especially if your efforts to fix carburetor issues don’t address the problem. If your bike still sputters, stalls, or won’t start after cleaning and basic adjustments, it’s time to get expert help. Persistent issues like flooding, poor acceleration, or rough idling may indicate deeper problems that require specialized tools and knowledge. Deep cleaning, rebuilds, or internal repairs are often beyond DIY scope and benefit from professional diagnosis. Additionally, if you notice electrical issues, vacuum leaks, or worn internal parts, a mechanic can guarantee proper repairs and adjustments. Avoid risking further damage or unsafe riding conditions—consult a professional to restore your bike’s performance safely and efficiently.
Frequently Asked Questions
How Can I Tell if My Carburetor Is Causing My Bike’s Starting Issues?
You can tell if your carburetor causes starting issues by spraying starter fluid into the intake while cranking. If the engine starts or runs better, it indicates a fuel delivery problem. Also, check the spark plugs; if they’re blackened or fouled, it suggests flooding from carb issues. Look for fuel leaks, overflowing bowls, or clogged jets, as these are common signs of carburetor trouble affecting starting.
What Are the Signs of a Carburetor Running Too Rich or Too Lean?
You’ll notice if your carburetor runs too rich by seeing black smoke from the exhaust, a strong fuel smell, and fouled spark plugs. If it runs too lean, expect sputtering, poor acceleration, rough idle, and potential overheating. Excessive flooding or difficulty starting also indicate a rich mixture, while hesitation and power loss signal a lean condition. Keep an eye on these signs to diagnose and fix your carburetor’s mixture issues.
Can I Fix a Carburetor Myself or Should I Always Seek Professional Help?
You can often fix a carburetor yourself if you’re comfortable with basic mechanical work and have the right tools. Start by cleaning the jets, replacing worn rubber parts, and inspecting the float valve. However, if you’re unsure about disassembly, experience issues after cleaning, or if problems persist, it’s best to seek professional help. A mechanic can ensure precise adjustments and avoid damaging delicate components.
How Often Should I Clean or Rebuild My Old Bike’s Carburetor?
You should clean or rebuild your old bike’s carburetor every 10,000 to 15,000 miles or if you notice symptoms like rough idle, poor acceleration, or black smoke. Coincidentally, these issues often appear just as fuel quality declines or after long storage. Regular maintenance prevents buildup of gum, varnish, and debris, keeping your engine running smoothly. If your bike’s performance drops unexpectedly, it’s time for a thorough carburetor check.
What Tools Are Needed for a Proper Carburetor Rebuild or Adjustment?
You’ll need basic tools like screwdrivers, pliers, and a socket set to remove and disassemble the carburetor. A carburetor rebuild kit, which includes gaskets, seals, and diaphragms, is essential for replacing worn parts. Additionally, use carb cleaner and compressed air to thoroughly clean components. A float height gauge and jet wrench help with precise adjustments, ensuring your carburetor runs smoothly and your bike performs efficiently.
Conclusion
Don’t delay diagnosing and delving into your carburetor’s quirks. With a little diligence, you can defeat dirt, debris, and deterioration, restoring your bike’s best balance. By recognizing the warning signs, cleaning the carb, and making precise adjustments, you’ll boost performance and prolong your bike’s life. Remember, when in doubt, don’t hesitate—seek a skilled specialist. Stay savvy, stay smooth, and keep riding with confidence and clarity!