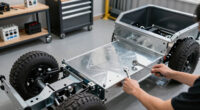
To fix poor ground connections on old motorcycles, start by inspecting all grounding points and wiring for corrosion, looseness, or damage. Clean contact surfaces with a wire brush and tighten all bolts and screws securely. Use dielectric grease to prevent future corrosion, and replace any damaged wires or terminals. Ensuring proper grounding improves electrical performance and reliability. If you want to learn more about maintaining a solid electrical system, keep exploring these essential steps.
Key Takeaways
- Locate all ground points using wiring diagrams and inspect for corrosion, looseness, or damage.
- Clean contact surfaces thoroughly with a wire brush or contact cleaner before reattaching.
- Tighten all ground connections securely to ensure proper electrical contact.
- Apply dielectric grease or compound to ground points to prevent future corrosion.
- Regularly inspect and maintain ground connections as part of ongoing motorcycle upkeep.
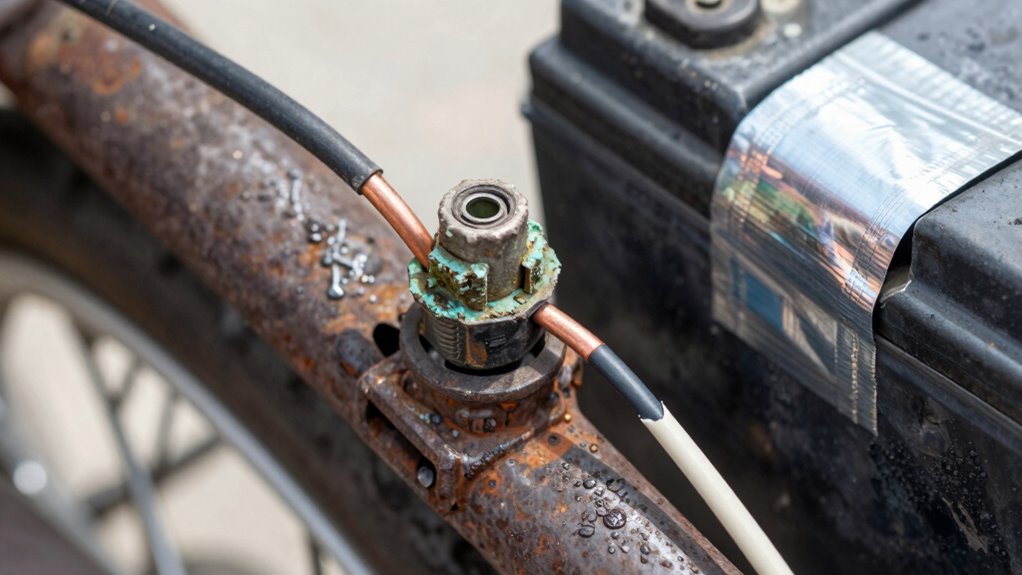
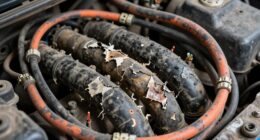
Old motorcycles often develop poor ground connections over time, leading to electrical problems like dim lights, starting issues, or inconsistent performance. These issues are common as corrosion, loose fittings, or worn wiring degrade the grounding system. To fix this, you need to start with proper battery maintenance. Make certain your battery terminals are clean, tight, and free of corrosion because a weak or faulty battery can mimic ground problems. Removing corrosion from battery terminals with a wire brush and applying a protective terminal spray helps maintain a solid connection. When inspecting grounds, check the battery’s negative terminal and cable to make sure they’re securely attached and free of rust or corrosion. If the battery is old or weak, replacing it might be necessary, as a good electrical system depends heavily on a healthy power source.
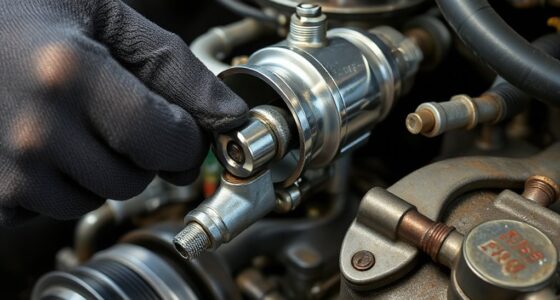
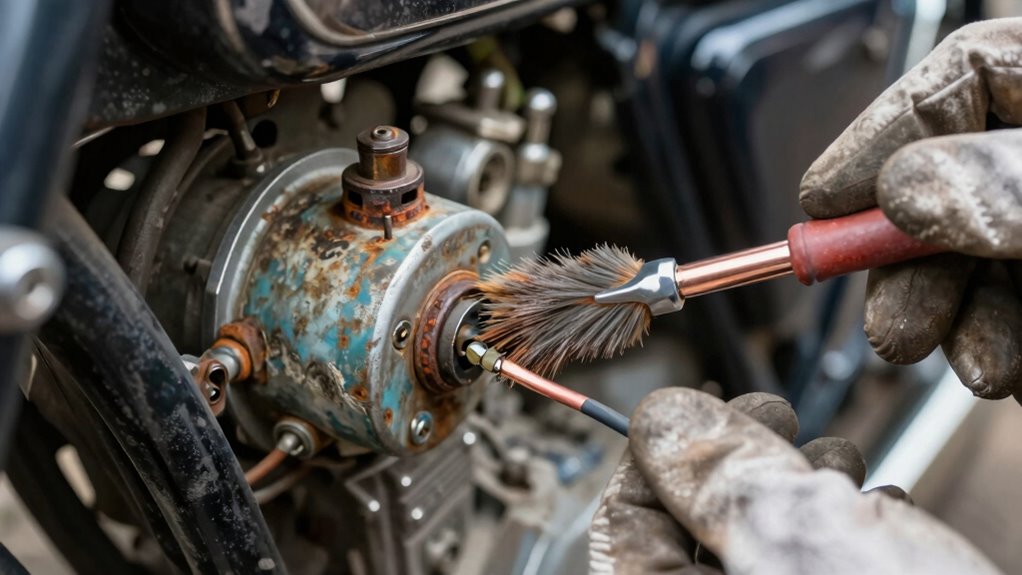
Next, consult your wiring diagrams to identify all ground points in your motorcycle’s electrical system. Wiring diagrams are invaluable because they show you exactly where ground connections should be made, making troubleshooting more straightforward. Once you have the diagram, examine each ground wire and terminal. Look for signs of corrosion, fraying, or loose fittings. Often, poor ground connections happen because of corrosion buildup or worn-out wiring insulation that causes intermittent contact. When you find a bad ground, clean the connection thoroughly with a wire brush or contact cleaner. Tighten any loose screws or bolts to guarantee a firm connection. If the wire itself is damaged, replace it with a new one that matches the original gauge and specifications.
Sometimes, the grounding point on the frame or engine can become loose or corroded. In such cases, removing the bolt or screw, cleaning the contact surface, and tightening it back down can restore proper grounding. For added security and conductivity, consider applying a thin layer of dielectric grease or dielectric compound before reassembling. This prevents future corrosion and ensures a good electrical connection over time. Additionally, inspecting the grounding points regularly as part of your maintenance routine can help catch issues early before they lead to more serious problems. Incorporating proper grounding techniques into your maintenance routine can significantly improve electrical reliability. Regularly checking the integrity of your ground connections and understanding your motorcycle’s wiring system are essential steps in preventing electrical failures. After making these adjustments, test your motorcycle’s electrical functions—lights, indicators, and starting system—to verify improvements. If problems persist, revisit your wiring diagram to double-check all ground points, ensuring no connection was overlooked.
In the end, maintaining your motorcycle’s ground system is about regular inspection and cleaning, especially as your bike ages. Proper battery maintenance, combined with following wiring diagrams, helps you identify and fix grounding issues efficiently. This approach not only restores reliable electrical performance but also prolongs the lifespan of your motorcycle’s electrical components, giving you confidence on every ride.

DriSentri 5 Point Car Universal Earth Ground Cables Grounding Wire System Kit High Performance Improve Power for Car Truck, Blue
Material: Grounding wire kit is made from high quality copper for maximum conductivity, strong & durable PVC plastic…
As an affiliate, we earn on qualifying purchases.
As an affiliate, we earn on qualifying purchases.
Frequently Asked Questions
How Often Should I Check My Motorcycle’s Ground Connections?
You should check your motorcycle’s ground connections every 3 to 6 months, especially if you notice issues like battery corrosion or wire corrosion. Regular inspections help catch loose or corroded connections early, preventing starting problems and electrical failures. Keep an eye out for any signs of corrosion or corrosion buildup, and clean or tighten connections as needed. This routine maintenance guarantees your motorcycle stays reliable and runs smoothly.
Can Poor Grounding Cause Engine Stalling?
Think of your motorcycle’s electrical system as a chain, where poor grounding is like a weak link. Yes, poor grounding can cause engine stalling because it interrupts electrical continuity. Battery corrosion at the ground connection worsens this issue, making it harder for current to flow properly. When the ground isn’t solid, the engine might stall unexpectedly, especially at idle. Ensuring clean, tight connections helps keep your bike running smoothly.
What Tools Are Best for Inspecting Ground Wires?
You should use a multimeter or a test light for inspecting ground wires. These tools help identify issues like ground wire corrosion or broken connections. Start with inspection techniques such as checking for corrosion, loose connections, or damaged insulation. A multimeter can measure resistance, ensuring the ground wire has a solid connection. Regularly inspecting ground wires with these tools helps prevent electrical problems and keeps your motorcycle running smoothly.
How Do I Identify a Bad Ground Connection Visually?
You spot a bad ground connection by carefully examining the wires. Look for ground corrosion—rusty, greenish, or whiteish buildup—around terminals or connectors. Also, check for loose terminals that wiggle or seem disconnected. These signs are clues that your ground isn’t solid, and trouble’s lurking beneath. Don’t ignore these warning signs; addressing them now keeps your motorcycle running smoothly and prevents future electrical issues.
Are There Specific Grounding Points to Avoid?
Avoid grounding points near battery corrosion or areas with poor ground wire routing, as these can cause electrical issues. Steer clear of rusty or dirty grounding spots, and make sure the ground wire connects to a clean, bare metal surface. Proper grounding points are typically solid, unpainted metal parts close to the battery or frame. Regularly inspect and clean these connections to prevent corrosion and guarantee a reliable electrical system.

TKDMR Battery Terminal Cleaners (2 pcs),12 pcs Battery Terminal Anti-Corrosion Fiber Washers (6 Red & 6 Green) for Car Marine Battery
Quantity: comes with 10 pieces battery anti-corrosion washers(5 red & 5 green) and 2pcs Battery Terminal Cleaning Brush.
As an affiliate, we earn on qualifying purchases.
As an affiliate, we earn on qualifying purchases.
Conclusion
Think of your motorcycle’s electrical system as a lively dance troupe, with each connection as a dancer. When a ground connection falters, it’s like a dancer missing a step — the performance falters. By fixing those poor connections, you’re guiding your bike back into perfect harmony, ensuring every part moves in sync. With a little care, you keep the dance lively and your ride smooth, making every journey a seamless performance.

Permatex 22058 Dielectric Tune-Up Grease, 3oz. – High Performance Dielectric Grease Used to Protect Terminals, Spark Plugs, Wiring and Other Electrical Connections Against Salt, Dirt, and Corrosion
Protects Electrical Connections And Wiring From Salt, Dirt And Corrosion
As an affiliate, we earn on qualifying purchases.
As an affiliate, we earn on qualifying purchases.

Advanced Custom Motorcycle Wiring- Revised Edition
As an affiliate, we earn on qualifying purchases.
As an affiliate, we earn on qualifying purchases.