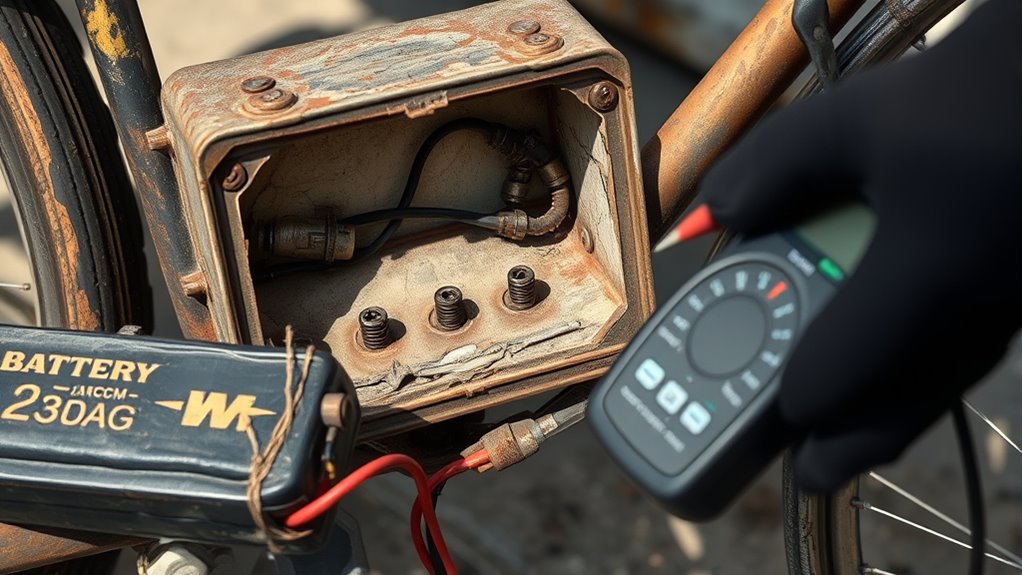
If your old bike’s battery isn’t charging, start by checking the battery’s voltage with a multimeter—full charge should be around 12.6V. Then, rev the engine to about 3,000 RPM and measure the voltage; it should be between 13.8 and 14.5V. Inspect wiring, connections, and grounds for corrosion or looseness. Test the stator and regulator/rectifier for proper function. Following these steps will help identify the issue before exploring more detailed troubleshooting tips.
Key Takeaways
- Verify the battery charge level and recharge or replace if voltage is below 12.6V.
- Check the charging voltage at around 3,000 RPM; it should be between 13.8–14.5V.
- Inspect wiring, connectors, and grounds for corrosion, looseness, or damage.
- Test the stator’s AC output and resistance to ensure proper generation of charging current.
- Confirm the regulator/rectifier is functioning correctly and regulating voltage within safe limits.

AstroAI Digital Multimeter Tester 2000 Counts with DC AC Voltmeter and Ohm Volt Amp Meter; Measures Voltage, Current, Resistance, Continuity and Diode, Blue
Additional Tips – The following incorrect operations may cause the multimeter not to show results: Firstly, the plugs…
As an affiliate, we earn on qualifying purchases.
As an affiliate, we earn on qualifying purchases.
Verify the Battery’s Charge Level Before Testing

Before performing any electrical tests on your motorcycle’s charging system, you should verify that the battery is properly charged. Start by turning off the ignition and using a multimeter to check the battery’s voltage. A fully charged motorcycle battery should read around 12.6 volts. If it’s considerably lower, it might be dead or sulfated, affecting your tests. If the voltage is low, recharge the battery fully before proceeding. Once charged, ensure the terminals are clean and tightly connected. A weak or faulty battery can mimic charging system issues, so confirming a healthy charge helps you avoid misdiagnosing. Only after verifying the battery’s condition should you move on to testing the charging voltage at higher RPMs.

PRO BAT Lifan Stator Kick Start Electric Wire Harness Kit Complete Wiring Harness Loom CDI Coil Magneto Pit Dirt Bike ATV SSR YX Coolster for 50cc 70cc 90cc 110cc 125cc 140cc
High Quality Lifan Stator Kick Electrics Wire Harness Kit Fits for 50cc 70cc 110cc 125cc 140cc 4 Stroke…
As an affiliate, we earn on qualifying purchases.
As an affiliate, we earn on qualifying purchases.
Assess the Charging Voltage at 3,000 RPM

Starting the motorcycle and revving the engine to around 3,000 RPM allows you to evaluate the charging voltage effectively. At this speed, the stator should produce enough current for testing. Use a multimeter to measure voltage across the battery terminals. Your goal is to see a reading between 13.8 and 14.5 volts, indicating proper system function. If the voltage is below 13.8 volts, it signals potential issues with the stator or regulator/rectifier. Keep in mind:
Rev the engine to 3,000 RPM and check for 13.8–14.5 volts across the battery.
- Voltage should increase with RPM and stabilize around 3,000 RPM.
- Avoid readings above 15 volts, which may suggest regulator failure.
- Ensure the engine is steady, not fluctuating.
- Use a reliable multimeter set to DC voltage.
- Repeat the test to confirm consistent results.
- Remember that charging system performance can vary depending on the bike’s age and condition. Additionally, electrical connections should be checked for corrosion or loose wiring, as these can affect readings and overall system health. Confirming proper ground connections is also crucial for accurate measurements and reliable charging system operation. Regular inspection and maintenance can help prevent charging issues and ensure your bike runs smoothly.

Voltage Regulator Rectifier Motorcycle Voltage Rectifier Universal for Go Kart And Boat Motors, DIY Engines
【Good Heat Dissipation】– Voltage regulator Using heat sink design, our regulator rectifier has good heat dissipation and long…
As an affiliate, we earn on qualifying purchases.
As an affiliate, we earn on qualifying purchases.
Check the Battery’s Cold Cranking Voltage

Start by measuring your battery’s cold cranking voltage with a multimeter before attempting to start your motorcycle. A healthy battery should read around 12.6 volts; anything substantially lower indicates it may be weak or failing. If the voltage drops below 9.6 volts during testing, it’s time to contemplate replacing the battery. Additionally, ensuring your battery is properly charged and maintained can help prevent further issues. Regular battery monitoring can extend its lifespan and ensure reliable performance. Being aware of the battery’s lifecycle can also help you plan for timely replacements before complete failure occurs. Keeping an eye on battery performance can help catch issues early and avoid unexpected breakdowns. Proper battery maintenance is essential for consistent electrical system operation.
Measure Voltage Clearly
Wondering whether your motorcycle’s battery is healthy? To get a clear reading, use a digital multimeter set to DC volts. First, turn off the ignition and disconnect the battery if needed. Place the probes on the battery terminals—red to positive, black to negative. A healthy, fully charged battery should read around 12.6 volts. For an accurate assessment:
- Ensure the engine is off before testing.
- Use a reliable multimeter for precise readings.
- Wait for the display to stabilize.
- Record the voltage immediately.
- Repeat to confirm consistency.
- Understanding the field of view and imaging scale in equipment setup can help you interpret voltage readings more accurately in different contexts. Additionally, proper battery maintenance can extend the life of your motorcycle’s charging system. Regular inspection of the charging system components ensures optimal performance and prevents unexpected failures. Keeping the battery terminals clean and tight also contributes to consistent voltage readings.
Assess Battery Health
Evaluating your battery’s health involves checking its cold cranking voltage to verify it can deliver the necessary power to start your motorcycle. To do this, turn off the ignition and use a multimeter set to DC volts. Connect the probes to the battery terminals—red to positive and black to negative. A healthy, fully charged battery should read around 12.6 volts. Then, start your engine and note the voltage; it should rise to between 13.8 and 14.5 volts during charging. Pay special attention to the cold cranking voltage: if it drops below 9.6 volts, your battery likely needs replacing. Low readings indicate insufficient capacity to start your bike or hold a charge, which can cause charging system issues down the line. Regularly monitoring battery health can help prevent unexpected breakdowns and ensure reliable performance.
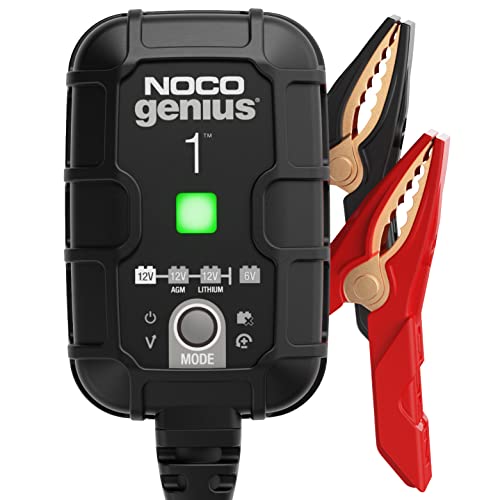
NOCO GENIUS1: 1A 6V/12V Smart Battery Charger – Automatic Maintainer, Trickle Charger & Desulfator with Overcharge Protection & Temperature Compensation – for Lead-Acid & Lithium Batteries
MEET THE GENIUS1 — Similar to our G750, just better. It's 35% smaller and delivers over 35% more…
As an affiliate, we earn on qualifying purchases.
As an affiliate, we earn on qualifying purchases.
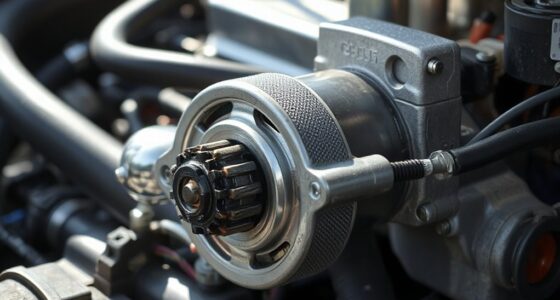
Test the Stator’s AC Output and Windings

To test the stator’s AC output and windings, you’ll need a multimeter set to measure AC voltage. First, disconnect the stator wires from the regulator/rectifier. Start the engine and rev it to around 3,000 RPM. Measure the voltage between each pair of yellow wires. You should see similar readings across all three wires, typically between 13-15 volts. Keep these points in mind:
To test the stator’s AC output, measure voltage between yellow wires at around 3,000 RPM for consistent 13-15V readings.
- Ensure the engine is at the correct RPM for testing.
- Check all three phase wires for consistent voltage.
- Look for significant discrepancies indicating damage.
- Test resistance across each winding for shorts or opens.
- Confirm there’s no continuity to ground, which signals a short.
- Properly maintaining the charging system can prevent costly repairs and ensure reliable operation. Regular inspection of electrical connections is also recommended to keep the system in good condition.
- Additionally, testing the winding resistance can help identify internal faults within the stator. A good understanding of power generation components can assist in diagnosing issues effectively.
Consistent, within-spec readings suggest the stator is functioning properly. Variations or low readings point to problems.
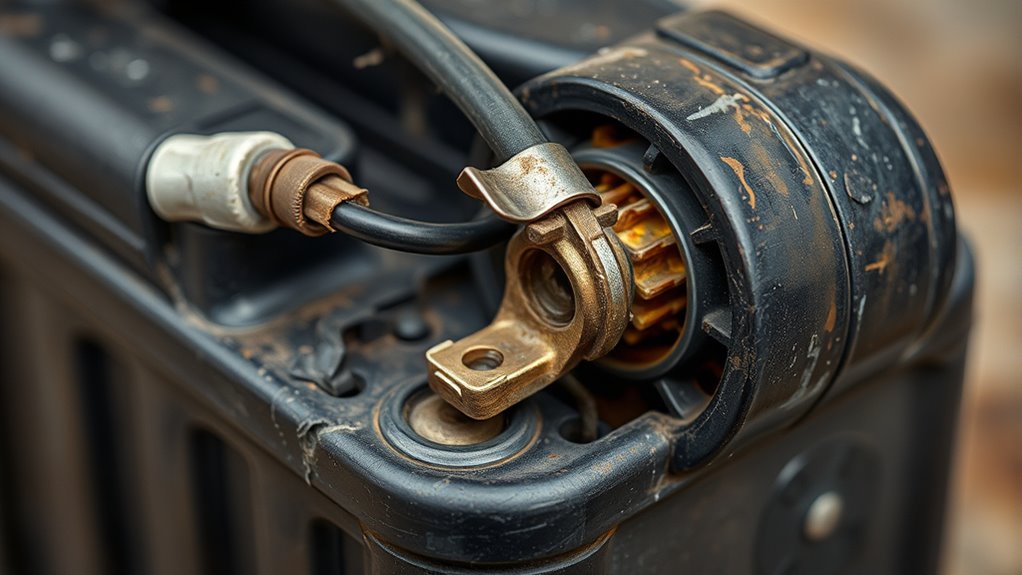
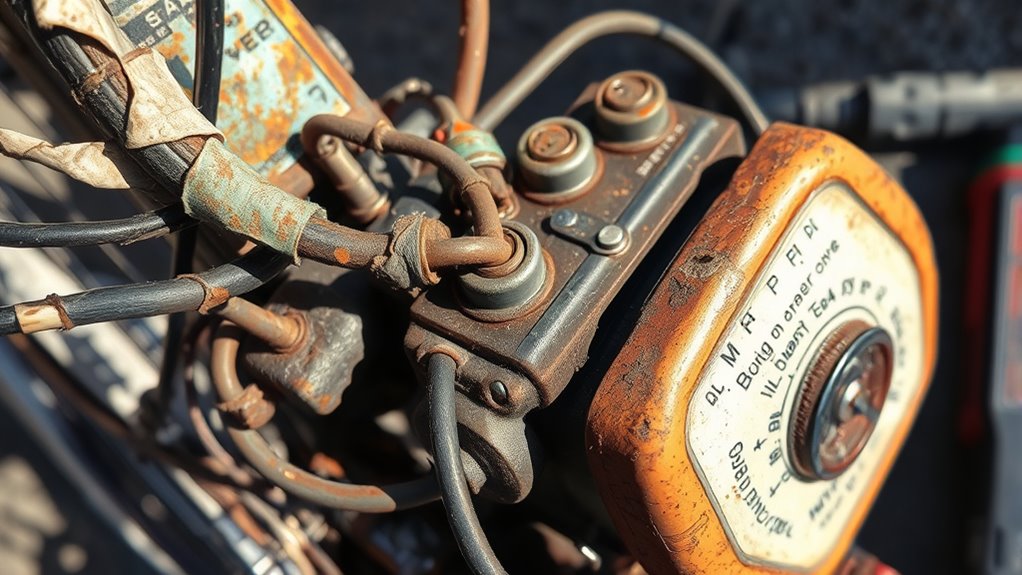
Inspect the Wiring Harness and Connections
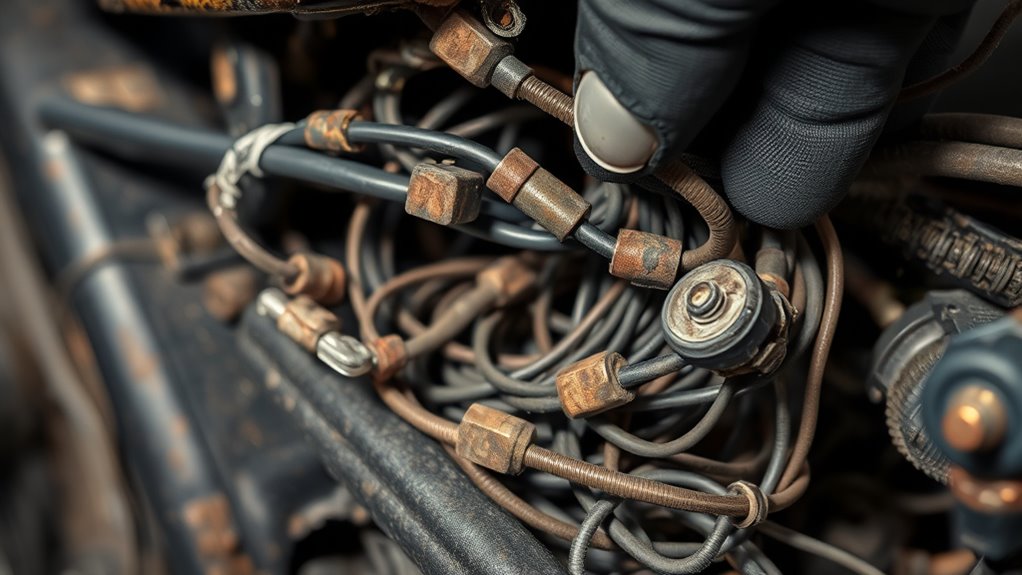
Start by inspecting the wiring harness for any signs of corrosion or physical damage, as these can disrupt electrical flow. Make certain all connections are secure, clean, and free of dirt or rust to maintain reliable contact. Don’t forget to check grounding points, making sure they’re solid and free from corrosion or looseness. Additionally, ensure that the wiring and connections are free from oxidation, which can interfere with proper electrical conduction. Regularly inspecting and maintaining electrical contacts can help prevent charging issues caused by poor connectivity. Implementing preventive maintenance practices, such as routine cleaning and inspection, can help sustain optimal electrical performance and reduce potential problems. Maintaining clean and corrosion-free connectors is essential for consistent electrical performance.
Check for Corrosion and Damage
Corrosion and damage in the wiring harness and connections can cause intermittent charging problems or complete electrical failures. Inspect all wiring carefully, especially around connectors, terminals, and exposed areas. Look for signs of corrosion such as greenish or white deposits, rust, or dirt buildup. Check for cracked, frayed, or burnt wires that may indicate damage or wear. Loose or broken connectors can disrupt the flow of electricity, so ensure all connections are tight and secure. Also, examine the wiring insulation for cuts or abrasions that could cause grounding issues. Address any corrosion or damage promptly to prevent further problems. Proper wiring maintenance is essential for reliable charging performance. Key points to focus on include:
- Corrosion buildup on terminals and connectors
- Frayed or cracked wiring insulation
- Burn marks or melted sections
- Loose or corroded connections
- Signs of rust or dirt in wiring harness
Ensuring the wiring is properly maintained can help prevent future charging issues and extend the lifespan of your bike’s electrical system.
Secure and Clean Connections
Ensuring all wiring connections are secure and free of dirt or corrosion is essential for reliable charging system performance. Start by inspecting the wiring harness thoroughly, looking for loose or disconnected connectors. Tighten any loose fittings and reseat connectors firmly. Clean corrosion or dirt from terminals and connectors using a wire brush or contact cleaner. Pay special attention to the battery terminals, regulator/rectifier connections, and stator wiring. Damaged or frayed wires should be repaired or replaced to prevent voltage drops. Confirm that all connectors are properly seated and locking into place. Properly secured and clean connections guarantee consistent electrical flow, reducing the risk of intermittent charging issues and helping your charging system operate smoothly. Additionally, proper maintenance practices can extend the lifespan of your bike’s charging components and improve overall reliability. Regular inspection and cleaning of these connections contribute to system longevity and dependable operation.
Inspect Grounding Points
Inspecting grounding points is vital because loose or poor connections can cause voltage drops and intermittent charging issues. Grounding guarantees a stable electrical flow, preventing the system from malfunctioning. Start by locating all grounding points, usually attached to the frame or engine. Check each connection for corrosion, looseness, or damage. Clean and tighten any loose or corroded grounds to ensure solid contact. Use a multimeter to verify continuity between grounding points and the battery negative terminal. Proper grounding is essential for accurate voltage regulation and reliable charging.
- Confirm all ground wires are securely attached
- Remove corrosion with a wire brush or sandpaper
- Ensure grounding points are free of rust or paint
- Replace damaged or frayed ground wires
- Re-tighten all connections to prevent future issues
Evaluate the Regulator/Rectifier Functionality
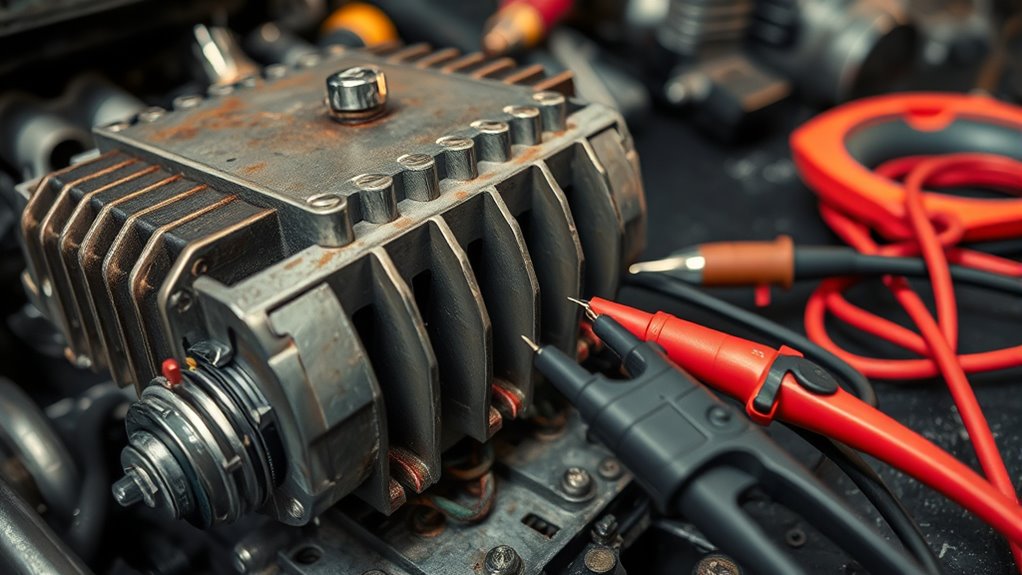
Wondering if your regulator/rectifier is functioning properly? First, check the wiring harness connected to it. The battery voltage wire (red or red/white) should have a constant voltage reading—even with the key off. Next, remove the rectifier and test between the green wire and each yellow stator wire using a multimeter. You’re looking for proper diode function—current should flow in one direction but not the other. If you notice dim headlights, difficulty starting, or a dead battery, the regulator/rectifier may be faulty. Replacing it prevents further damage to your battery. Always use a multimeter to confirm the voltage regulation and diode integrity, ensuring your charging system functions smoothly and reliably.
Look for Signs of Damage or Wear in Electrical Components
Are there visible signs of damage or wear in your motorcycle’s electrical components? Look closely for cracks, burns, or melted areas on wires, connectors, and components. Corrosion or rust at connections can impede electrical flow, while frayed or broken wires indicate potential faults. Check for discolored or swollen resistors and damaged fuses. Loose or corroded terminals can cause inconsistent charging. Burn marks or melted insulation reveal overheating issues. Keep an eye out for corrosion on battery terminals or connector pins, which hinder good contact. Regular inspections help catch early signs of damage before they cause larger problems.
Inspect for cracks, burns, corrosion, and damaged wires to prevent electrical issues early.
- Cracks, burns, or melting on wires and connectors
- Corrosion or rust at connection points
- Frayed or broken wiring
- Swollen or discolored resistors
- Damaged or blown fuses
Confirm Proper Grounding and Absence of Shorts

Start by checking all ground connections to verify they’re clean, tight, and free of corrosion. Next, inspect the wiring for any signs of shorts, such as melted insulation or burnt spots. Finally, test the frame ground integrity with a multimeter to confirm it provides a solid electrical path.
Check Ground Connections
A solid ground connection is essential for the proper functioning of your motorcycle’s charging system. Without a good ground, electrical components can malfunction, causing charging issues. First, locate the main ground wire, usually attached to the frame or engine block. Ensure it’s tightly secured and free of corrosion. Check all ground connections for signs of rust, dirt, or loose fittings. Use a multimeter to verify continuity between the battery negative terminal and the frame or engine. A proper ground should register near zero ohms.
- Tighten loose or corroded ground bolts
- Clean corrosion from grounding points
- Confirm no paint or rust under connections
- Test continuity with a multimeter
- Ensure wires aren’t frayed or damaged
Inspect Wiring for Shorts
Inspecting wiring for shorts is a crucial step in diagnosing charging system issues because even a small grounding or short circuit can disrupt proper electrical flow. Start by visually inspecting the wiring harness for signs of damage, frayed insulation, or corrosion, especially around connectors and terminals. Use a multimeter to check for continuity between each wire and the motorcycle frame; any reading indicates a short to ground. Pay close attention to the stator and battery wiring, ensuring no pinched or exposed wires are touching metal surfaces. Confirm that all connectors are secure and free of corrosion. If you find a short, repair or replace the damaged wiring and re-test. Proper wiring integrity prevents false readings and ensures the charging system functions correctly.
Test Frame Ground Integrity
Ensuring the grounding and absence of shorts in the motorcycle’s wiring system is a vital step in diagnosing charging issues. Proper ground connections prevent voltage leaks and guarantee reliable operation. Use a multimeter set to resistance or continuity mode to check the frame ground connection. Attach the test lead to the negative terminal of the battery or engine block, then probe the frame and wiring grounds. Look for:
- Continuity between battery negative terminal and frame
- No resistance or infinite reading indicating a good ground
- Absence of continuity between wires and frame unless intentionally grounded
- No signs of corrosion or damaged insulation around ground points
- Secure, clean connections free of rust or debris
Confirming a solid ground helps eliminate one common source of charging problems and guarantees the system functions correctly.
Replace or Recharge the Battery if Necessary
When your motorcycle’s battery isn’t holding a charge or shows low voltage during testing, replacing or recharging it becomes essential. First, remove the battery and check its cold cranking amps (CCA) with a load tester; if it drops below the manufacturer’s specifications, it’s time for a replacement. If the battery is still relatively new, try recharging it with a suitable motorcycle charger. Follow the charger’s instructions carefully, and after charging, test the voltage; it should read around 12.6 volts when fully charged. If the battery refuses to hold a charge or repeatedly drops below the acceptable voltage, replace it to guarantee reliable starting and proper system operation. Always use the correct battery type and maintain clean, tight terminals for peak performance.
Follow a Systematic Troubleshooting Flowchart
Following a systematic troubleshooting flowchart helps you efficiently identify and resolve battery charging issues. Start by checking the battery voltage with the key off; if it’s below 12.6 volts, recharge or replace it. Next, start the bike and measure the voltage at 3,000 RPM—aim for 13.8 to 14.5 volts. If it’s lower, investigate the stator and regulator/rectifier. Then, test the stator’s AC output and wiring integrity, ensuring no shorts or open circuits. Confirm the regulator/rectifier’s function by checking voltage consistency and diode operation. Finally, inspect wiring connections, fuses, and the battery’s condition.
Follow a step-by-step process to diagnose and fix battery charging problems efficiently.
Remember these key points:
- Follow a logical step-by-step process
- Use precise voltage and resistance specs
- Verify wiring and connections
- Test components individually
- Document findings for clarity
Frequently Asked Questions
How Do I Identify a Faulty Regulator/Rectifier in My Motorcycle?
You can identify a faulty regulator/rectifier by testing the wiring harness for proper voltage and diode function. Use a multimeter to check the green wire against the yellow stator wires—if you see inconsistent or no voltage, or if diodes fail in both directions, it’s likely broken. Additionally, signs like dim headlights, difficulty starting, or a dead battery despite a good stator indicate your regulator/rectifier may need replacing.
What Are Common Causes of Low AC Output From the Stator?
You might have low AC output from the stator due to damaged windings, broken or corroded wires, or loose connections. Over time, the stator can develop shorts or open circuits, reducing voltage. Check the resistance of the windings and look for visible damage or corrosion. Also, make certain all wiring connections are secure and free of corrosion. If the output remains low, replacing the stator may be necessary to restore proper charging.
How Can I Tell if My Wiring Harness Is Causing Charging Issues?
Think of your wiring harness as the nervous system of your bike—if it’s compromised, signals get lost. To check for issues, inspect all wiring for visible damage, corrosion, or loose connections. Use a multimeter to test continuity and make sure wires aren’t grounding out or broken. Confirm all connectors are secure and clean. Replacing damaged wiring or securing loose connections can restore the flow and eliminate charging problems caused by wiring faults.
What Is the Proper Way to Test for a Short to Ground in the Stator Wires?
You should set your multimeter to the resistance or continuity setting. Connect one lead to each of the stator wires and the other to the motorcycle frame. If the meter shows zero or very low resistance, it indicates a short to ground. No continuity means no short. Make sure your bike’s ignition is off before testing to avoid false readings. If you find a short, repair or replace the damaged wiring immediately.
When Should I Replace My Motorcycle’s Battery During Troubleshooting?
When your battery’s below the cold cranking voltage of 9.6 volts or consistently fails load tests, it’s time to replace it. Weak, sulfated, or slipping batteries won’t hold a charge, causing persistent problems. If your battery struggles despite a functioning charging system, swapping it out restores reliable power. Don’t delay—delayed replacement damages other components and diminishes your ride’s rhythm and reliability.
Conclusion
By carefully following these steps, you’ll uncover the subtle clues hiding in your bike’s charging system. Sometimes, a gentle touch or a keen eye is all it takes to bring clarity to the mystery. With patience and attention, you may find that what seemed complex is just a small hiccup waiting to be resolved. Trust your instincts, and soon your bike will be humming along smoothly, ready for the road ahead.