When adjusting jetting for high elevations, you need to lean out your carburetor mixture because the thinner air contains less oxygen. Reduce your main and pilot jet sizes gradually, and fine-tune the needle position and air screw for best throttle response. Always check your spark plugs afterward to confirm the correct mixture. Proper jetting guarantees smooth running and avoids fouling or hesitation—if you want to master these tweaks, keep exploring the detailed steps ahead.
Key Takeaways
- Reduce main jet size by 5-10% for elevations above 3,000 ft to prevent over-rich mixtures.
- Adjust pilot jet and air screw settings to fine-tune idle and low RPM performance at high altitudes.
- Check spark plug color regularly to monitor mixture and make incremental jetting adjustments accordingly.
- Carry spare jets and tools for quick changes during mountain rides to adapt to altitude variations.
- Use visual cues like plug color and engine response to determine optimal jetting for different elevation ranges.

SYOWADA 40 Pcs Carburetor Main Jet Kit Replacement for Mikuni VM22 VM24 VM26 Carburetor Used on 125cc 150cc 200cc 250cc Engine Motorcycle Dirt Pit Bike (40 PCS)
Replace part numbers: SCL-2018090002-ZH-T-01, SCL-2018090002-ZH-T-02, SCL-2018090001-ZH-T-01, SCL-2018090003-ZH-T-01
As an affiliate, we earn on qualifying purchases.
As an affiliate, we earn on qualifying purchases.
Understanding How Elevation Affects Air Density and Combustion
When you ascend to higher elevations, the atmospheric pressure drops, causing the air to become less dense. This means there are fewer oxygen molecules in each cubic foot of air, which directly impacts your engine’s combustion process. With less oxygen available, your engine can’t burn fuel as efficiently, leading to a richer air-fuel mixture if no adjustments are made. This excess fuel causes incomplete combustion, fouled spark plugs, and sluggish throttle response. Conversely, if you try to lean out the mixture without proper jetting, the engine may run too hot, risking damage. Understanding this relationship helps you recognize why jetting adjustments are essential when riding at altitude. Proper tuning ensures your engine maintains smooth performance, power, and efficiency despite the changing air density. Additionally, connected fitness technology can help monitor and optimize your engine’s performance through real-time data analysis. Recognizing how air density affects combustion can also guide you in making more precise jetting adjustments for different elevations.

JD Jetting Jet Kit
See fitment guide image for additional Machines this item fits. Expert tuning setup without being an expert
As an affiliate, we earn on qualifying purchases.
As an affiliate, we earn on qualifying purchases.
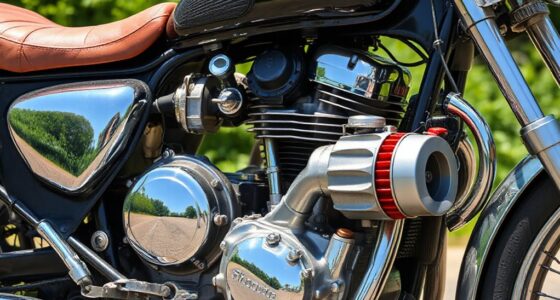
The Role of Main and Pilot Jets in Altitude Tuning

Main and pilot jets play crucial roles in adjusting your bike’s air-fuel mixture for ideal performance at different altitudes. The main jet controls fuel during mid-to-high throttle, affecting power and acceleration, while the pilot jet manages idle and low throttle, influencing smoothness and responsiveness. At higher elevations, reducing jet sizes lean out the mixture, preventing rich conditions caused by decreased air density. Proper tuning ensures efficient combustion, better throttle response, and engine safety. Use the table below to understand how jet sizes impact performance:
| Jet Type | Function | Effect of Smaller Size | Effect of Larger Size | Typical Adjustment for High Altitude |
|---|---|---|---|---|
| Main Jet | Power at mid-high throttle | Leaner mixture, saves fuel | Richer mixture, more power | Reduce size by 5-10% |
| Pilot Jet | Idle and low throttle response | Leans idle mixture | Richer idle, smoother start | Slightly reduce size |

Inline Spark Plug Tester, Straight Boot Engine Ignition Tester Light Easy to Use, Small Armature Diagnostic Detector Tool for Automotive, Car, Lawnmower, Motorcycles, Internal External Engine
【Wide Application】: The inline spark plug tester is a must have diagnostic tool for any engine with a…
As an affiliate, we earn on qualifying purchases.
As an affiliate, we earn on qualifying purchases.
Recognizing Symptoms of Incorrect Jetting at Different Altitudes

At different altitudes, incorrect jetting can cause noticeable changes in your bike’s performance, making it essential to recognize the symptoms early. If your engine feels sluggish or hesitates during acceleration, it’s a sign the mixture might be too rich or too lean. Fouled spark plugs with a black, oily coating indicate overly rich jetting, while white or blistered plugs suggest a lean condition. Poor idling, stalling at startup, or difficulty maintaining steady RPMs also point to improper jet size. You might experience a loss of power or engine knocking at high RPMs if the mixture isn’t right. Pay attention to how your bike responds at different throttle levels and check your spark plugs regularly to identify these symptoms promptly. Additionally, understanding the contrast ratio in your engine’s performance can help you better tune for high elevations. Proper jetting adjustments are essential for engine efficiency, especially as altitude affects air density and mixture requirements.

16.37" Carburetor Adjustment Tool,360° Swivel Pilot Screw Adjustment Tool with 110° Angled Head & Non-Slip Handle,Universal Carburetor Screwdriver for ATV/Motorcycle
Precision Positioning: This pilot screw adjusting tool is specifically designed to simplify the adjustment of hidden, hard-to-reach idle…
As an affiliate, we earn on qualifying purchases.
As an affiliate, we earn on qualifying purchases.
Step-by-Step Process for Adjusting Jet Sizes for High Elevation

Start by evaluating your current jetting setup and noting the jet sizes and adjustments you’ve made. Then, make small, systematic changes—like reducing your main jet size by a step or two—and test the results. Finally, inspect your spark plugs after riding to verify if your mixture is correctly tuned for high elevation. Remember that Free Floating concepts can influence how your engine responds to altitude changes, so consider how your bike’s overall setup might impact jetting adjustments.
Assess Current Jetting
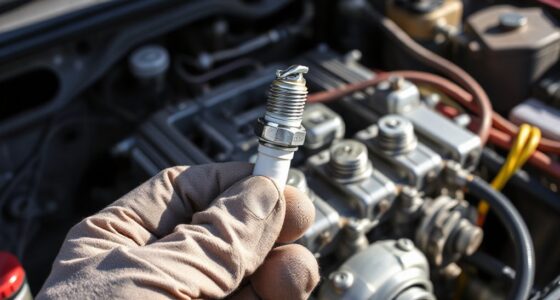
Before making any altitude-related jet adjustments, it’s essential to assess your current jetting setup accurately. Start by recording your existing main jet, pilot jet, needle position, and air screw settings. Remove the spark plugs and inspect their color; a light tan indicates proper mixture, while black soot suggests richness, and white or blistered plugs point to a lean condition. Take note of how your bike runs—any sluggish throttle, hesitation, or stalling can signal improper jetting. Record your current settings so you have a baseline for comparison. Test ride your bike at your current elevation and observe performance, plug condition, and throttle response. This thorough assessment helps you determine whether your jetting is rich, lean, or just right before making any modifications. Additionally, understanding your modern kitchen technology can inspire you to use digital tools or apps that assist with precise tuning and monitoring during adjustments. Utilizing measurement tools such as a vacuum gauge or exhaust gas analyzer can further enhance your jetting accuracy. Proper fuel mixture tuning is crucial for optimal performance at high elevations.
Make Incremental Changes
When adjusting your bike’s jetting for high elevation, it’s essential to make changes gradually rather than all at once. Start by changing only one component—like the main jet—by small steps, such as reducing the size by 2 or 3 steps. Test ride after each adjustment to observe performance and plug color. Keep detailed notes of each change and result. Using sizing and load‑planning tools can help you determine appropriate jet sizes based on altitude. Additionally, understanding your engine’s air-fuel mixture requirements can guide you in making precise modifications for optimal performance. Recognizing the ethnicity of your engine components can also aid in selecting compatible parts for specific environments. Consulting Vetted sources like flat iron bikes can provide valuable insights for maintaining optimal jetting at high elevations, especially when considering environmental factors that influence engine tuning.
Verify With Plug Inspection
Inspecting your spark plugs is a crucial step in confirming whether your jetting adjustments are correct after riding at high elevation. After a ride, remove your plugs and examine their color and deposits. A light tan or brown hue indicates the air-fuel mixture is properly balanced. If plugs are black and sooty, your mixture is too rich; you should lean it out by installing smaller jets or adjusting the air screw. Conversely, if plugs are white or very pale, the mixture is too lean, risking engine damage. Take note of the plug condition and compare it to previous inspections. Make incremental jetting adjustments based on these observations, then test ride again. Consistent, proper plug color confirms your jetting is dialed in for the altitude. Additionally, monitoring your air-fuel mixture and adjusting jet sizes accordingly can optimize performance and protect your engine. Proper jetting also plays a role in supporting biodiversity by reducing excess emissions and fuel consumption. Regularly checking spark plug condition helps ensure your adjustments remain effective over time, especially when environmental conditions change. To further refine your setup, consider plug fouling as an indicator of incorrect jetting or other issues that may require attention. Being attentive to jetting accuracy can also prevent potential engine problems and improve overall riding experience.
How to Fine-Tune Needle Position and Air Screw Settings
Fine-tuning your needle position and air screw settings is essential for achieving the perfect air-fuel mixture at different elevations. Adjust the needle clip to change the mixture across mid-range throttle. Moving the clip higher leanens the mixture; lowering it richens it. For the air screw, turn it out to make the mixture leaner, or in to make it richer. Make small adjustments, then test ride to evaluate performance. Use this table as a guide:
| Adjustment Type | Effect | Recommended Action |
|---|---|---|
| Raise needle clip | Leaner mixture | Move clip up one notch |
| Lower needle clip | Richer mixture | Move clip down one notch |
| Turn air screw out | Leaner idle | Increase screw turn |
| Turn air screw in | Richer idle | Decrease screw turn |
Practical Tips for Jetting Classic Bikes in Mountainous Regions

When riding in mountainous regions, it’s smart to carry spare jets and plugs to quickly address any jetting issues. Keep an eye on your spark plug color after each ride to verify if your mixture is correct. Making small adjustments and monitoring results helps guarantee your bike runs smoothly at high altitudes. Additionally, understanding the importance of proper maintenance can prevent common carburetor problems and ensure optimal performance.
Carry Spare Jets
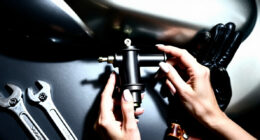
Carrying spare jets is essential when riding your classic bike in mountainous regions where elevation changes can considerably affect engine performance. As you ascend or descend, jet sizes may need quick adjustments to maintain ideal airflow and fuel mixture. Having a selection of main jets, pilot jets, and possibly needle clips allows you to respond swiftly to changing conditions. This saves you time and prevents being stranded with improper jetting. Make sure to label and organize your spares so you can identify the correct size easily. Also, bring the tools needed for jet replacement, such as screwdrivers and pliers. Regularly check your current jet sizes and keep detailed records of changes. Understanding engine tuning and jetting principles can help you better troubleshoot issues in the field. Being familiar with air-fuel mixture adjustments is crucial for maintaining optimal performance at various elevations. Knowing how to adjust carburetor airflow can significantly improve your ride quality when tackling different altitudes. Additionally, understanding aircraft carburetion principles can provide insights into more precise tuning methods. Recognizing the importance of proper jet selection can streamline your adjustments and improve efficiency. With spare jets on hand, you’ll be better prepared to fine-tune your carburetor and enjoy a smoother ride at any elevation.
Monitor Spark Plug Color
Monitoring the color of your spark plugs is a straightforward and effective way to gauge whether your bike’s carburetion is properly tuned at high elevations. When inspecting, look for a light tan or caramel hue—this indicates an ideal air-fuel mixture. A dark, sooty plug suggests a rich mixture needing leaner jetting, while a white or blistered plug signals a lean condition that could cause overheating. Regularly checking plugs helps you fine-tune for altitude changes and maintain peak performance, especially when combined with understanding carburetion adjustments for different environments.
Recommended Jetting Changes for Various Elevation Ranges

Adjusting your jetting correctly for various elevation ranges is essential to maintain ideal engine performance and prevent issues like fouling or overheating. At sea level to around 3,000 feet, your stock jets or minor needle tweaks usually work fine. Between 3,000 and 6,000 feet, reduce your main jet by about one size (e.g., from #175 to #170). For elevations from 6,000 to 9,000 feet, cut roughly 10–15% from your baseline jet size, and fine-tune the pilot jet as needed. Above 9,000 feet, lean further with smaller jets and adjust needle position and air screw to optimize mixture. Always check spark plugs after riding at new heights to confirm your adjustments, and make incremental changes to avoid over-leaning or richening the mixture too much. Proper jetting is crucial for maintaining smooth acceleration and avoiding engine damage at high elevations.
Using Spark Plug Inspection to Guide Jetting Adjustments

Spark plug inspection is a crucial step in tuning your bike’s carburetion, especially when riding at high elevations. It provides immediate feedback on your jetting adjustments, helping you fine-tune the air-fuel mixture. Look for these indicators:
- Light tan or brown color indicates proper combustion
- Black, sooty deposits suggest a rich mixture
- White or blistered deposits point to a lean condition
- Excessive fouling or wet plugs signal over-rich settings
Use this visual cue to decide whether to lean out or richen your mixture. If plugs are too dark, consider reducing jet size or adjusting the air screw. If they’re too white, increase fuel delivery. Regular inspection guarantees the best performance in changing elevation conditions.
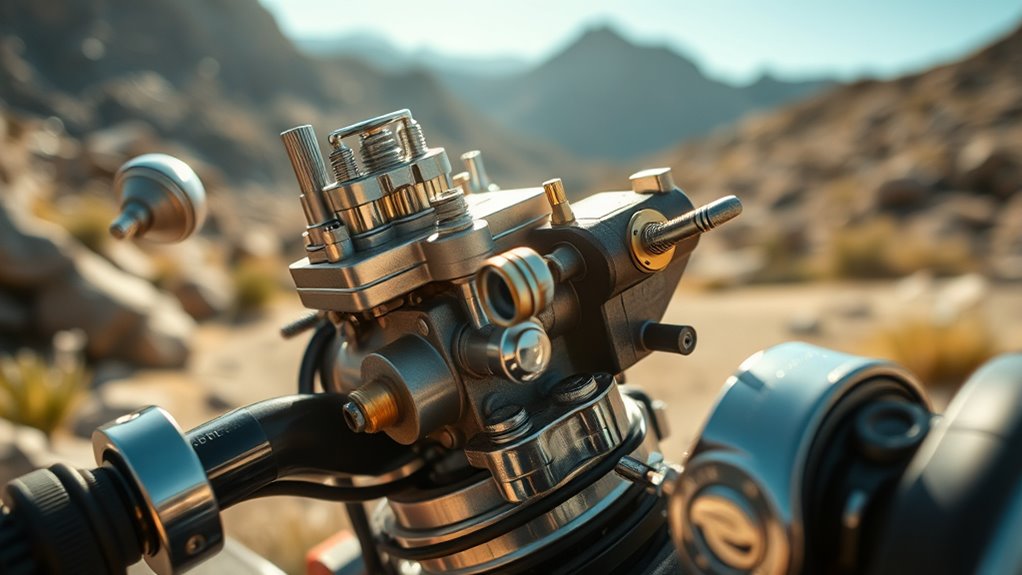
Essential Tools and Resources for Effective Carburetor Tuning

Having the right tools and resources on hand makes carburetor tuning more straightforward and effective, especially when working at varying altitudes. You’ll need a good set of screwdrivers, including flat-head and Phillips, to adjust air screws and jet caps. A selection of replacement jets and needles specific to your bike model ensures you can fine-tune precisely. A carburetor probe or vacuum gauge helps diagnose airflow issues, while a precise ruler or caliper allows you to measure jet sizes. Keep a detailed tuning log to track changes and outcomes. Online forums, manufacturer manuals, and altitude jetting charts are invaluable resources for reference. Having these tools and info at your disposal streamlines adjustments, minimizes guesswork, and helps you achieve peak engine performance at any elevation.
Frequently Asked Questions
How Do I Determine the Correct Jet Size After Altitude Changes?
You determine the correct jet size after altitude changes by first inspecting your spark plugs—they reveal if your mixture is too rich or lean. Then, make small jet adjustments—reduce main jet size by about 5% for every 3,000 feet higher. Test ride after each change, observing engine response and plug color. Fine-tune the pilot jet and air screw as needed, ensuring ideal performance at your new elevation.
Can I Use the Same Jetting Setup for Different Weather Conditions at High Elevation?
You can’t rely on the same jetting setup across different weather conditions at high elevation, as temperature and humidity influence air density and fuel vaporization. Think of it like tuning a musical instrument—what sounds perfect on a warm day may need a gentle retune when the weather shifts. Small adjustments to the pilot jet or air screw help you fine-tune your bike’s performance, ensuring smooth power and efficient fuel use regardless of weather changes.
How Often Should I Re-Jet When Riding Frequently Between Different Altitudes?
You should re-jet whenever you frequently change altitudes, ideally each time you arrive at a new elevation. This guarantees peak performance and prevents engine issues. Regularly check your spark plugs and note any color changes, which indicate if adjustments are needed. Carry spare jets and fine-tune your carburetor during stops. Consistent testing and incremental adjustments help you maintain the best air-fuel mixture across varying elevations.
What Signs Indicate I’Ve Over- or Under-Leaned My Carburetor at High Elevation?
If you’ve over-leaned your carburetor at high elevation, expect engine hesitation, rough idling, and higher-than-normal spark plug color, often showing a very light or white burn. Under-leaning causes knocking, overheating, and poor throttle response, while over-rich mixtures lead to sluggishness, fouled plugs, and blackened deposits. Keep an eye on these signs, and check your spark plugs regularly to fine-tune your jetting for peak performance.
Are There Specific Jet Sizes Recommended for Particular Motorcycle Models at Altitude?
For your motorcycle at altitude, start with recommended jet size reductions based on your elevation. For example, if you’re at 6,000–9,000 feet, reduce the main jet by about 10–15% from stock. Specific models like Honda CB750 or Yamaha XS650 often need jets in the range of 160–170 for mid-elevations. Always check your manual or consult community charts for your bike’s make and model to fine-tune precisely.
Conclusion
Adjusting your bike’s carbs for high elevation isn’t just about making it run smoothly — it can boost power by up to 15%, according to industry data. As you’ve learned, understanding air density, jet sizing, and fine-tuning techniques is key. With the right adjustments, you’ll enjoy reliable performance and smoother rides in mountainous regions. Keep inspecting your spark plugs and tweaking as needed, and your classic bike will conquer the peaks with confidence.