To maintain vintage bike brakes, you should regularly inspect and clean drum brakes, checking for grooves, wear, and surface smoothness, and make certain the shoes are properly aligned and lubricated. For early disc brakes, focus on inspecting hydraulic lines, pads, and rotors for wear or leaks, and keep components clean and properly adjusted. Both systems require attention to detail, and if you continue exploring, you’ll discover tips for keeping these brakes in top shape.
Key Takeaways
- Drum brakes require regular inspection of shoes, drums, and lubrication of pivot points to prevent uneven wear and maintain proper contact.
- Early disc brakes need periodic checking of hydraulic lines, pads, and calipers for leaks, contamination, and smooth operation.
- Maintenance for drum brakes is simpler with straightforward component replacement, while disc brakes demand careful hydraulic system maintenance.
- Surface condition assessment, including measuring drum or rotor runout, is essential for both brake types to ensure optimal braking performance.
- Consistent cleaning, lubrication, and adjustment are vital for preserving brake function and safety in vintage bikes with either system.

AlveyTech 80 mm Rear Band Drum Brake Assembly – Schwinn Meridian rear brake For Trike, Razor Pocket Mod Rocket, Dirt Bike & Scooter – With Rotor, Spring, and Hardware – Schwinn Meridian Trike Parts
COMPATIBILITY: These adult tricycle brakes are compatible with a broad range of trikes and bicycles needing rear band…
As an affiliate, we earn on qualifying purchases.
As an affiliate, we earn on qualifying purchases.
Overview of Vintage Brake Systems

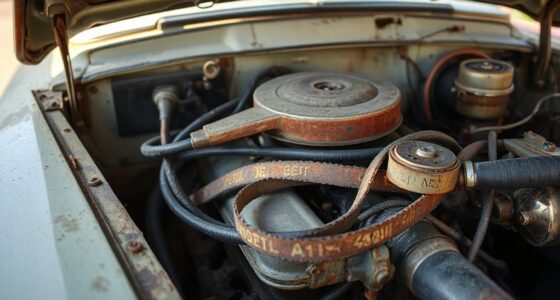
Vintage brake systems primarily rely on mechanical linkages and friction surfaces to slow and stop the bike. Drum brakes use brake shoes that expand outward inside a metal drum attached to the wheel, creating friction. These systems depend on cables or rods to actuate the shoes, making maintenance straightforward but requiring regular inspection for wear and proper adjustment. Understanding the science behind braking systems can help in making informed maintenance decisions. Additionally, the ease of repair for drum brakes makes them a popular choice for vintage bicycles. The simplicity of design in drum brakes contributes to their durability and ease of maintenance. Regular inspection of the brake shoes and replacing worn components ensures optimal performance. Early disc brakes, on the other hand, employ hydraulic calipers squeezing brake pads onto a rotor attached to the wheel. While offering more consistent braking, they depend on hydraulic fluid and seals, which can complicate repairs. Both systems are simpler than modern brakes but need regular upkeep. Drum brakes are easier to repair in the field, whereas early disc brakes demand more precise hydraulic work and parts. Proper maintenance practices can extend the lifespan of both brake types and enhance safety.

GegonC Bicycle Disc Rotor Truing Fork Tool Kit – Bicycle Brake Pad and Rotor Alignment – Steel Rotor Adjustment Tool for Mountain Road Bike Calibration,(Black)
【Built to Last】: Engineered with thickened high-quality stainless steel, this brake rotor tool withstands heavy-duty rotor truing without…
As an affiliate, we earn on qualifying purchases.
As an affiliate, we earn on qualifying purchases.
Disassembly and Inspection Procedures
To start disassembling your vintage brake, follow the specific sequence to avoid missing parts or causing damage. Use the inspection checklist to identify worn or damaged components that need replacement or repair. Make sure you have the specialized tools on hand, like dial indicators and brake-specific cleaning supplies, to perform an effective and safe overhaul. Additionally, understanding the different types of support breakfast options can help you select the best maintenance or upgrade parts suited for your bike. Being aware of cookie categories can also help you manage your privacy preferences during online research related to brake maintenance.
Disassembly Sequence
Start by removing the wheel and brake plate assembly to access the brake components. Carefully detach the brake shoes from the actuating cam and pivot points, keeping springs and small parts organized. Next, remove the operating cam and inspect its surfaces for wear or damage; clean and lubricate them if needed. If your drum has a separate hub, take it off and check the interior for rust or scoring. For disassembly of the brake drum, use a drum puller if necessary, and then clean the drum surface thoroughly. Remove and inspect all springs, clips, and adjusters, replacing any worn or damaged parts. Document the order of removal to simplify reassembly. This sequence ensures a systematic approach, preventing missed components and facilitating accurate inspection. Additionally, proper documentation during disassembly can greatly aid in efficient reassembly and troubleshooting. Incorporating free floating features in the design can also make reassembly easier by providing more accessible clearance and alignment options.
Inspection Checklist
Before reassembling your brake components, performing a thorough inspection is essential. This guarantees safety and peak performance. First, check the brake drum or rotor surface for grooves, out-of-roundness, or high-low spots using a dial indicator or a straightedge. Second, examine all moving parts—cams, pivots, and linkages—for wear, corrosion, or sticking, cleaning and lubricating as needed. Third, inspect brake shoes or pads for uneven wear, cracks, or contamination; replace if necessary. Fourth, test cables or hydraulic lines for fraying, leaks, or damage. Confirm that all components move freely and are properly aligned. Address any issues before proceeding with reassembly. Proper inspection prevents uneven braking, reduces wear, and extends your vintage bike’s life. Additionally, consulting comprehensive maintenance schedules ensures you don’t overlook critical service intervals. Regularly performing preventive maintenance on your brake system helps maintain optimal safety and performance over time.
Specialized Tools Needed
Disassembly and inspection of vintage brake components require specialized tools to guarantee precision and safety. You’ll need a set of brake spring pliers for removing and installing springs without damage. A brake drum puller helps detach drums stuck from corrosion or wear. For drum resurfacing, use a dial indicator to measure runout accurately, along with a lathe or grinding tools designed for brake drums. A wire brush or abrasive stones are essential for rust removal, while files and sandpaper smooth surfaces. For lubrication, use brake-specific grease and a grease gun for precise application. Additionally, a caliper or feeler gauges assist in measuring clearances. Having these tools ensures thorough disassembly, inspection, and reassembly, preventing issues and extending your vintage brake’s lifespan. Proper tool selection is crucial for safe and effective maintenance, especially when dealing with complex or delicate components. Regular inspection with precision measuring tools can help identify wear and potential failure points early, safeguarding your bike’s performance.

focopot Bike Cleaning Kit Including Bicycle Chain Cleaner Degreaser,Cycling Chain Lube,Cleaner Brush Tool,Scrubber,Suitable for Mountain/MTB,Ebike,Road Bike and Trail Bikes
【Bike Cleaning Kit】:focopot Bicycle cleaner kit includes chain lubricant, degreaser, chain scrubber, gear brush, wheel brush and chain…
As an affiliate, we earn on qualifying purchases.
As an affiliate, we earn on qualifying purchases.
Surface and Component Condition Assessment

You need to carefully inspect the drum surface for grooves, out-of-roundness, and high-low spots, as these imperfections can markedly reduce braking efficiency. Worn pivot shafts and misaligned stays also affect brake action, so check and adjust or rebush as necessary. Ensuring these components are in good condition helps maintain smooth, reliable braking performance. Incorporating sound therapy techniques can also assist in diagnosing subtle issues that may affect braking feel. Additionally, verifying the condition of filtering and pump protection components can prevent debris from compromising brake system performance. Conducting regular system evaluations allows for early detection of issues and helps extend the lifespan of your braking components.
Drum Surface Integrity
Evaluating the surface integrity of a drum brake is essential for guaranteeing effective braking performance. You need to check the drum surface for grooves, crown, and high-low spots that can impair contact and reduce braking efficiency. Use dial indicators to measure out-of-roundness, aiming for tolerances between .002″ and .004″. Keep an eye out for signs of excessive wear or scoring that mimic the effects of worn pistons. Also, inspect the drum’s interior for uneven wear patterns and deformation. Proper assessment helps determine if machining or replacement is necessary. Remember, a smooth, true drum surface ensures ideal shoe contact and braking response. Regular inspection prevents issues like vibration, noise, and reduced stopping power, keeping your vintage bike safe on the road. Additionally, understanding surface condition assessment techniques can help extend the lifespan of your brake components. Incorporating preventative maintenance practices, such as routine cleaning and lubrication, can further enhance brake performance and safety. Conducting visual inspections regularly allows for early detection of potential problems before they become costly repairs. Checking the condition of brake components regularly can also help identify early signs of deterioration and avoid costly repairs. Moreover, staying informed about vintage brake technology can improve your maintenance approach and ensure safety.
Wear and Out-of-Round
Evaluating wear and out-of-round conditions on your vintage bike’s brake components is essential for ensuring reliable stopping power. Use dial indicators to check drum surface flatness; tolerances are typically .002″ to .004″. Worn pivot shafts or misaligned stays affect brake actuation, so rebushing and adjustments are necessary. Turning or machining drums to specified tolerances helps bedding new shoes and maintains consistent braking. Here’s a quick guide:
| Condition | Inspection Method | Action Needed |
|---|---|---|
| Drum surface grooves | Visual, dial indicator | Resurface or replace drum |
| Out-of-roundness | Dial indicator on drum | Machine to tolerance |
| Worn pivot shafts | Visual, feel for play | Rebush or replace |
| High-low spots | Visual, tactile check | Resurface or replace drum |
| Brake shoe contact area | Visual, test brake action | Adjust or replace shoes |
Pivot and Stay Alignment
Ensuring proper pivot and stay alignment is crucial for consistent brake performance on vintage bikes. Misaligned pivots or stays can cause uneven brake shoe contact, reducing effectiveness and causing uneven wear. To assess surface and component condition, check these key points:
- Inspect pivot shafts for wear, corrosion, or damage, replacing or rebushing as needed. Regular component inspection helps prevent failure and maintains safety.
- Verify stay alignment by ensuring brake arms move smoothly without binding or side-to-side play.
- Examine pivot and stay surfaces for scoring or pitting; clean and lubricate with appropriate grease.
- Measure stay alignment with a straight edge or dial indicator, adjusting to maintain even contact across brake shoes.
- Regularly maintain lubrication of moving parts to prevent rust and ensure smooth operation. Proper lubrication reduces friction and extends component lifespan. Additionally, inspecting for corrosion control can help maintain optimal function and safety. Proper alignment and surface condition assessment are essential for optimal brake function and longevity.

2-in-1 Hose Cutter & Needle Driver Tool for Bicycle Hydraulic Brake Repair, Lightweight Aluminum Alloy with Plastic Handle, MTB Road Bike Oil Line Cutting and Fitting Installation Tool
✅ 2-in-1 Design: Combines a hydraulic hose cutter and needle driver installation tool in one lightweight unit. Eliminates…
As an affiliate, we earn on qualifying purchases.
As an affiliate, we earn on qualifying purchases.
Cleaning and Restoring Brake Components

Cleaning and restoring brake components is a crucial step to guarantee maximum performance and longevity of vintage drum brakes. You want to remove rust, dirt, and debris that can hinder operation. Use mineral spirits and abrasive stones to clean the drum’s inner surface, working systematically and wiping away debris frequently. Follow with files, sandpaper, or roll lock discs to smooth surfaces. Polishing hub fins and applying protective coatings help prevent future corrosion. Alternative methods like wet/dry sandpaper can be effective but might risk altering the drum shape. Proper cleaning maintains drum flatness and ensures even contact with brake shoes.
| Step | Purpose |
|---|---|
| Rust removal | Restore surface, improve braking efficiency |
| Surface smoothing | Prevent uneven wear, extend component life |
| Polishing & coating | Reduce corrosion, ease future maintenance |
| Final inspection | Confirm drum shape and surface integrity |
Lubrication and Adjustment Techniques

Proper lubrication and precise adjustments are essential to keep vintage drum brake systems functioning smoothly and reliably. Properly lubricate the brake cams, pivots, and actuating arms with a light film of grease like Copper Slip, ensuring nothing contaminates the brake linings. When adjusting, focus on these key steps:
- Check and tighten brake cable tension to prevent dragging or slack.
- Inspect brake shoes and replace if worn beyond specifications.
- Adjust the slack in the brake cable or rod for firm engagement without over-tightening.
- Reassemble components carefully, testing brake response before riding.
Special Considerations for Drum Brakes

When working on vintage drum brakes, paying close attention to the alignment of the brake shoes and drum is essential for consistent performance. Improper alignment causes uneven wear, reduces braking efficiency, and can lead to noise or vibration. Before reassembling, inspect the drum surface for grooves, out-of-roundness, or high spots, and machine it if necessary to restore a smooth, even surface. Ensure the brake shoes are correctly positioned relative to the drum, with uniform clearance on both sides. Lubricate the cam and pivot points thoroughly but sparingly to prevent sticking, and adjust cable tension carefully to avoid dragging or insufficient engagement. Regularly check for rust, dirt, and wear, and clean components meticulously to maintain reliable, effective braking.
Unique Aspects of Early Disc Brake Maintenance
Maintaining early disc brakes requires careful attention to hydraulic system integrity, as these brakes rely on fluid pressure to function properly. You must regularly inspect for leaks, ensure proper bleeding, and verify that seals and hoses are in good condition.
Key maintenance aspects include:
- Inspect and replace worn pads and damaged hydraulic components to prevent brake failure.
- Bleed the hydraulic lines thoroughly to remove air, ensuring responsive braking.
- Check for leaks around seals and fittings, replacing any compromised parts.
- Maintain proper fluid levels and use recommended brake fluids to avoid contamination and corrosion.
Performance and Reliability Comparison

Vintage drum brakes generally deliver reliable performance when properly maintained, but they can struggle under demanding conditions compared to early disc brakes. Discs provide more consistent stopping power and better heat dissipation, reducing fade during extended use. However, drum brakes excel in simplicity and ease of repair, especially in the field, with minimal tools. Reliability varies based on maintenance—drum brakes require regular shoe replacement and drum machining, while disc brakes depend on hydraulic integrity and bleeding.
| Aspect | Drum Brakes | Early Disc Brakes |
|---|---|---|
| Performance | Reliable with proper maintenance | More consistent, less fade |
| Heat Management | Prone to fade under heat | Better heat dissipation |
| Maintenance | Frequent, straightforward | More complex, hydraulic repairs |
| Reliability | Dependent on proper adjustment | Dependent on hydraulic system |
Tips for Proper Maintenance and Troubleshooting
Proper maintenance of vintage bike brakes is vital to guarantee reliable stopping power and safety. Regular checks and prompt troubleshooting can prevent costly repairs and ensure peak performance. Here are four key tips:
Maintaining vintage bike brakes ensures safety, reliability, and peak performance through regular checks and prompt troubleshooting.
- Inspect Brake Components Regularly: Look for wear, grooves, or corrosion on drums, shoes, and pads. Replace worn parts immediately.
- Keep Moving Parts Clean and Lubricated: Use appropriate cleaners and apply thin grease to pivots and cam surfaces to prevent sticking.
- Adjust Cables and Linkages Properly: Ensure brake cables aren’t frayed, and tension is correct. Proper adjustment avoids dragging and underperformance.
- Practice Systematic Troubleshooting: Identify issues like spongy brakes, noise, or reduced response. Check for leaks, contamination, or misalignment, then address accordingly.
Frequently Asked Questions
What Are the Best Lubricants for Vintage Drum Brake Components?
You should use high-quality lubricants like Copper Slip or similar molybdenum-based greases on vintage drum brake components. These lubricants withstand high temperatures and won’t contaminate brake linings. Apply a thin layer to cams, pivots, and actuation points to guarantee smooth operation without excess that could cause sticking or brake drag. Regular lubrication helps prevent corrosion, reduce wear, and keep your brakes responsive during rides.
How Often Should Brake Drums Be Machined or Replaced?
You should machine or replace brake drums when you notice grooves, high-low spots, or out-of-roundness exceeding .002″ to .004″. Regular inspections during maintenance help identify wear early. If machining doesn’t restore proper surface smoothness or if the drum is too thin, it’s time for replacement. Maintaining proper drum thickness and surface condition guarantees ideal brake performance and safety, so don’t delay addressing these issues.
What Common Issues Cause Early Disc Brake Hydraulic Failure?
You often face early disc brake hydraulic failure due to contaminated or degraded fluid, which causes air bubbles and reduces braking power. Leaking seals, worn hoses, or damaged calipers also lead to loss of pressure and spongy brakes. Additionally, neglecting regular bleeding and fluid replacement allows moisture buildup, causing corrosion inside the system. Proper maintenance, timely seal replacements, and using high-quality fluid help prevent these common issues.
Can Drum Brakes Be Converted to Disc Brakes on Vintage Bikes?
Imagine swapping your vintage bike’s drum brakes for disc brakes—it’s doable but not straightforward. You’ll need to modify or replace the wheel hub, fabricate or buy a compatible fork or frame adapter, and install a hydraulic caliper system. Keep in mind, you’ll also need to bleed the hydraulic lines and verify proper alignment. This upgrade boosts braking performance but requires mechanical skill and willingness to adapt your bike’s existing setup.
What Tools Are Essential for Maintaining Vintage Drum and Disc Brakes?
You need vital tools like a set of screwdrivers, pliers, and wrenches to remove and install brake components. A brake spring removal tool makes handling springs easier, while a drum brake hone or brake lathe helps with drum resurfacing. For disc brakes, a hydraulic bleeding kit is essential to remove air from the system. Also, use cleaning brushes, brake cleaner, and lubrication supplies to guarantee smooth operation and proper maintenance.
Conclusion
Think of maintaining vintage brakes as tending a delicate garden—each component a carefully chosen plant needing attention. Whether you’re nurturing the classic drum brakes or early disc systems, your hands guide their growth and resilience. With patience and skill, you become the gardener of your bike’s history, ensuring it runs smoothly through time’s seasons. Proper care keeps this vintage garden thriving, ready to carry you forward on your journey with confidence and grace.