To successfully paint your motorcycle at home, start by preparing the surface with thorough cleaning, sanding, and priming for smooth adhesion. Use an airbrush for precise designs, gradients, and layering thin coats, practicing on scrap first. Make certain proper ventilation and safety gear throughout the process. Patience with drying times and finishing touches will give your bike a professional, durable look. Keep exploring these techniques to master creating a flawless, long-lasting paint job that stands out.
Key Takeaways
- Prepare the surface by cleaning, sanding, and priming for optimal paint adhesion and smooth finish.
- Use an airbrush for detailed designs, gradients, and fine lines, practicing on scrap first.
- Apply multiple thin, even coats of paint with proper technique, gradually layering for a professional look.
- Follow proper drying times and finish with clear coat for durability and a polished appearance.
- Prioritize safety with ventilation, masks, and correct tools to achieve high-quality, long-lasting results.

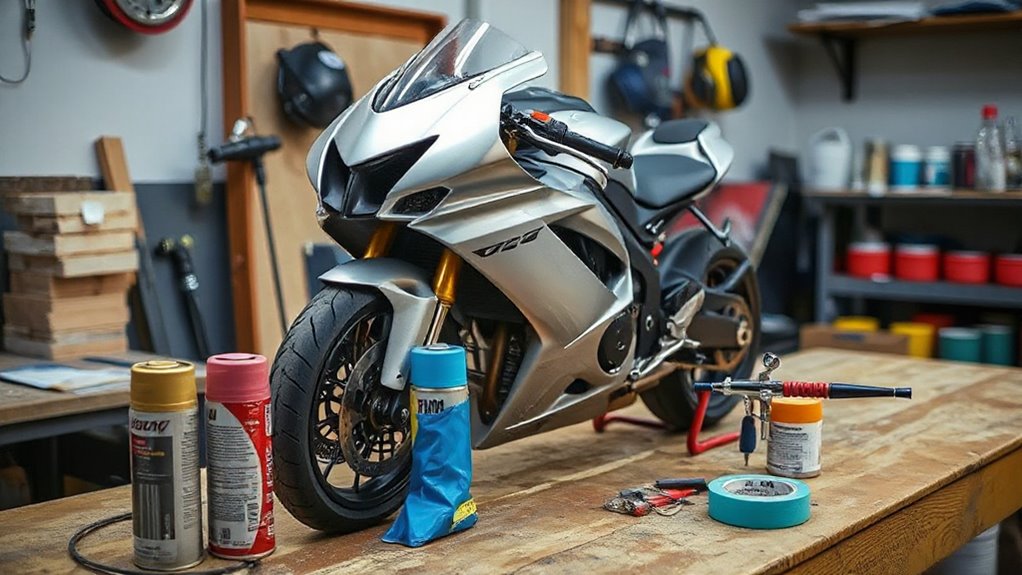
Painting your motorcycle at home can be a rewarding project that saves money and allows you to customize your ride exactly how you want. To achieve professional-looking results, you’ll need to master some basic techniques and follow essential preparation steps. One of the most important skills you can learn is airbrush techniques, which give you the ability to add detailed designs, gradients, or custom effects. Using an airbrush allows for more control than spray cans and helps create smooth transitions and fine lines, giving your motorcycle a sleek, personalized finish. Before diving into airbrushing, however, you must prioritize paint prep steps to guarantee your paint adheres properly and your final result is flawless.
Start with thorough cleaning. Remove any dirt, grease, or old paint from your bike’s surface using a degreaser or soap and water. Once clean, inspect for rust or corrosion, and sand these areas down with fine-grit sandpaper. Proper sanding creates a smooth, even surface that helps the primer and paint stick better. After sanding, wipe down the surface with a tack cloth to remove dust and debris. Next, apply a high-quality primer suited for metal surfaces, which will fill in imperfections and improve paint adhesion. Allow the primer to dry completely, then lightly sand it with very fine grit paper to smooth out any raised edges or bubbles.
Once your surface is prepped and primed, you’re ready to start applying paint. If you’re using an airbrush, practice your airbrush techniques on a scrap piece of material first. This helps you get a feel for the spray pattern, flow rate, and pressure needed for different effects. When you begin painting the motorcycle, work in thin, even coats. Keep the airbrush moving steadily to avoid build-up or drips, and layer your paint gradually. Multiple light coats generally produce better results than a single heavy one, ensuring a smooth finish and reducing the risk of runs or sags.
Throughout the process, ventilation is key to safety and quality. Always work in a well-ventilated area or outdoors, and wear a mask to avoid inhaling fumes. After completing your paint job, follow the recommended drying times before applying clear coat or decals. Patience during each step will pay off with a professional, durable finish. Mastering airbrush techniques combined with proper paint prep steps gives you full control over your motorcycle’s look, making your DIY paint job stand out and last for years to come.

Custom SprayMax 2k Kit Paint Made for Harley Davidson Vivid Black DH One Basecoat Paint Can and One Clearcoat Can
Precision Match: Experience the assurance of an exact color match, as our Basecoat aerosol is formulated to replicate…
As an affiliate, we earn on qualifying purchases.
As an affiliate, we earn on qualifying purchases.
Frequently Asked Questions
How Long Does Motorcycle Paint Typically Last Outdoors?
Motorcycle paint typically lasts 3 to 5 years outdoors, depending on paint durability and environmental effects. You should expect factors like sun exposure, rain, and pollutants to accelerate fading and chipping over time. To maximize longevity, apply a good clear coat and keep your bike sheltered when possible. Regular maintenance and touch-ups can also help preserve the paint’s appearance and protect it from harsh environmental effects.
Can I Paint My Motorcycle With Regular Household Spray Paint?
You can technically use regular household spray paint, but it’s not recommended for a durable motorcycle finish. Instead, you should use proper spray paint types designed for metal and outdoor use. Start with a DIY primer to guarantee good adhesion, then apply a high-quality spray paint meant for motorcycles or automotive work. This approach gives you a long-lasting, professional-looking finish that withstands weather and riding conditions.
What Safety Gear Is Essential During Motorcycle Painting?
Protect your personal safety with proper protective gear and safety precautions during motorcycle painting. You should wear a respirator or mask to prevent inhaling harmful fumes, goggles to shield your eyes from splatters, and gloves to guard your skin. Cover exposed skin and work in a well-ventilated area to limit risks. Prioritizing these precautions guarantees your safety and a successful, satisfying painting session.
How Do I Prevent Paint From Bubbling or Peeling?
To prevent paint from bubbling or peeling, make certain proper surface preparation by cleaning and sanding your motorcycle thoroughly. Apply a high-quality primer to improve adhesion, which helps the paint stick better and reduces risks of bubbling. Make sure the surface is completely dry and free of dust before painting. Use thin, even coats and allow each layer to dry fully. Proper surface prep and primer adhesion are key to a smooth, long-lasting finish.
Is It Necessary to Remove Old Paint Before Repainting?
You should definitely remove old paint before repainting because it guarantees proper surface preparation. Neglecting paint removal can cause adhesion issues, leading to peeling or bubbling later on. When you strip the old paint, you create a clean, smooth surface that the new paint can bond to effectively. This coincidence of thorough preparation and a fresh start helps your new coat last longer and look better, saving you time and frustration down the line.

Roizefar Airbrush Kit with Compressor & 18 Colors Paints, 55 PSI Non-Clogging Gun with 0.2/0.3/0.5mm Nozzles, 4 x 3.38fl oz Cleaner, 2 x 0.67fl oz Thinner & Cleaning Set, Ideal for Modeling & Crafts
High-Pressure Performance & Adjustable Airflow: This airbrush kit delivers a powerful and stable 55 PSI for professional results….
As an affiliate, we earn on qualifying purchases.
As an affiliate, we earn on qualifying purchases.
Conclusion
Now that you’re armed with expert tools and techniques, your motorcycle will shine brighter than a star in the night sky. With patience and a steady hand, you can transform your bike into a masterpiece rivaling those in glossy magazines. Remember, every stroke brings you closer to perfection—so don’t rush. Your dedication will turn your motorcycle into a stunning work of art that’ll turn heads everywhere you go. Get ready to ride proud, knowing you created it yourself!
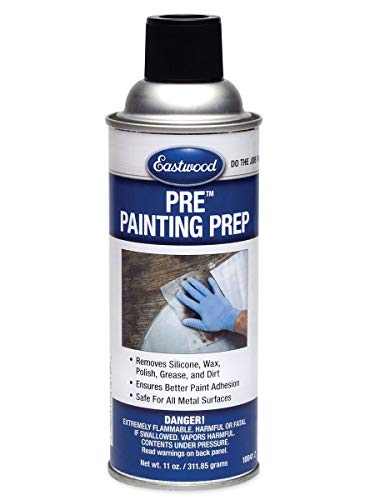
Eastwood Silicone Surface Preparation Wax Polish Grease Dirt Remover | Automotive Painting Pre-Prep Spray Solution | Easy to Use Spray On Application
Advanced Surface Cleaning: Eastwood Silicone Surface Preparation Wax Polish Grease Dirt Remover Spray effortlessly wipes off silicone, wax,…
As an affiliate, we earn on qualifying purchases.
As an affiliate, we earn on qualifying purchases.

SprayMax 2K Glamour High Gloss Clear Coat | 2K Automotive Clear Coat Spray Paint | High Gloss Finishing Spray | UV-Resistant, Scratch & Gasoline Resistant | Professional Grade 11.8 oz
PREMIUM CLEAR FINISH: Professional-grade polyurethane automotive spray paint designed for automotive refinishing and new paint jobs — delivers…
As an affiliate, we earn on qualifying purchases.
As an affiliate, we earn on qualifying purchases.