To replace and pack wheel bearings on vintage motorcycles, first remove the wheel and carefully take out the old bearings, cleaning the hub thoroughly with solvent. Inspect the bearings for wear or damage, then press new bearings into place if needed. Pack the bearings with high-quality grease, working it into all rollers and races. Reassemble the wheel, ensuring proper alignment and smooth rotation. For detailed steps and tips, continue exploring more about this essential maintenance.
Key Takeaways
- Remove the wheel carefully, then clean and inspect the bearings for wear or dirt.
- Pack the bearings with high-quality grease, working it into rollers and races thoroughly.
- For replacement, press new bearings into the hub carefully, ensuring proper fit.
- Reinstall the wheel, checking for proper alignment, free rotation, and no wobbling.
- Regularly inspect, re-lubricate, and replace bearings to maintain smooth operation and prevent wear.

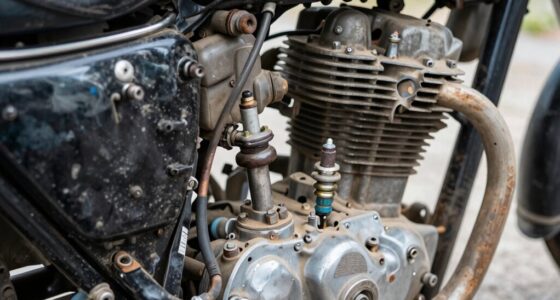
Maintaining vintage motorcycles requires careful attention to their wheel bearings, which are crucial for smooth operation. These bearings support the wheel’s rotation and handle the weight and stresses of riding. Over time, dirt, moisture, and wear can compromise their function, leading to poor handling or uneven tire wear. Proper bearing lubrication is essential to prevent corrosion and reduce friction, ensuring your motorcycle runs smoothly. When inspecting your bike, always check for signs of bearing wear, such as unusual noise or play in the wheel. If you notice any issues, it’s time to replace or pack the bearings to keep your vintage motorcycle in top shape.
Careful maintenance of wheel bearings keeps your vintage motorcycle running smoothly and extends its lifespan.
Before diving into bearing maintenance, confirm your wheel is properly aligned. Wheel alignment affects how your bike handles, and misaligned wheels can cause uneven bearing wear. Correct alignment ensures that the load is evenly distributed across the bearings, extending their lifespan and optimizing performance. When replacing or packing wheel bearings, start by removing the wheel carefully, following your motorcycle’s service manual. Once the wheel is off, inspect the bearings closely. If they feel rough or have excessive play, replacing them is the best choice. If they seem intact but dirty or dry, packing them with fresh bearing grease will suffice.
When packing bearings, clean the old grease from the bearings using a solvent, then dry them thoroughly. Apply a high-quality bearing grease, making sure to work it into all the rollers and races. This process restores proper bearing lubrication, reducing the risk of overheating or seizure during rides. If you’re replacing the bearings, press the new ones into the hub carefully, avoiding any damage. After installation, double-check the wheel’s alignment to confirm it spins freely and true without wobbling.
Throughout this process, remember that proper bearing lubrication and wheel alignment are interconnected. Well-lubricated bearings reduce wear, while correct alignment ensures even distribution of forces. Skimping on either can lead to premature bearing failure and compromised ride quality. Regular maintenance, including checking for signs of wear and re-lubricating or replacing bearings as needed, will preserve your vintage motorcycle’s performance. Keep in mind that maintaining precise wheel alignment during reassembly will help prevent additional stresses on the bearings. Proper power tool use and maintenance techniques can make these tasks easier and more precise, ensuring long-lasting results. By staying vigilant and attentive to these details, you’ll enjoy a smoother, safer ride and extend the life of your vintage machine.

Black Widow Aluminum Dirt Bike Hitch Carrier with Ramp for Truck & SUV, 400-Pound Capacity - Non-Folding Motorcycle, eBike & Fat Tire Bike Hauler, Fits 2-Inch Class III/IV Receiver
Versatile Bike Hauling: Transport motorcycles, e-bikes, and fat tire bikes with ease using your Class III or IV...
As an affiliate, we earn on qualifying purchases.
Frequently Asked Questions
What Tools Are Essential for Wheel Bearing Replacement?
You’ll need a few essential tools for wheel bearing replacement. Start with bearing grease to make certain of smooth operation and long-lasting lubrication. Use a hub removal tool or a punch to carefully detach the hub from the wheel. A bearing puller or drift punch helps remove old bearings without damage. Additionally, have a socket set, screwdrivers, and rubber mallets on hand to assist with disassembly and reassembly.
How Often Should Wheel Bearings Be Inspected on Vintage Bikes?
Think of your vintage motorcycle’s wheel bearings as the heartbeat of your ride. You should inspect them at least every 1,000 to 2,000 miles, or more often if you ride in harsh conditions. Following a consistent maintenance schedule helps you catch wear before it causes serious issues. Keep an eye on bearing lifespan, and don’t wait for symptoms—early inspections keep your bike running smoothly and extend bearing life.
Can I Upgrade to Modern Bearings on Vintage Motorcycles?
You can upgrade to modern bearings on vintage motorcycles, and it’s a smart move for better performance. Check modern bearing compatibility carefully to make certain they fit your bike’s hubs and axles. Vintage wheel upgrades with newer bearings can improve ride smoothness and longevity, but you might need adapters or modifications. Always verify the specifications and consult a vintage bike expert to ensure a seamless upgrade that preserves your bike’s character.
What Signs Indicate Wheel Bearings Need Immediate Replacement?
If you notice bearing noise, such as grinding or squealing, or experience rough handling or wobbling, it’s time to replace your wheel bearings immediately. These signs indicate worn or damaged bearings that could compromise safety and performance. Don’t ignore unusual vibrations or increased resistance when spinning the wheel. Addressing these issues promptly guarantees smooth rides and prevents more extensive damage to your vintage motorcycle’s wheel assembly.
Are There Specific Lubrication Types Recommended for Vintage Wheel Bearings?
Did you know that improper lubrication can cause wheel bearings to fail up to 70% faster? For vintage motorcycles, use compatible vintage grease types to guarantee proper lubrication. Look for lubricants specifically designed for older bearings, as they maintain the right viscosity and protection. Always check lubrication compatibility to prevent corrosion and wear, extending your bike’s lifespan and keeping your ride smooth and safe.

VEVOR Motorcycle Carrier, 600 LBS Steel Motorcycle Carrier Hitch Mount with 47" Longer Ramp, Scooter Dirt Bike Trailer Hauler with Ratchet Straps and Stabilizer, for Car, Truck with 2" Hitch Receiver
600LBS Weight Capacity: Our steel motorcycle hitch carrier has an exceptional weight capacity of 600 pounds, ensuring stable...
As an affiliate, we earn on qualifying purchases.
Conclusion
Remember, a well-maintained wheel bearing keeps your vintage motorcycle rolling smoothly. Regularly replacing and packing your bearings prevents costly repairs down the road and guarantees safe, reliable rides. Don’t wait for trouble to strike—an ounce of prevention is worth a pound of cure. By staying attentive to your bearings, you’ll enjoy the open road with confidence and keep that classic bike running like new. Stay proactive, and your vintage motorcycle will thank you for it.

POLICE 1000 KZ1000 1991-2003 Carburetor Rpair Kit Float parts KZ1000-P (repair kit)
Different pictures contain different accessories, please make sure to look carefully before taking a picture, thank you.
As an affiliate, we earn on qualifying purchases.

4x Carburetor Carb Rebuild repair Kit Fit for 81-83 KZ1000 LTD J ELR CSR
This item is made with High quality materials. All made in Taiwan.
As an affiliate, we earn on qualifying purchases.