
Using 3D printing allows you to recreate those hard-to-find vintage motorcycle parts quickly and cost-effectively. By selecting the right materials, like ABS or PETG for heat and stress, you can produce durable components that match the original look. This process saves time and money compared to sourcing or machining rare parts. If you want to discover how to optimize your restoration project and bring your vintage bike back to life, keep exploring the possibilities.
Key Takeaways
- 3D printing enables reproduction of rare, discontinued motorcycle parts, preserving authenticity and functionality.
- Selecting durable, heat-resistant filaments like ABS or PETG ensures reliable performance of vintage components.
- Cost-effective compared to sourcing or machining original parts, especially for obscure or unavailable items.
- Custom CAD design allows precise recreation of complex or damaged parts quickly.
- Strategic material choice and planning optimize restoration efficiency and long-term durability.

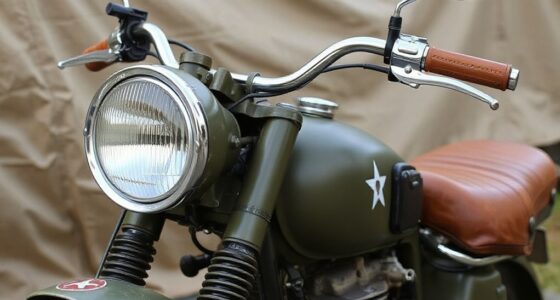
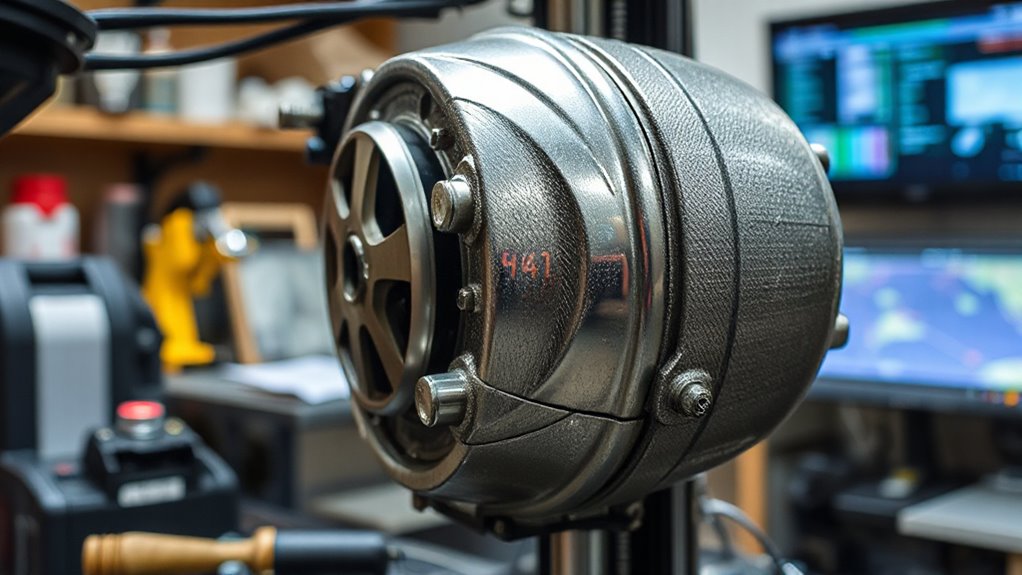
If you’re restoring a vintage motorcycle, finding original parts can be a challenge. 3D printing offers a practical solution by enabling you to produce custom replacement parts quickly and cost-effectively. When starting this process, one of your first considerations should be material selection. Not all 3D printing filaments are suitable for every component, especially those exposed to heat, friction, or weather elements. For example, if you’re recreating a carburetor component or a brake lever, you’ll want to choose durable, heat-resistant materials like ABS or PETG. For aesthetic parts or those not subjected to heavy stress, PLA might suffice. The right material ensures that your printed part performs reliably and looks authentic, preserving the vintage appeal of your motorcycle.
Choosing the right 3D printing material ensures your vintage motorcycle parts are durable, authentic, and reliable.
Cost analysis is equally important when deciding how to approach your project. 3D printing can be remarkably affordable, especially when compared to sourcing rare original parts or having parts machined from metal. You need to take into account the cost of filament, the time spent designing or modifying CAD files, and the initial investment in a quality 3D printer if you don’t already own one. While high-end filaments like nylon or composite materials might cost more per spool, they often provide superior strength and longevity, potentially reducing the need for frequent replacements. Evaluating the costs involved helps you determine whether 3D printing is the most economical route for each part, or if some components might be better sourced through traditional means.
Additionally, understanding material properties influences your overall cost analysis. For instance, a more expensive filament might have a longer lifespan or better resistance to environmental damage, saving you money in the long run. It also helps you avoid costly failures or the need for reprints due to premature wear or breakage. By weighing these factors carefully, you can allocate your budget effectively, ensuring that each printed part meets your performance needs without overspending. Knowing about material properties and how they impact durability is crucial for successful 3D printed restorations.
Ultimately, combining strategic material selection with thorough cost analysis allows you to make informed decisions about which parts to print and which to purchase or restore through other methods. 3D printing empowers you to recreate obscure or discontinued components, but your success hinges on choosing the right materials and managing your expenses wisely. This approach not only saves money but also speeds up your restoration process, helping you bring your vintage motorcycle back to life with precision and confidence.
Frequently Asked Questions
What Materials Are Best for 3D Printing Vintage Motorcycle Parts?
You should choose materials like ABS, PETG, or nylon for 3D printing vintage motorcycle parts, as they offer durability and heat resistance. Material selection depends on the part’s function, so consider high-strength filaments for load-bearing components. Use appropriate printing techniques, such as fine layer resolution for detailed parts or multi-material printing for complex assemblies, ensuring your vintage parts match original specifications and withstand regular use.
How Durable Are 3D Printed Motorcycle Parts Compared to Original Ones?
Your 3D printed motorcycle parts are surprisingly tough, almost like steel warriors ready for battle. Thanks to high-quality materials with excellent material strength and wear resistance, they can withstand daily riding stresses, even better than you’d expect. While they might not match original parts in every detail, they hold up remarkably well, giving you confidence that your vintage bike stays reliable and resilient on every ride.
Can 3D Printing Replicate the Exact Metal Finish of Vintage Parts?
You can’t perfectly replicate the exact metal finish of vintage parts with 3D printing, but you can get close. The surface texture may differ, often appearing smoother or more uniform than original castings. To improve authenticity, you can sand, polish, and apply specialized finishes or coatings after printing. While it’s challenging to match the exact metal finish, these post-processing steps help achieve a more authentic look.
What Is the Cost Difference Between 3D Printed and Original Vintage Parts?
You’ll find that 3D printed parts are often much cheaper than original vintage components, making them a more affordable option. While the cost comparison shows significant savings, an affordability analysis reveals potential trade-offs in material quality and finish. This contrast highlights how 3D printing offers a budget-friendly solution, but you might sacrifice some authenticity and durability compared to original parts.
How Long Does It Take to Produce a 3D Printed Vintage Motorcycle Part?
It typically takes anywhere from a few hours to a day to produce a 3D printed vintage motorcycle part, depending on printing speed and design complexity. Simple parts print faster, often in just a few hours, while intricate designs with detailed features require longer. Your printer’s speed settings and the part’s complexity directly influence the overall production time, so plan accordingly for your project.
Conclusion
With 3D printing, you’re holding the power to resurrect legendary vintage motorcycle parts that once seemed impossible to find. No longer do you need to scour antique markets or settle for fragile, outdated pieces. This revolutionary technology transforms your garage into a modern workshop where even the most elusive parts are within your grasp. Get ready to defy time and turn your vintage dreams into reality—because with 3D printing, nothing’s truly out of reach!