To restore a vintage motorcycle from a barn find, start with a thorough assessment and create a plan. Disassemble the bike systematically, labeling parts and documenting your process. Repair or rebuild the engine, brakes, and suspension, then clean and restore the surface finishes. Carefully reassemble, ensuring everything fits and functions correctly. With patience and attention to detail, you’ll transform your find into a stunning showpiece. Continue exploring each step to master the full restoration journey.
Key Takeaways
- Follow the manufacturer’s manual for disassembly, cleaning, and part inspection to ensure proper restoration procedures.
- Organize and label all parts during disassembly, documenting with photos for accurate reassembly.
- Rebuild or replace engine components and overhaul electrical systems to restore functionality.
- Clean, repair, and refinish exterior surfaces, including paint and chrome, for a polished appearance.
- Reassemble systematically, perform thorough testing, and make final adjustments for safe, reliable operation.

Carburetor Repair Rebuild Kit Set of 4 Fit for Honda CB550K CB550 1974-1976 Motorcycle Carb Kit
Vehicle Compatibility Specifically designed to fit for Honda CB550K models from 1974 to 1976. Ideal for restoring original…
As an affiliate, we earn on qualifying purchases.
As an affiliate, we earn on qualifying purchases.
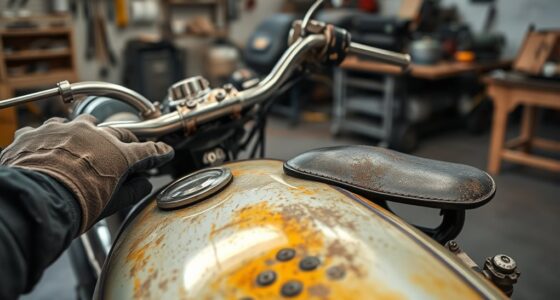
Initial Assessment and Planning

Before diving into the restoration process, performing a thorough initial assessment and planning is essential. Start by consulting the service manual specific to your motorcycle model; it provides critical guidance for disassembly, repairs, and parts replacement. Next, give the bike a detailed wash and initial clean to evaluate its overall condition and spot rust, damage, or missing parts. Conduct a quick test to see if the engine turns over or if the motorcycle is currently operable. Based on this, decide whether a cosmetic refresh is feasible or if a full mechanical overhaul is necessary. Develop a clear restoration plan that prioritizes key areas like the engine, frame, electrical system, and bodywork. Gather all essential tools, supplies, and replacement parts to streamline your workflow and avoid delays during the project. Additionally, understanding the contrast ratio of your motorcycle’s lighting and display components can be beneficial if you plan to upgrade or restore lighting features for better visibility and aesthetic appeal. It’s also helpful to research vintage motorcycle restoration techniques to ensure you’re using appropriate methods suited for your specific model. To further support your project, consider studying restoration safety procedures to prevent accidents and ensure a smooth process. Incorporating proper documentation of your progress can also help you stay organized and track important details throughout the restoration journey. Moreover, evaluating the availability of replacement parts early on can significantly impact your restoration timeline and budget.

wedfish 8PCS Motorcycle Tool Kit with Storage Bag,Multi-Tools Motorcycle Tools Kit Set Includes Wrench,Screwdriver,Pliers,Spark Plug Socket,Professional Dirt Bike Tool Kits Set
Motorcycle Tool Kit: Our motorcycle tool kit includes 1pc hexagonal wrench, 3pcs double-ended wrenches (8mm/10mm, 12mm/14mm, 14mm/17mm), 1pc…
As an affiliate, we earn on qualifying purchases.
As an affiliate, we earn on qualifying purchases.
Systematic Disassembly and Organization
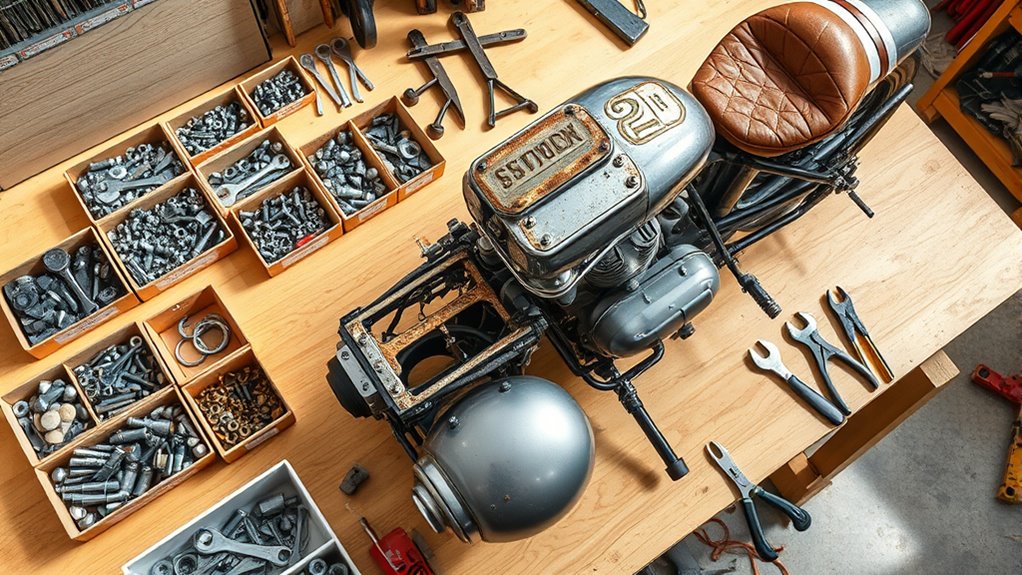
Start by disassembling the motorcycle systematically, focusing on one section at a time—such as the engine, forks, suspension, or chassis—to keep your work organized. This approach helps prevent confusion and keeps track of parts. As you work, consider these steps:
Disassemble your motorcycle step-by-step, focusing on one section at a time for better organization.
- Label each component clearly with masking tape or tags, noting its position.
- Take detailed photographs before removing parts to aid reassembly.
- Store parts in labeled containers or trays, grouped by section.
- Keep your workspace clean, removing debris and old grease to avoid damage.
- Remember that proper documentation ensures all parts are accounted for and correctly reassembled, streamlining the restoration process. Additionally, maintaining a comprehensive inventory can significantly improve efficiency during reassembly. This method guarantees you can reassemble efficiently and helps identify parts needing repair or replacement. Staying organized minimizes stress and reduces the risk of losing or damaging crucial components during the restoration process. Incorporating organized workflow techniques further enhances your efficiency and reduces errors throughout the project. Developing a detailed plan at the start can also help you stay on track and anticipate potential challenges before they arise. Furthermore, applying AP Tuning principles can help optimize the performance of your vintage motorcycle once restored.

CLASSIC MOTORCYCLES RESTORATION AND MAINTENANCE LOGBOOK
As an affiliate, we earn on qualifying purchases.
As an affiliate, we earn on qualifying purchases.
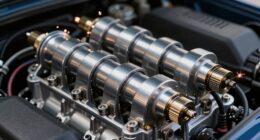
Mechanical Restoration and Repairs
To restore the mechanical integrity of a vintage motorcycle, focus on rebuilding or repairing the engine, suspension, and braking systems to guarantee reliable performance. Begin by disassembling the engine and inspecting components like pistons, crankshaft, gaskets, and seals. Rebuild or replace parts to meet factory specs, ensuring the engine runs smoothly. Clean the carburetor thoroughly, using ultrasonic cleaning if possible, to remove varnish and deposits. Overhaul the suspension and brake systems, repairing or upgrading parts while maintaining the bike’s vintage character. Service electrical components by rewiring or replacing worn wiring, lights, and indicators. Replace consumables such as oil, brake fluid, tires, and brake pads. These steps restore core functionality, safety, and reliability for your vintage motorcycle.

Wizards Mist-N-Shine Detail Spray – 22 Oz – Multi-Purpose High Gloss Finish Waterless Quick Detailer Spray for Glass, Chrome, Paint and Plastics – Car Exterior Cleaner for Auto Detailing Supplies
Show-Winning Shine in a 22oz Spray Bottle: Effortlessly restore your car's surface with our waterless car detailer spray….
As an affiliate, we earn on qualifying purchases.
As an affiliate, we earn on qualifying purchases.
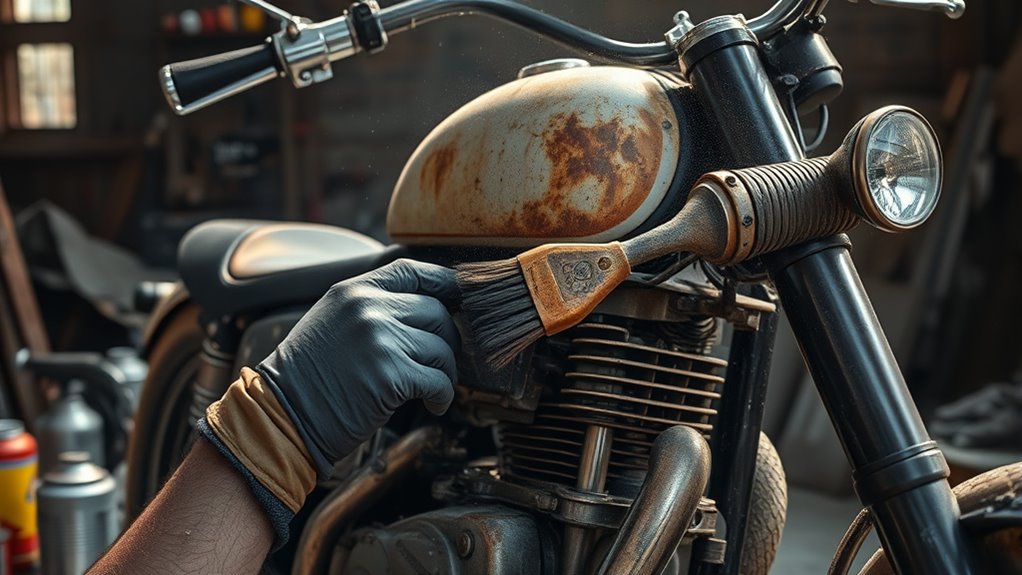
Cosmetic Work and Surface Refinishing

Restoring the motorcycle’s surface appearance involves carefully cleaning, polishing, and repairing the exterior components to bring back their original luster. First, you’ll start with a thorough cleaning to remove dirt, grease, and grime. Next, you’ll assess paint and chrome surfaces for oxidation or damage. Then, you might:
Restoring your motorcycle’s shine involves cleaning, polishing, and repairing to revive its original look.
- Use polishing compounds to restore faded paint and chrome shine.
- Sand and repaint areas with matching color for chipped or scratched paint.
- Apply specialized cleaners to white wall tires to eliminate stains.
- Consider chrome plating or powder coating for parts needing extra protection or aesthetic enhancement.
In addition, exploring connected equipment and apps can help monitor your progress and maintain your motorcycle’s appearance over time. This process revitalizes your bike’s visual appeal while preserving its vintage charm, ensuring it looks stunning on display or the road. Proper surface work also guards against future deterioration.
Reassembly, Testing, and Final Adjustments

Once all the components are cleaned, repaired, and aligned, carefully reassemble the motorcycle following the sequence outlined in your service manual. Use your photographic references and organized parts to guarantee accuracy. As you reassemble, pay close attention to torque specifications and proper tightening order. During this process, check the fit and function of each part, adjusting as needed. Once assembled, perform thorough testing of the electrical system, engine, brakes, and suspension. Use the table below to guide final adjustments, ensuring everything operates smoothly. Additionally, consulting proper testing procedures can help confirm that all systems are functioning safely and efficiently.
Frequently Asked Questions
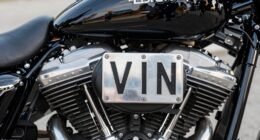
How Do I Identify Rare or Hard-To-Find Vintage Motorcycle Parts?
You identify rare or hard-to-find vintage motorcycle parts by researching your bike’s specific model and year, consulting service manuals, and joining online forums or groups dedicated to vintage bikes. Inspect parts carefully for unique markings, part numbers, and manufacturer stamps. Visit scrap yards, motorcycle salvage dealers, and specialty suppliers. Keep detailed records of your findings and compare them with reference images or catalogs to confirm authenticity and rarity.
What Are the Best Methods to Restore Original Paint Without Damaging It?
Wondering how to restore your vintage motorcycle’s original paint without damage? You should start with gentle cleaning using mild, non-abrasive solutions, then carefully test a small area first. Use soft cloths and avoid harsh scrubbing. For more stubborn stains, apply specialized conservation cleaners designed for delicate finishes. Patience and caution are key—remember, preserving authenticity often means opting for gentle methods over aggressive polishing or sanding.
How Can I Troubleshoot Electrical Issues in an Old Motorcycle Safely?
To troubleshoot electrical issues safely, start by disconnecting the battery to prevent shocks. Use a multimeter to check circuits, connections, and fuses for continuity. Visually inspect wiring for corrosion, loose connections, or damage. Test switches and relays with the multimeter, ensuring proper operation. Always wear insulated gloves and work in a dry area. Double-check your work before reconnecting power to avoid short circuits or further damage.
What Safety Precautions Should I Take During Frame Welding or Metal Repairs?
You should wear proper personal protective equipment, like a welding helmet, gloves, and fire-resistant clothing. For example, during a frame weld, a hobbyist avoided burns and eye injuries by using a full-face shield and flame-resistant apron. Make certain of good ventilation to avoid inhaling fumes, keep a fire extinguisher nearby, and disconnect the battery to prevent electrical sparks. Always follow manufacturer safety instructions and work in a well-ventilated, clutter-free area.
How Do I Ensure the Restored Motorcycle Meets Modern Safety Standards Subtly?
You can guarantee your restored motorcycle meets modern safety standards by discreetly upgrading critical components. Install modern brake pads, braided stainless steel brake lines, and upgraded lighting while maintaining a vintage look. Rewire with quality wiring harnesses for reliability. Regularly inspect and replace worn parts, and consider adding subtle safety features like reflective tape or modern mirrors. These improvements enhance safety without compromising the classic aesthetic, giving you peace of mind on the road.
Conclusion
Just like a phoenix rising from the ashes, your vintage motorcycle can be reborn through patience and care. Each step, from assessment to final adjustments, mirrors a journey of transformation—turning a forgotten relic into a shining masterpiece. Remember, the process demands perseverance, much like the hero’s quest. With dedication, you’ll not only restore a bike but revive a piece of history, ready to carve new stories on the open road.