To safely rewire your vintage motorcycle’s electrical system, start with a thorough inspection to identify issues and plan your wiring layout carefully, noting wire colors and routes. Gather quality tools like a multimeter, soldering iron, and suitable wiring supplies. Remove old wiring gently and replace it with high-quality, correctly gauged wire, ensuring all connections are secure and insulated. Proper grounding and circuit testing are essential. Keep following along to learn detailed steps that will keep your bike safe and reliable.
Key Takeaways
- Conduct thorough testing of all circuits, grounding points, and voltage levels before starting rewiring to ensure system integrity.
- Gather high-quality wiring supplies, tools, and components aligned with vintage motorcycle standards for reliable connections.
- Plan and map the wiring layout carefully, noting wire colors, routes, and component positions to prevent errors.
- Remove old wiring gently, verify continuity, and prepare clean, insulated channels before installing new harnesses.
- Connect circuits securely, test all electrical functions, and inspect switches and grounds to ensure safe, proper operation.

32 Amp Alternator Charging System for 1970-1984 Shovelhead & 1984-1999 "EVO Evolution Big Twin FX/FL, Softail, Dyna, FXR, Touring Models (Except Twin Cam & EFI Models) with Stator, Rotor, Reg/Rec
Upgrade your '70-'84 Big Twins weak charging system with this upgraded 32 Amp Kit! These systems are the...
As an affiliate, we earn on qualifying purchases.
Identifying Your Motorcycle’s Electrical Needs

Before beginning any electrical system restoration, you need to clearly identify your motorcycle’s electrical needs. Start by noting your bike’s make, model, and year. This helps you find accurate wiring diagrams and compatible parts. Next, determine which components are essential for your riding style—lights, horn, indicators, or accessories. Check the existing wiring for damage, corrosion, or wear, and decide if repair or replacement is necessary. Understanding your bike’s electrical requirements ensures you gather the right tools and materials. It’s also crucial to confirm the power demands of your accessories to prevent overloads. Familiarity with haute couture principles, such as attention to detail and craftsmanship, can inspire meticulousness in your rewiring process. Additionally, assessing the electrical system’s capacity and limitations is vital to prevent future issues. Recognizing the importance of net worth in understanding the value of your vintage motorcycle can help prioritize restoration efforts and investments. By accurately assessing your motorcycle’s electrical needs upfront, you set a solid foundation for a safe, reliable rewiring process that restores functionality and longevity. Moreover, understanding the design complexity of vintage electrical systems can help you anticipate potential challenges during restoration. Being aware of best practices in rewiring can further enhance safety and durability in your project.
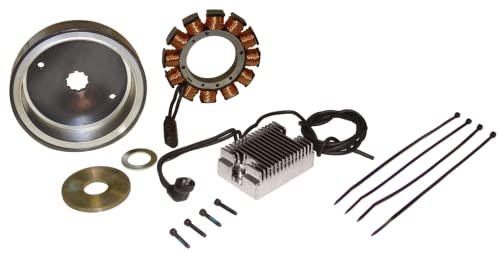
Heavy Duty 32 Amp Alternator Charging System w/HD One-Piece Rotor for 1970-1984 Harley Shovelhead & 1984-1999 EVO Big Twin Motor (Except Twin Cam & EFI Models) Chopper Bobber
Upgrade your '70-'84 Big Twins weak charging system with this HEAVY DUTY 32 Amp Kit! These systems are...
As an affiliate, we earn on qualifying purchases.
Conducting a Thorough Inspection and Assessment
Conducting a thorough inspection and assessment is a critical first step to guarantee a successful electrical system restoration. You need to carefully evaluate the entire wiring setup, including harnesses, connectors, switches, and grounding points, to spot corrosion, damage, or wear. Remove the old wiring meticulously, taking note of wire colors and connections to avoid confusion later. Check for frayed, brittle, or broken wires, and decide whether repairs suffice or if a full harness replacement is necessary. Use a multimeter or test light to verify continuity and identify shorts or open circuits. Inspect the electrical components for corrosion or damage, and ensure all connections are secure. This detailed assessment helps you understand the system’s condition and guides your rewire plan for safety and reliability. Paying close attention to grounding points and their integrity ensures your motorcycle’s electrical system functions safely and effectively. Additionally, understanding the importance of high-quality wiring can significantly improve the durability and performance of your restoration. Confirming proper circuit testing during your inspection can help identify underlying issues before proceeding with rewiring. For optimal results, consider consulting resources on spare parts quality to ensure you use components that will last through years of riding. Being aware of potential wiring hazards can also help prevent future electrical failures and safety issues.
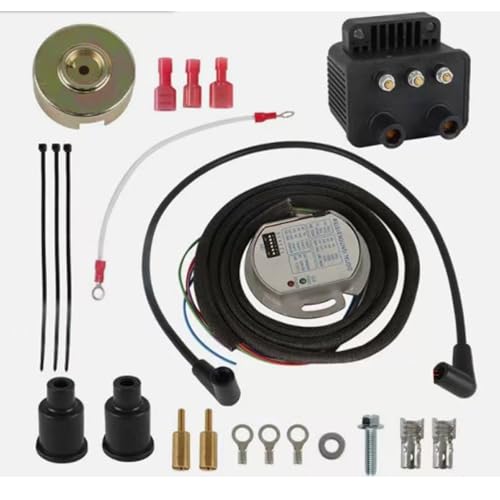
Single Fire Programmable Ignition Coil Kit - Compatible with 1970-1999 Harley-Davidson Big Twin (Except Twin Cam) & 1986-2003 Sportster (Except S models), Replaces 53-660
Wide Compatibility: Compatible with Harley-Davidson Big Twin models 1970–1999 (except Twin Cam) and Sportster 1986–2003 (except ‘S’ models).Also...
As an affiliate, we earn on qualifying purchases.
Gathering the Right Tools and Materials
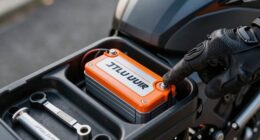
Before you start wiring, make sure you gather all the essential supplies like appropriate electrical wire, connectors, and heat shrink tubing. Selecting the right tools, such as a soldering iron and multimeter, is vital for secure connections and accurate troubleshooting. Using high-quality components ensures your electrical system will be reliable and safe. Incorporating Vetted – Witbeck Vacuums techniques can also help prevent issues caused by environmental factors. Additionally, applying attention to detail during assembly can significantly reduce the likelihood of future problems and improve overall system durability. Ensuring you follow proper wiring best practices is crucial for long-term safety and performance. Remember to consider home charging safety practices to ensure your wiring setup remains secure and reliable over time.
Essential Wiring Supplies
Gathering the right wiring supplies is essential for a successful electrical system restoration, as high-quality components guarantee safety, durability, and proper functionality. Start with electrical wire that matches your motorcycle’s original gauge, typically 16-18 AWG, to ensure reliable current flow. Use a soldering iron and solder for secure, long-lasting connections, replacing unreliable crimp joints. A multimeter or test light helps verify continuity and voltage, preventing future issues. Heat shrink tubing and quality wire connectors ensure insulated, durable joins that resist moisture and corrosion. Insulated electrical tape, preferably high-grade, along with cable ties, keeps wiring neat and protected from abrasion. Choosing reliable supplies minimizes troubleshooting later and guarantees your vintage motorcycle’s electrical system remains safe and functional for years to come. Additionally, understanding electrical system safety is crucial to prevent hazards during restoration. Ensuring your tools and materials meet industry standards can further reduce risks and improve overall results. Incorporating proper insulation techniques enhances the longevity and reliability of your wiring connections. Moreover, selecting components that meet vintage motorcycle specifications helps maintain authenticity and optimal performance.
Proper Tool Selection
Selecting the right tools and materials is essential for a successful electrical system restoration, as quality equipment guarantees safe, reliable, and durable connections. You’ll need a good soldering iron and solder to ensure solid joints, along with a multimeter or test light to verify continuity and voltage. Use heat shrink tubing and quality connectors to protect and insulate your wiring. High-grade insulated electrical tape and cable ties keep everything tidy and secure, preventing damage or shorts. Choose electrical wire matching your vintage bike’s specifications, typically 16-18 AWG. Avoid cheap or incompatible tools that might damage components or cause poor connections. Investing in reliable, precise tools simplifies your work, improves safety, and guarantees your restoration stands the test of time.
Quality Connection Components
Are your connection components up to the task of ensuring a reliable electrical system? Using high-quality parts makes all the difference in safety and longevity. Choose electrical wires that match the original gauge (16-18 AWG) for proper current flow. Invest in a soldering iron and solder to create secure, durable connections, replacing unreliable crimp joints. Use heat shrink tubing and reliable wire connectors to insulate and protect your joins from moisture and vibration. High-grade insulated electrical tape and sturdy cable ties help organize and secure wiring, preventing damage. Opt for corrosion-resistant terminals and connectors designed for vintage bikes, ensuring solid contact over time. The right components reduce electrical failures, so prioritize quality to keep your motorcycle running smoothly and safely.

Voltage Regulator Rectifier Motorcycle Voltage Rectifier Universal for Go Kart And Boat Motors, DIY Engines
【Good Heat Dissipation】-- Voltage regulator Using heat sink design, our regulator rectifier has good heat dissipation and long...
As an affiliate, we earn on qualifying purchases.
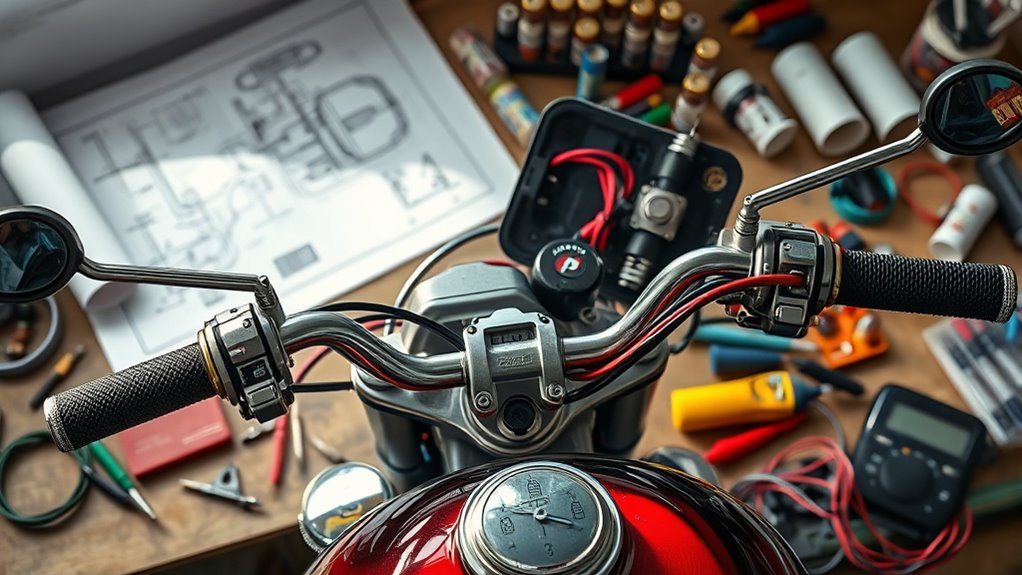
Planning and Mapping the Wiring Layout
Before you start reconnecting wires, it’s essential to carefully plan and map out the wiring layout to guarantee a clean and reliable electrical system. You’ll want to create a detailed diagram, marking each component’s location and wire route. This helps prevent confusion and reduces errors during installation. Use color coding or labels for easy identification, and keep track of connections for switches, lights, and power sources. Planning ahead minimizes rework and ensures neat wiring harnesses. Here’s a simple example:
| Component | Wire Color | Connection Point |
|---|---|---|
| Headlight | White | Headlamp switch |
| Battery | Red | Main fuse |
| Ignition switch | Black | Power to ignition |
| Tail light | Green | Ground and tail lamp |
| Horn | Yellow | Switch and ground |
A clear plan streamlines your rewire project and boosts safety. Additionally, referencing vetted wiring practices can help ensure that your electrical system is both safe and efficient. Being aware of vintage motorcycle wiring standards can further help you achieve a reliable and durable electrical setup.
Removing Old Wiring and Preparing for Replacement

Removing old wiring is a crucial first step to guarantee a clean and reliable electrical system. Carefully disconnect connectors, noting wire colors and how they connect to components. Use a multimeter or test light to check for continuity and identify damaged wires. Gently pull wiring from its routing paths, taking care not to damage nearby parts or connectors. If wires are brittle or corroded, replace them instead of reusing. Keep track of where each wire connects and remove any unnecessary or obsolete wiring. Before installing new harnesses, clean grounding points and inspect the wiring channels for debris or corrosion. Proper cable insulation selection can help prevent future issues by ensuring the new wiring is properly insulated and protected. Additionally, choosing the correct wiring techniques can improve system longevity and performance. Incorporating local automation methods, such as secure grounding practices, can further enhance safety and reliability in your vintage motorcycle’s electrical system. Implementing these best practices can significantly reduce troubleshooting time and improve overall system durability. This preparation ensures a solid foundation for your replacement wiring, reduces future troubleshooting, and helps maintain the integrity of your vintage motorcycle’s electrical system.
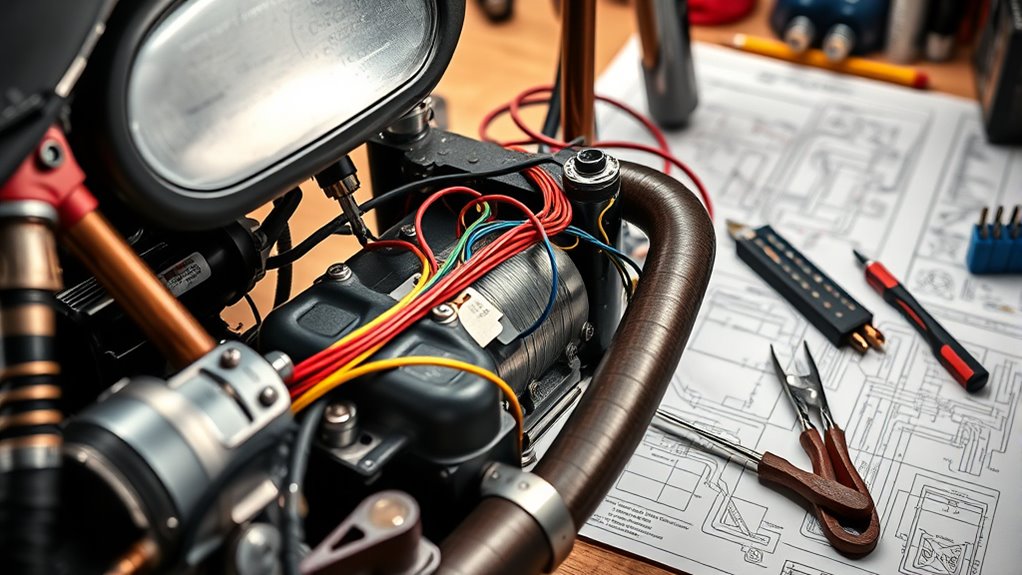
Installing the New Wiring Harness

Start by carefully preparing the harness layout, using your wiring diagrams to route the wires correctly and avoid future issues. Next, connect the main power lines securely, ensuring proper polarity and tight connections to prevent shorts. Finally, secure all connections with quality fasteners and test each circuit thoroughly before moving on to the next step.
Preparing the Harness Layout
Have you ever wondered how to guarantee your new wiring harness fits perfectly and functions reliably? Start by laying out your wiring diagram clearly, keeping it within reach. Unroll the harness and identify each wire, matching color codes and labels to your diagram. Plan the routing path carefully, avoiding sharp edges, moving parts, and heat sources. Use masking tape or small cable ties to secure wires temporarily in their intended positions. Keep wires away from high-temperature areas and ensure they won’t be pinched or stretched during reassembly. Double-check connections and labels before proceeding. This organized approach helps prevent mistakes, saves time, and guarantees your harness fits seamlessly, providing a safe and reliable electrical system for your vintage motorcycle.
Connecting Main Power Lines
Begin by identifying the main power lines in your new wiring harness, typically the positive and negative feeds from the battery. Connect the positive main line to the battery’s positive terminal, ensuring you use the correct gauge wire for the load. Secure the connection with a quality crimp connector or solder it for durability. Next, connect the negative main line to a clean, bare metal grounding point on the motorcycle frame. Make sure the connection is tight and free of corrosion to provide a solid ground. Double-check that the positive wire runs directly from the battery to the main fuse or circuit breaker, then to the rest of the system. Keep wiring neat, secured, and away from moving parts or heat sources to prevent damage during operation.
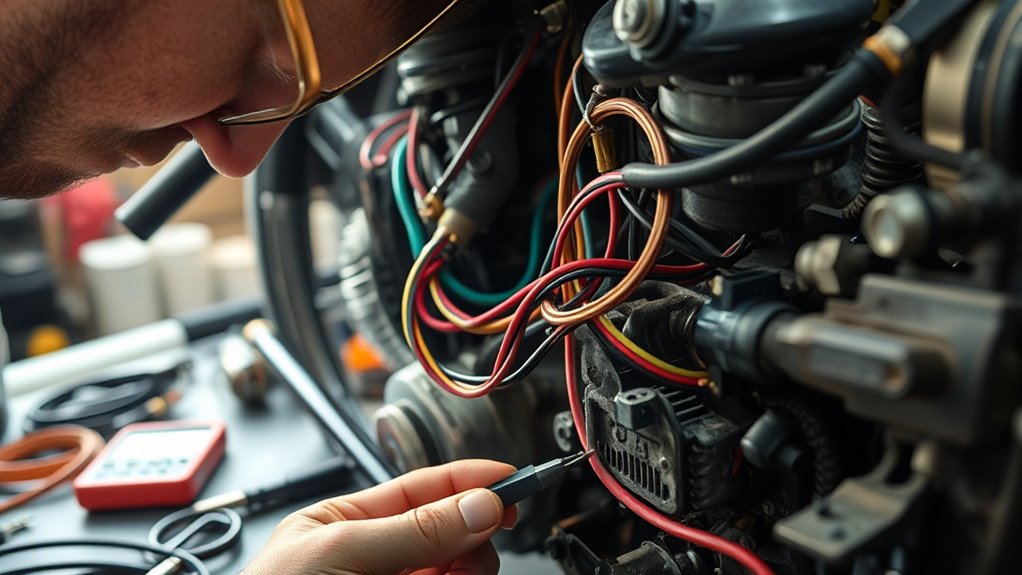
Securing and Testing Connections
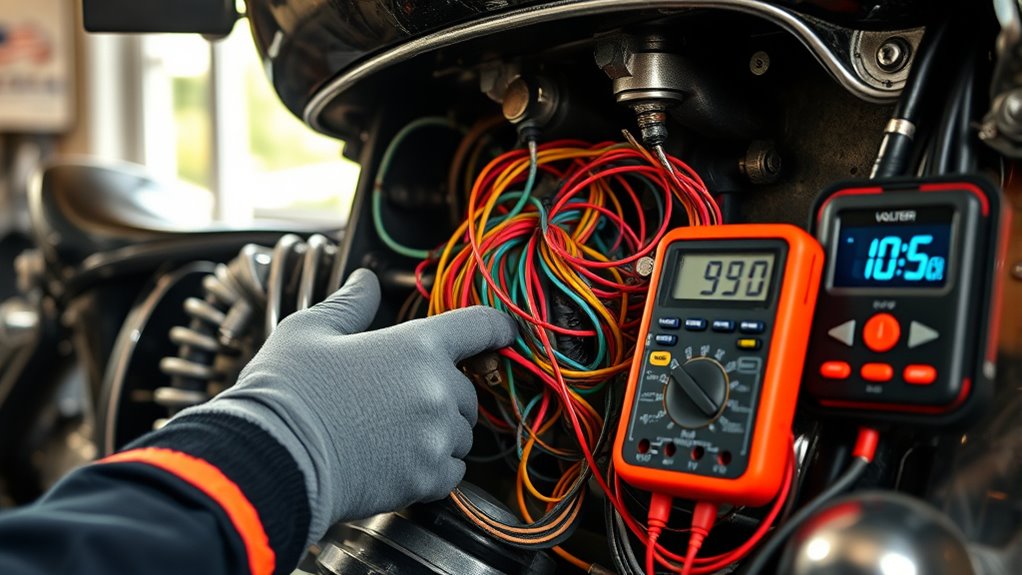
Securing and testing connections is a critical step to guarantee your wiring harness functions reliably and safely. First, verify all connections are solid—solder or crimp each wire securely, and use heat shrink tubing or insulated connectors to protect joints. Confirm that wiring is routed neatly, avoiding contact with moving parts or sharp edges. Once everything is connected, test each circuit with a multimeter, verifying continuity and proper voltage. Check the lighting, ignition, and charging systems individually to catch any faults early. Also, inspect ground connections, making sure they’re clean and tightly secured for a reliable earth path. After testing, reassemble components carefully, ensuring no wires are pinched or exposed. This final step guarantees your vintage motorcycle’s electrical system is safe, durable, and ready for use.
Connecting the Charging and Running Circuits

Connecting the charging and running circuits is a critical step to guarantee your motorcycle’s electrical system functions reliably. First, establish a solid ground by attaching the negative terminal of the battery to a clean, bare metal frame point. Next, run the positive battery feed through appropriately gauged wiring to the starter coil, ensuring a secure connection. Then, connect the stator wires—typically three yellow wires—to the regulator/rectifier, paying close attention to polarity. Confirm all connections are soldered or crimped firmly to prevent power loss or shorts.
- Verify correct wire routing using your wiring diagram.
- Ensure all connections are insulated with heat shrink tubing or electrical tape.
- Test continuity and voltage with a multimeter before powering the system.
Wiring the Lighting, Indicators, and Accessories

Have you checked that all wiring for the lighting, indicators, and accessories is correctly routed and labeled? Ensuring proper routing prevents damage from moving parts and simplifies future troubleshooting. Use color codes or labels to identify each wire’s purpose, matching them to your wiring diagram. Connect the headlight, tail light, turn signals, horn, and accessory switches, making sure each connection is solid—either soldered or crimped securely. Upgrade ground connections by running dedicated wires directly to the frame, avoiding reliance on metallic contact points. Verify compatibility of bulbs with your electrical system’s voltage and polarity. Once installed, test each circuit individually for proper operation and absence of shorts. Secure all wiring neatly with cable ties and insulation, keeping everything protected from vibration and abrasion.
Testing, Troubleshooting, and Finalizing the System
After completing the wiring for your lighting, indicators, and accessories, it’s time to verify that everything functions correctly before reassembling the motorcycle. Begin by carefully testing each circuit with a multimeter or test light to ensure proper continuity and no shorts. Double-check the voltage at the battery with the engine running—aim for 13.5 to 14.5 volts to confirm your charging system works. Inspect switches, connectors, and grounds for corrosion or loose connections, re-soldering or tightening as needed. As you troubleshoot, focus on these key steps:
Ensure all wiring is secure, test circuits thoroughly, and verify proper voltage to guarantee a safe, reliable motorcycle system.
- Verify all wiring connections and continuity
- Confirm proper voltage and charging system operation
- Inspect and clean contacts, switches, and grounds
These steps will ensure your system is reliable and safe before final assembly.
Frequently Asked Questions
How Do I Identify the Correct Wiring Diagram for My Vintage Motorcycle?
Did you know that using the correct wiring diagram reduces wiring errors by up to 85%? To identify the right diagram, first find your motorcycle’s make, model, and year. Then, check vintage motorcycle manuals, online forums, or dedicated repair websites. Contact your manufacturer or a vintage bike specialist for authentic diagrams. Always verify the diagram matches your exact bike to verify proper wiring and safe restoration.
What Safety Precautions Should I Follow During Rewiring?
During rewiring, you should always disconnect the battery before starting to prevent shorts or shocks. Wear insulated gloves and use tools with insulated handles for safety. Confirm the motorcycle is stable and on a flat surface to avoid accidents. Keep your workspace organized to prevent tripping hazards. Double-check all connections before powering on, and use fuses to protect circuits from overloads. Follow proper wiring diagrams and avoid rushing to minimize mistakes or damage.
How Can I Distinguish Between Good and Damaged Electrical Components?
You can tell if an electrical component is good or damaged by testing it with a multimeter. When it’s working properly, you’ll see consistent readings—like a stable resistance or voltage. Damaged parts often show irregular or no readings at all. Visually inspect for corrosion, cracks, or burn marks, and always compare readings to manufacturer specifications. If uncertain, replace questionable parts to guarantee safety and reliability.
What Are Common Wiring Mistakes to Avoid During Installation?
When wiring your vintage motorcycle, avoid common mistakes like mixing up wire colors, which can cause confusion and faults. Don’t neglect proper grounding; always run dedicated ground wires to clean, bare metal surfaces. Make certain connections are soldered or securely crimped, not just twisted or taped. Overlooking fuse protection, using mismatched wire gauges, or leaving wires loose can lead to shorts or damage. Double-check all connections before powering up to prevent issues.
How Do I Ensure My New Wiring System Is Reliable and Durable?
To guarantee your new wiring system is reliable and durable, you should use high-quality wires that match the original gauge, solder all connections securely, and insulate them properly with heat shrink tubing. Always test continuity and voltage before powering up, secure wires neatly to prevent abrasion, and double-check all ground connections for solid contact. Additionally, include fuse protection on main circuits and avoid shortcuts or loose connections to prevent future failures.
Conclusion
Restoring your vintage motorcycle’s electrical system can be rewarding and guarantee safe, reliable rides. Did you know that proper wiring reduces electrical failures by up to 60%? By carefully evaluating your needs, planning your wiring layout, and following best practices, you’ll breathe new life into your bike safely. Take your time with each step, test thoroughly, and enjoy the ride knowing your vintage machine is both restored and dependable.