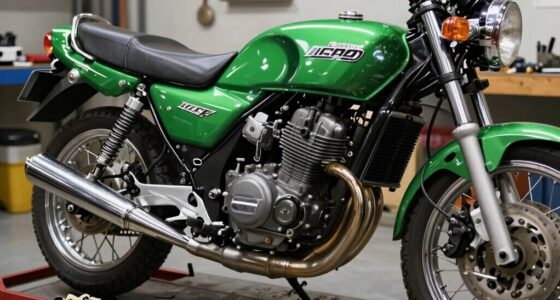

To bring your Yamaha XS650 back to life, start by disassembling and thoroughly cleaning the engine, inspecting all parts for wear, and replacing worn components like gaskets and seals. Restore or upgrade the frame, paint, and chrome, then overhaul the transmission and electrical system for reliability. Reassemble carefully, ensuring all fasteners are torqued correctly and systems checked. If you keep going, you’ll master each step to restore your bike to top condition.
Key Takeaways
- Carefully disassemble and clean engine parts, inspecting for wear, then reassemble with proper torque and sealant for a reliable rebuild.
- Remove rust and old paint from the frame, perform welding repairs if needed, and apply primer and durable paint or powder coating.
- Upgrade electrical components with modern wiring, high-output alternator, and electronic ignition for improved reliability.
- Replace worn transmission parts, including gears and clutch plates, ensuring correct alignment for smooth shifting.
- Polish chrome parts, restore decals, and apply protective coatings to maintain aesthetics and prevent future corrosion.
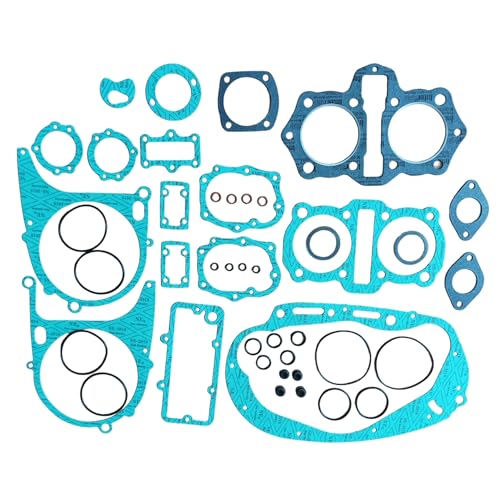
sugasket Engine Rebuild Kit Engine Gasket Set Replacement for Yamaha TX650 XS1/B XS2 XS650
Fitment: Engine gasket set for Yamaha TX650 XS1/B XS2 XS650 .
As an affiliate, we earn on qualifying purchases.
As an affiliate, we earn on qualifying purchases.
Disassembling the Engine for a Fresh Start

Disassembling the engine for a fresh start requires careful planning and systematic approach to guarantee a thorough rebuild. Begin by removing the banjo bolts, points cover, and timing plate, followed by the points assembly and mechanical advance cover. Carefully take out the cam chain tensioner, camshaft, cylinder head cover, clutch components, and kickstart mechanism before separating the crankcase halves. Use a rubber mallet to gently split the cases, avoiding damage. Clean the crankcase halves thoroughly, and apply Blue Hylomar sealant on the joint faces before reassembly. When removing components like the selector shaft, detent roller, springs, shims, and washers, note their order for reinstallation. Additionally, understanding the importance of a high contrast ratio can help you evaluate the clarity and depth of the images during reassembly, ensuring optimal visual quality of your restored engine components. Incorporating proper lubrication techniques during reassembly is also crucial to prevent premature wear and ensure smooth operation. Proper torque specifications during reassembly are also essential to prevent damage and ensure reliable performance. This methodical process sets the foundation for a successful engine rebuild, ensuring all parts are inspected, cleaned, and ready for the next stage. Being mindful of proper torque specifications during reassembly is essential to maintain engine integrity and performance.

ninesung Powder Coating Paint for Metal Surfaces | Car Paint | Building Materials | Powder Paint for Steel Structures, Factories, Buildings, Playgrounds, Gardens (Black, 4 Ounces)
Premium Quality Powder Coat: Powder Paint is a simple and effective way of coating any metal, steel, iron…
As an affiliate, we earn on qualifying purchases.
As an affiliate, we earn on qualifying purchases.
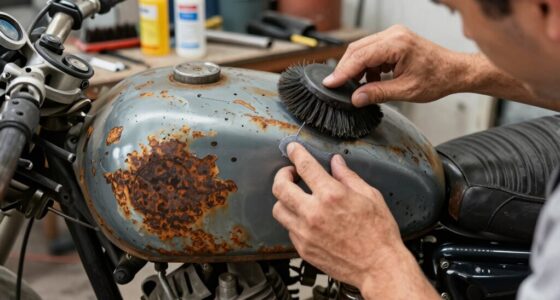
Restoring and Refinishing Frame and Body Components

Once you’ve disassembled the engine, attention turns to restoring and refinishing the frame and body components to enhance both appearance and durability. Start by thoroughly cleaning the frame with a degreaser, then remove rust using wire brushes or sanding equipment. For rusted or damaged areas, consider welding repairs with AWS-certified welders to restore integrity. Sandblast or strip old paint for a smooth surface, then apply primer suited for metal surfaces. Choose durable, high-quality paint or powder coating for a lasting finish, and apply multiple coats for even coverage. Replacing any corroded bolts, nuts, and washers with new hardware is essential to ensure safety. Polishing or re-chroming chrome parts adds aesthetic appeal, while decals and graphics can be restored or replaced for authenticity. Properly finished frame and body components set a solid foundation for the rest of your restoration. Additionally, applying a corrosion-resistant coating can help protect the restored surfaces from future rust and damage, especially when selecting coating types suited for motorcycle frames. Incorporating proper surface preparation techniques ensures optimal adhesion and longevity of the finish. To maximize durability, consider proper maintenance practices to prevent future deterioration. Furthermore, understanding auditory processing concepts can assist in assessing how environmental factors may influence the longevity of painted or coated surfaces.

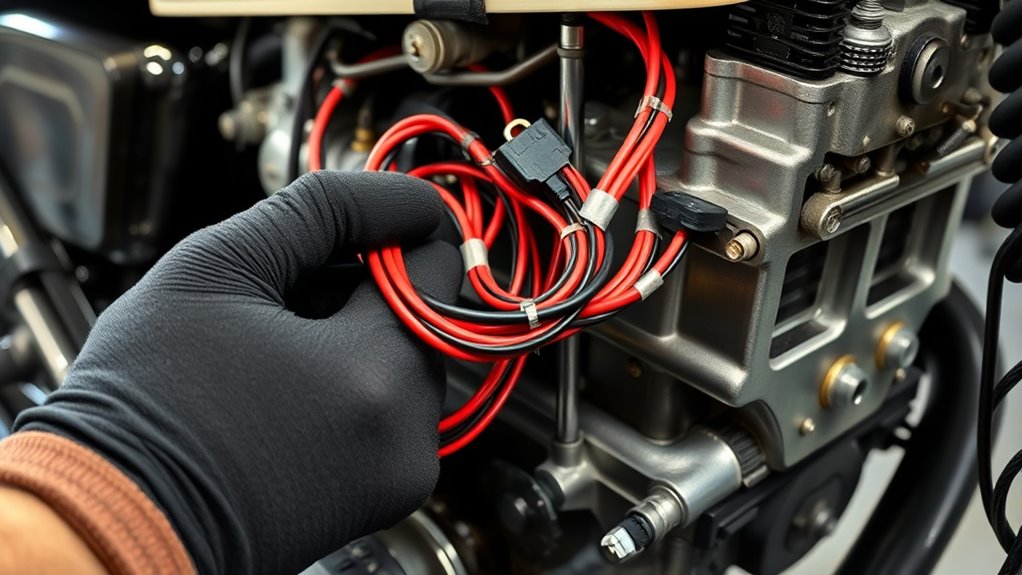
TC Bros. 1980-84 Yamaha XS650 Chopper Wiring Harness (6 pin CDI)
Made in the USA
As an affiliate, we earn on qualifying purchases.
As an affiliate, we earn on qualifying purchases.
Overhauling the Transmission and Drive System
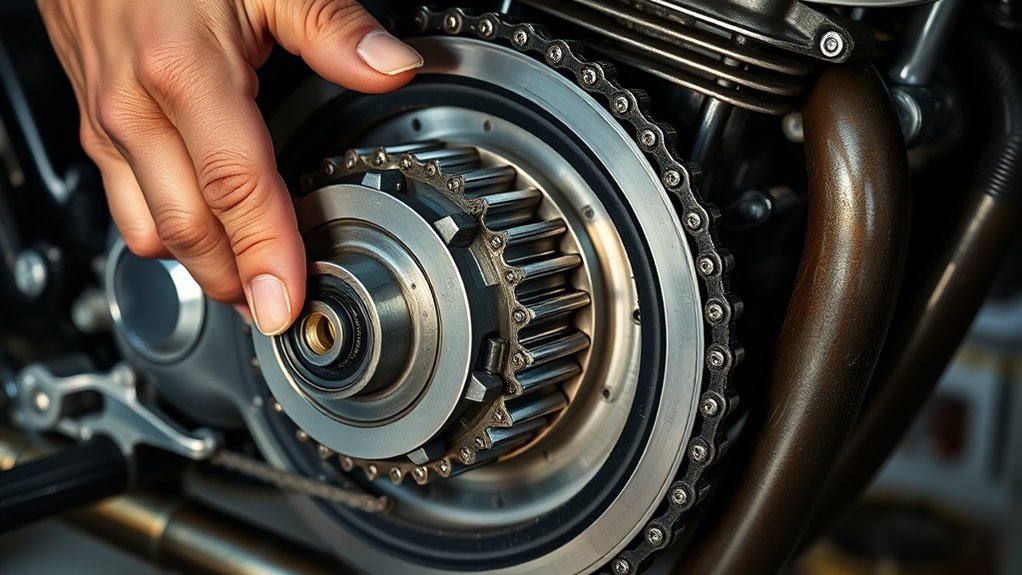
To guarantee your Yamaha XS650’s transmission and drive system operate smoothly, start by thoroughly inspecting and cleaning all gears, bearings, and shafts. Remove any worn or damaged parts, replacing them with quality OEM or suitable aftermarket components. Carefully disassemble the selector drum, shaft, and gear clusters, noting their orientation for proper reassembly. Clean all parts with solvent to remove grime and debris, then inspect for excessive wear or pitting. Reassemble the transmission, ensuring gears mesh correctly and shift smoothly. Overhaul the clutch by replacing friction plates, springs, and pressure plates to restore proper engagement. Lubricate moving parts thoroughly during reassembly. Additionally, inspection of gear alignment ensures smooth operation and prevents future issues. Proper preventive maintenance can extend the life of your transmission and drive system. Regularly checking lubrication levels and replacing transmission oil at recommended intervals helps maintain optimal performance. Ultimately, check the neutral switch and detent to confirm smooth shifting and reliable operation once everything is back in place. Understanding market trends and insights can also help you anticipate potential issues and plan maintenance accordingly. Being aware of current industry standards can guide you in selecting the best replacement parts for longevity and performance.
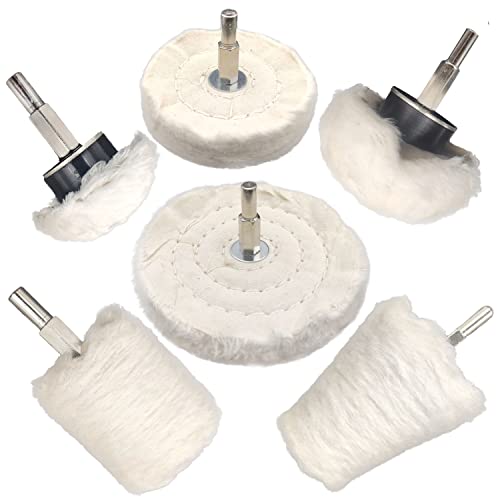
Tworider 6 pcs Buffing Wheel for Drill,Buffing Pad Polishing Wheel Kits,Wheel Shaped Polishing Tool for Metal Aluminum,Stainless Steel,Chrome,Jewelry,Wood,Plastic,Ceramic,Glass,etc
polishing Wheel for Drill:Specially repair dents, clean surface dirt and make it smoother and cleaner after use
As an affiliate, we earn on qualifying purchases.
As an affiliate, we earn on qualifying purchases.
Rebuilding the Electrical System for Reliability
To guarantee your XS650 runs reliably, you should start by upgrading the wiring harness to replace any worn or corroded wires. Next, install modern charging components to improve battery life and electrical stability. Finally, test all electrical systems thoroughly to confirm everything functions correctly before finishing your restoration.
Upgrading Wiring Harness
Upgrading the wiring harness is a crucial step in rebuilding your Yamaha XS650’s electrical system to guarantee greater reliability and safety. Start by removing the old harness carefully, noting the routing and connections. Inspect all connectors, switches, and wiring for corrosion, damage, or wear; replace any compromised components. Use high-quality replacement wires with proper gauge to ensure current capacity and durability. When installing the new harness, follow the original routing to prevent chafing or pinching. Secure wires with zip ties or clips, avoiding sharp edges. Double-check all connections before powering up the system. Incorporating high-quality wiring and proper insulation techniques enhances overall system performance and longevity. Ensuring correct wire gauge for each circuit is essential to handle the electrical load safely and prevent overheating or failures. Proper installation techniques are vital to maintain the integrity of the electrical system and avoid future issues. Additionally, employing proper insulation techniques minimizes the risk of shorts and electrical faults, contributing to a safer and more reliable electrical system. Using appropriate tools during installation can further improve the precision and safety of the wiring process.
Modern Charging Components
Modern charging components are essential for guaranteeing your Yamaha XS650’s electrical system remains reliable and efficient. Upgrading these parts can prevent common issues like battery drain or inconsistent charging. Focus on:
- Installing a modern, high-output alternator or replacement stator for improved electrical capacity.
- Using a modern rectifier/regulator to stabilize voltage and protect your electrical system from surges.
- Upgrading wiring harness connectors to corrosion-resistant, high-quality terminals for better conductivity.
- Ensuring proper grounding techniques improve electrical performance to further enhance system reliability.
These upgrades help maintain a steady charge, extend battery life, and improve overall reliability. When replacing components, ensure compatibility with your XS650 model. Proper installation of modern parts reduces the risk of electrical faults, making your restoration more durable and dependable.
Testing Electrical Systems
Ensuring your Yamaha XS650’s electrical system is reliable starts with thorough testing of all components before completing the rebuild. Begin by inspecting wiring harnesses, looking for corrosion, frayed wires, or damaged connectors. Use a multimeter to test continuity and verify that switches, relays, and fuses are functioning correctly. Check the ignition system, including coil resistance and spark plug wiring, to ensure proper spark generation. Test the charging system by measuring the voltage output of the alternator or stator at various engine speeds. Confirm that the battery holds a charge and that all lights and indicators work properly. Regularly monitor electrical connections to prevent potential issues and address any faults or inconsistencies before reassembling to prevent future electrical failures and ensure your bike runs smoothly and reliably.
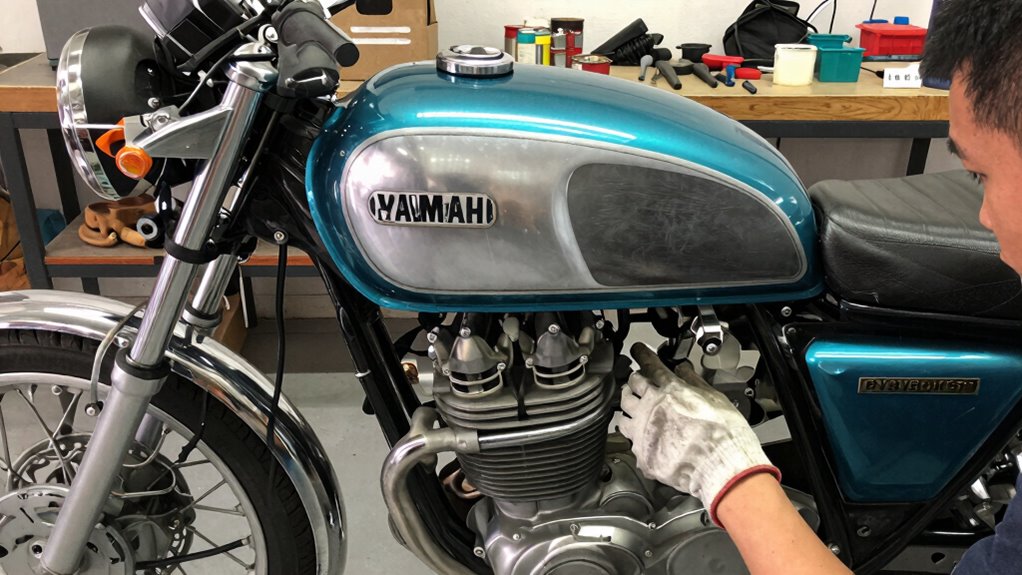
Cleaning, Polishing, and Reassembling Engine Parts
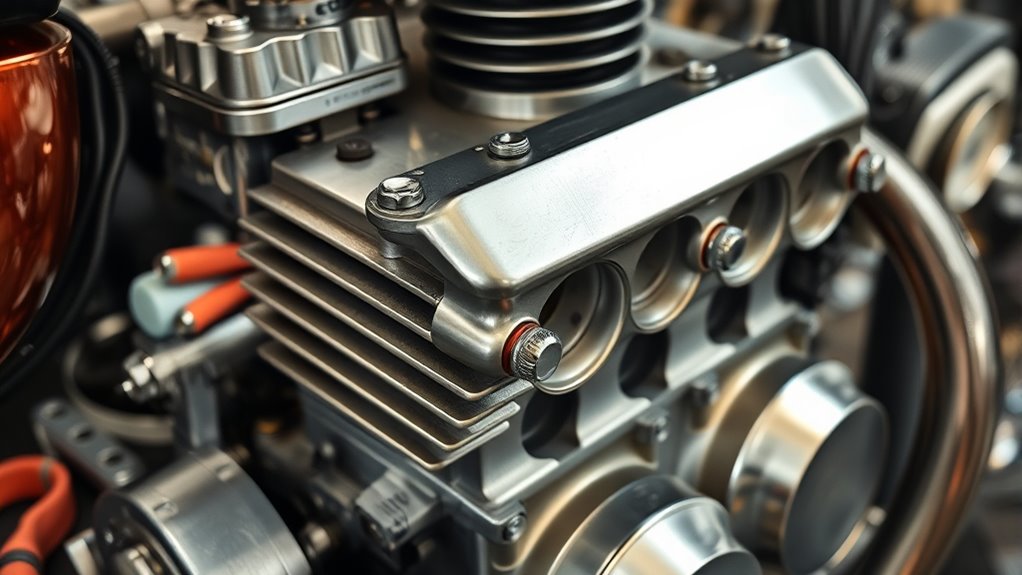
Cleaning, polishing, and reassembling engine parts are essential steps in restoring your Yamaha XS650 to peak condition. First, thoroughly clean all components to remove grease and dirt. Use degreasers and brushes, then rinse and dry completely. Proper component cleaning ensures that no residue interferes with reassembly or operation. To facilitate effective cleaning, consider using appropriate cleaning tools designed for engine parts. Next, polish parts like the cylinder head and covers to restore their shine, using metal polish and a soft cloth. Proper polishing not only improves appearance but also helps prevent corrosion. Additionally, employing proper cleaning techniques can help reach intricate areas and ensure thorough debris removal. Incorporating detailed inspection methods can help identify wear or damage that needs attention before reassembly. Finally, reassemble the engine carefully to ensure proper fit and function. Focus on these key steps:
Thorough cleaning, polishing, and careful reassembly restore your Yamaha XS650’s engine to peak performance.
- Clean components with degreaser and compressed air
- Polish with appropriate metal polish and microfiber cloth
- Reassemble, paying close attention to torque specifications and order
Doing this guarantees your engine looks good and functions smoothly, setting a solid foundation for the rest of your restoration. Proper document management can also help you keep track of your restoration progress and parts inventory, making the process more efficient and less stressful.
Upgrading Critical Components for Improved Performance

Upgrading critical components can substantially boost your Yamaha XS650’s performance and reliability. Start by installing high-performance ignition coils and a modern electronic ignition system to improve spark consistency and throttle response. Upgrading the carburetors with larger, more precise jets or aftermarket units can enhance airflow and fuel delivery for better power and throttle smoothness. Consider replacing the stock exhaust with a performance aftermarket system to increase horsepower and improve exhaust flow. Upgrading the camshaft to a performance grind can boost mid-range torque, while installing high-quality piston rings and stronger valves can improve durability. Lastly, consider using high-performance chain and sprockets to optimize power transfer. These upgrades collectively maximize your bike’s efficiency, responsiveness, and overall riding experience.
Final Assembly and Testing to Ensure Smooth Operation

Once you’ve completed reassembling your XS650, it’s vital to perform thorough final inspection procedures to catch any overlooked issues. After that, take the bike for a test ride to evaluate its performance, handling, and smoothness. Make necessary adjustments based on these assessments to guarantee your restoration delivers reliable and peak operation.
Final Inspection Procedures
Before you begin final assembly, it’s essential to perform a thorough inspection to guarantee all components are correctly installed and functioning properly. Start by checking these key areas:
- Fasteners and Bolts – Ensure all bolts are tightened to the specified torque, with no signs of looseness or damage.
- Fluid Levels and Leaks – Verify oil, brake fluid, and coolant levels are correct, and inspect for any leaks around seals, hoses, or fittings.
- Electrical Connections – Confirm wiring is secure, connectors are properly seated, and there are no exposed or damaged wires.
Next, test your signals, lights, and switches for proper operation. Make sure the clutch and throttle work smoothly, and that the brakes engage effectively. This thorough check helps prevent issues during your first ride.
Test Ride and Adjustments
After completing the final assembly, it’s time to take your Yamaha XS650 for a test ride to guarantee everything operates smoothly. Begin by checking tire pressure, brake function, and fluid levels. Start the engine, listen for unusual noises, and ensure smooth idling. Test ride at low speed, shifting through gears to confirm clutch engagement and gear changes. Keep an eye on handling, braking response, and acceleration. Make adjustments to carburetor sync, chain tension, or brake feel as needed. Use the following table for quick reference:
| Action | Checkpoint | Adjustment Needed |
|---|---|---|
| Engine performance | Smooth acceleration | Carburetor sync |
| Gear shifting | No slipping or sticking | Clutch or linkage adjustment |
| Braking | Stopping power and feel | Brake pad or fluid check |
Repeat tests until riding feels precise and reliable.
Frequently Asked Questions
How Do I Identify the Correct Replacement Parts for My XS650 Model?
You identify the correct replacement parts for your XS650 by checking your bike’s model year and serial number, then cross-referencing these with OEM parts catalogs or manuals. Use original part numbers whenever possible, and consult online forums, restoration communities, or trusted suppliers to confirm fitment. Always verify part compatibility before purchasing, and consider taking old parts to a dealer or parts specialist for accurate matching.
What Are the Best Tools for Safely Disassembling the Engine?
You need quality tools like a set of metric wrenches, socket sets, screwdrivers, and pliers for safe disassembly. A rubber mallet helps gently separate crankcase halves without damage. Use a torque wrench for reassembly to avoid overtightening. A magnetic pickup tool makes retrieving small parts easier, and wear gloves to protect your hands. Proper lighting and a clean workspace are essential to prevent losing tiny components and ensure safety during the process.
How Can I Prevent Corrosion During Frame Restoration?
To prevent corrosion during frame restoration, you should thoroughly clean and degrease the frame before any work. Apply a rust inhibitor or primer designed for metal surfaces to protect against future rust. Keep moisture away by storing the frame in a dry, controlled environment. Consider applying a durable paint or powder coating after restoration to provide a lasting barrier against corrosion, ensuring your frame stays protected long-term.
Which Electrical Components Are Most Critical to Upgrade for Reliability?
Did you know that outdated wiring can cause up to 70% of electrical failures on vintage bikes? You should prioritize upgrading your Yamaha XS650’s wiring harness and connectors to modern, corrosion-resistant materials. Replacing the old electrical system with a new wiring loom guarantees better reliability, improved safety, and consistent electrical performance. Also, upgrading to modern charging components and LED lighting enhances system stability, making your ride more dependable and efficient.
What Are Common Issues Faced During Final Testing and How to Troubleshoot Them?
During final testing, you might face issues like poor starting, inconsistent idle, or charging problems. To troubleshoot, check the electrical connections for corrosion or loose wires, test the charging system with a multimeter, and make certain the ignition timing is correct. Inspect the spark plug, carburetor adjustments, and wiring harness. Address any worn or faulty components, then retest until the engine runs smoothly and reliably.
Conclusion
Bringing your Yamaha XS650 back to life is a rewarding project that combines patience and skill. As you’ve seen, thorough disassembly, careful restoration, and thoughtful upgrades can transform your bike. For example, imagine restoring a friend’s XS650, turning it into a reliable, eye-catching ride. With each step, you’ll gain confidence and pride in your work. Keep at it, and soon you’ll enjoy the thrill of riding a bike you’ve truly brought back to life.