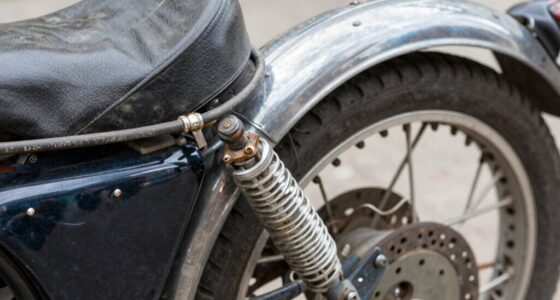
To fix short circuits on your vintage motorcycle, start by inspecting the wiring for brittle, cracked, or melted insulation, especially around areas that pass near frame or moving parts. Use a multimeter to check for continuity and locate where wires may be touching ground or each other. Look for corroded connectors or loose fittings. Carefully repair damaged sections with proper splicing and insulation. If electrical gremlins still persist, understanding these steps helps you move closer to a solution.
Key Takeaways
- Conduct thorough visual inspections for cracked insulation, corrosion, and loose or damaged connectors to identify potential short circuits.
- Use a multimeter to check for continuity, resistance, and locate wiring points where shorts or unintended connections occur.
- Isolate and repair damaged wiring sections with proper splicing, soldering, and heat-shrink tubing to restore insulation and circuit integrity.
- Clean and reseal connectors with dielectric grease to prevent moisture ingress and corrosion that can cause shorts.
- Regularly inspect and maintain wiring harnesses, securing them away from moving parts and replacing aged components proactively.
Recognizing the Signs of Short Circuits on Vintage Bikes

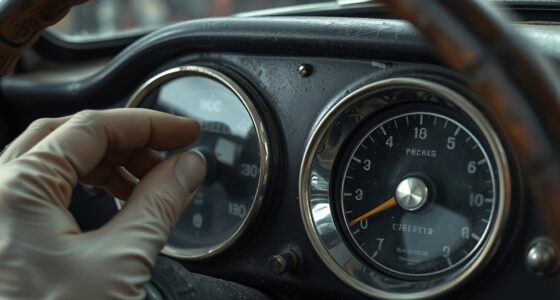
Recognizing the signs of short circuits on vintage bikes is essential for preventing further damage and ensuring safety. If you notice a burning plastic or electrical insulation smell, it indicates overheating wires, and you should disconnect the battery immediately to prevent fire. Cross-wiring effects, like turn signals activating the horn or brake lights affecting the tachometer, point to wiring issues. A fully drained battery with good health suggests parasitic drain caused by a short. Visual clues such as brittle or cracked insulation, chafed wires touching metal parts, or corroded connectors signal potential problems. Frequent fuse blows are classic signs of underlying wiring faults. Staying alert to these symptoms helps you catch issues early, avoiding costly repairs and dangerous failures down the line. Additionally, consulting with a qualified electrician can help identify hidden wiring problems that are not immediately visible.
Common Wiring Faults That Lead to Short Circuits

Wiring faults that cause short circuits often stem from insulation deterioration, worn or damaged wires, or corroded connections. Over time, heat and age weaken insulation, exposing wires that can touch and create shorts. Additionally, corrosion and loose connections compromise electrical flow, increasing the risk of shorts and electrical failures. Regular inspection and maintenance can help identify electrical issues early before they lead to more serious problems. For example, the horsepower of electric dirt bikes indicates the importance of proper wiring to handle high power loads safely. Proper wire insulation is crucial to prevent exposure that can cause shorts and potential damage. Ensuring circuit integrity through consistent testing can further reduce the likelihood of short circuits caused by hidden faults.
Insulation Deterioration Over Time
Over time, the insulation on vintage motorcycle wiring naturally degrades due to exposure to heat, moisture, and age, which can substantially increase the risk of short circuits. Cracks, brittleness, and fragility develop, exposing wires to contact with metal components or other wires. As insulation becomes delicate, even slight movement or vibration can cause wires to chafe or touch, creating a direct short. Water ingress can accelerate deterioration, leading to corrosion and weakened insulation bonds. When insulation fails, wires may contact each other or the frame, causing unintended connections and electrical faults. Regular inspections are vital to identify brittle or cracked insulation early. Replacing worn wiring or applying protective coatings can prevent shorts and guarantee your vintage motorcycle runs safely and reliably.
Worn or Damaged Wiring
As your vintage motorcycle ages, worn or damaged wiring becomes a common source of short circuits. Over time, insulation can crack or become brittle, exposing the copper wires inside. Frayed or broken wires may touch other metal parts, creating unintended connections. Rubbing through insulation occurs where harnesses pass frame sections or near moving components, causing localized shorts. Corroded or melted connectors compromise electrical contact and generate heat, increasing the risk of shorts. Improperly installed aftermarket accessories or makeshift splices often expose bare wires, leading to accidental contact. These issues can cause fuses to blow repeatedly, battery drains, or erratic electrical behavior. Regular inspection and early replacement of damaged wiring help prevent short circuits and keep your motorcycle running safely. Utilizing wire insulation and pump protection techniques can also help prevent debris and contaminants from damaging your wiring system. Additionally, employing vetted wiring components ensures durability and reduces the likelihood of faults over time. Proper circuit protection devices like fuses and circuit breakers further safeguard the electrical system from damage. Implementing proper wiring practices can help extend the lifespan of your motorcycle’s electrical system and prevent costly repairs.
Corrosion and Connection Failures
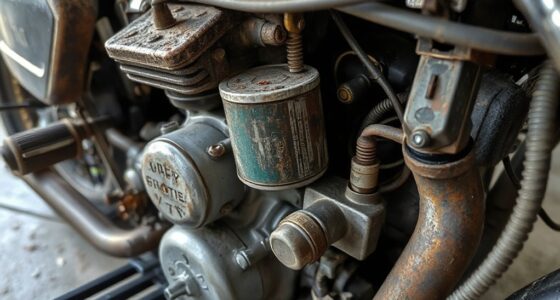
Corrosion and connection failures are common wiring faults that can lead to short circuits in vintage motorcycles. Over time, moisture, dirt, and age cause connectors to deteriorate, increasing resistance and risking shorts. Loose or dirty connections can also create sparks or intermittent faults. To prevent issues, inspect all wiring and connectors regularly. Look for signs like rust, melted terminals, or loose fittings. Tighten or replace corroded parts promptly. Use dielectric grease to protect connections from moisture. Proper maintenance ensures reliable electrical flow and reduces short circuit risk. Additionally, understanding water ingress and how it affects wiring integrity can help prevent future problems. Regularly checking for connection stability and maintaining proper sealing can further safeguard your motorcycle’s electrical system. Being aware of free floating wiring issues can also help diagnose and address problems early. Recognizing signs of electrical overload can additionally prevent damage caused by excessive current. Being vigilant about corrosion prevention techniques is essential for long-term reliability.
Step-by-Step Diagnostic Techniques for Short Circuits
Start by carefully inspecting the wiring harness for visible damage like cracks, corrosion, or loose connections. Then, use a multimeter to check fuse continuity and test for shorts between wires and components. These steps help you quickly identify the source of the short circuit and plan your repairs effectively. Additionally, understanding electrical diagnosis techniques can streamline the troubleshooting process and prevent future issues. Recognizing ear wax odor or other unusual smells can sometimes hint at underlying electrical or mechanical problems that may be contributing to wiring issues.
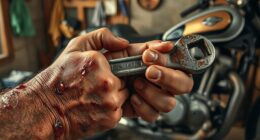
Visual Inspection Strategies
A thorough visual inspection is the first essential step in diagnosing short circuits on vintage motorcycles. Carefully examine the entire wiring harness, looking for frayed or cracked insulation, which indicates deterioration. Check for signs of chafing or abrasion where wires contact the frame, moving parts, or sharp edges. Inspect connectors for corrosion, melting, or loose pins, as these can cause poor contact and heat buildup. Look for melted or discolored insulation, which suggests overheating. Also, examine the fuse box for blown fuses, and verify that wiring routes are secure and free of pinched or stretched sections. Take note of any aftermarket additions or splices, ensuring they are properly insulated and correctly connected. This initial visual scan helps identify obvious damage that needs immediate attention.
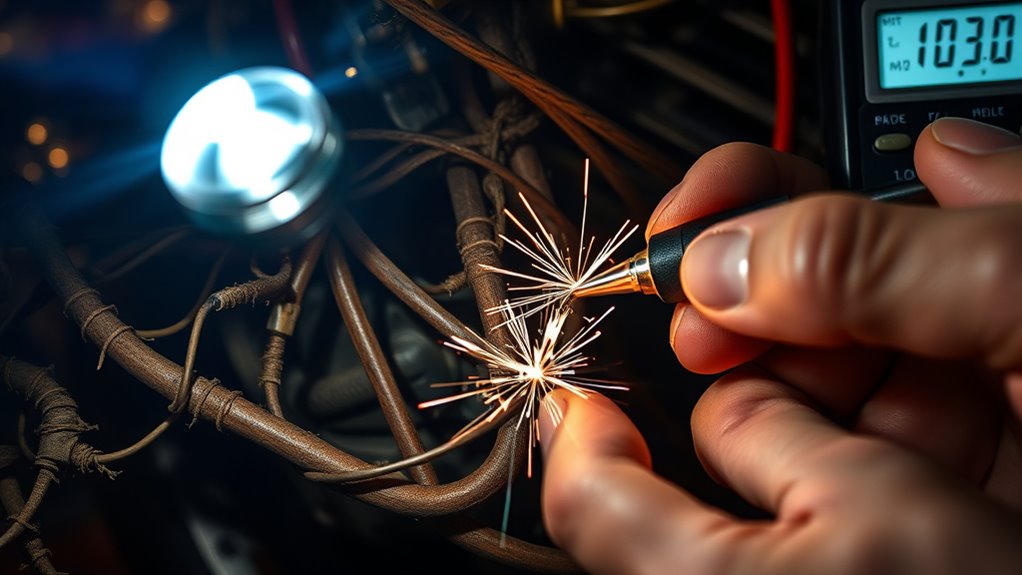
Multimeter Testing Procedures
Using a multimeter is an essential step in diagnosing short circuits on vintage motorcycles because it allows you to verify electrical continuity and identify unintended connections. First, set your multimeter to the resistance (ohms) or continuity mode. Disconnect the battery to prevent false readings. Start by testing fuses: check for continuity across each fuse; a broken fuse indicates a blown fuse. Next, probe wiring harness sections, especially around damaged or suspicious areas, to detect shorts. Place one lead on a known good ground and the other on various wires to see if there’s an unintended connection. For suspected shorted wires, measure resistance; low or zero ohms suggests a short. Always compare readings to manufacturer specifications to confirm faults. This systematic testing pinpoints wiring issues efficiently. Incorporating local automation techniques can also help monitor electrical systems and alert you to faults early, preventing further damage. Understanding wiring diagrams can greatly assist in tracing circuits and identifying problem areas more quickly. Additionally, utilizing multimeter features like peak hold or min/max functions can aid in capturing intermittent faults that might otherwise be missed.
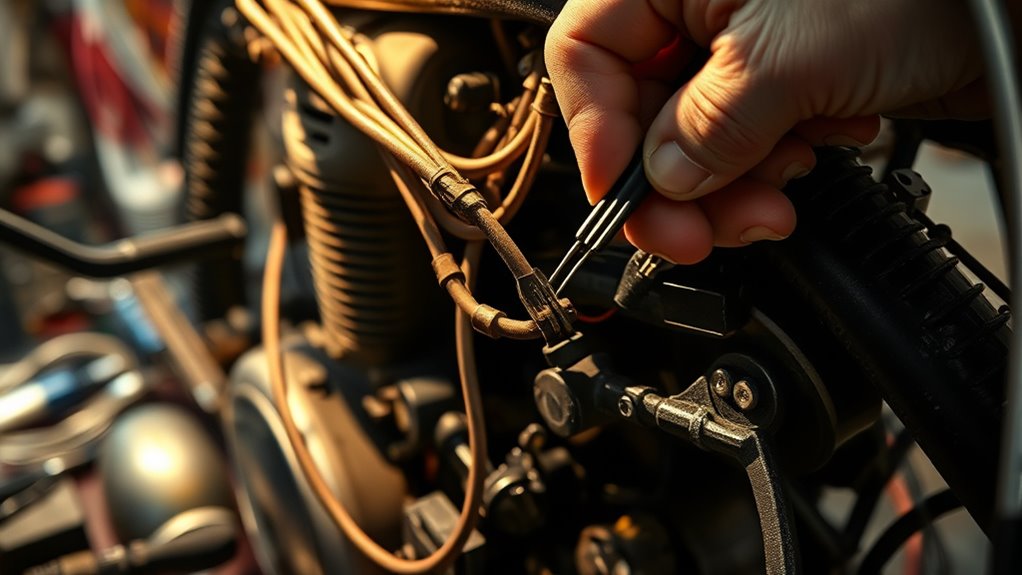
Repair Strategies for Damaged Wiring and Connectors

When repairing damaged wiring and connectors on vintage motorcycles, the key is to carefully remove and replace compromised sections to restore safe and reliable electrical function. Start by identifying damaged areas—brittle insulation, frayed wires, or corroded connectors. Use wire cutters and a soldering iron to cut out faulty sections, then splice in new wire with proper gauge and insulation. Solder connections securely and cover them with heat-shrink tubing to prevent moisture intrusion. For connectors, clean contacts with contact cleaner and reseal with dielectric grease. If damage is extensive, consider replacing the entire wiring harness to ensure safety and reliability. Regularly inspect and maintain connections to prevent future shorts and keep your vintage motorcycle running smoothly. Employing methodical testing processes can help systematically identify issues before they cause major failures.
Ensuring Safety During Electrical Troubleshooting

Before you begin troubleshooting electrical issues on your vintage motorcycle, prioritize safety to prevent injury or further damage. Disconnect the battery immediately if you notice burning smells, overheating wires, or smoke. Always use insulated tools and wear gloves to protect against shocks and accidental shorts. Verify circuits are isolated before testing to avoid damaging components or causing sparks. Ensure replacement fuses match the original amperage ratings to prevent electrical fires. When working on wiring, avoid rushed or careless splicing—use proper connectors or solder with insulated terminals. If you’re unsure about a repair, consult an experienced mechanic familiar with vintage systems. Properly maintaining your electrical system can maximize your motorcycle’s electrical integrity and prevent future issues, minimizes risks, keeps you safe, and preserves your motorcycle’s electrical system during troubleshooting. Additionally, understanding electrical safety protocols is essential for a safe troubleshooting process. Being familiar with electrical system components can help you identify potential problems early and avoid unnecessary repairs.
Addressing the Unique Challenges of Vintage Motorcycle Wiring

Vintage motorcycle wiring presents unique challenges because the materials and designs used decades ago don’t meet modern safety standards or durability expectations. The insulation materials tend to degrade over time, becoming brittle, cracked, or waterlogged, which increases the risk of shorts. Because many older bikes lack circuit breakers or protective devices, a single fault can cause significant damage or fire. Finding replacement parts can be tough, often requiring delicate repairs or custom wiring solutions. Additionally, period-specific electrical systems, like non-safety starter circuits, can produce unexpected shorts if misunderstood. Environmental factors like moisture and corrosion further complicate repairs, especially at connector seals and exposed wires. Handling these issues demands patience, vintage-specific knowledge, and careful inspection to restore safety and reliability effectively.
Preventative Measures to Avoid Future Short Circuits
To prevent future short circuits on your motorcycle, regular maintenance and proactive inspection are essential. You should routinely check wiring for signs of wear, such as cracked insulation or corrosion. Keep harnesses secured away from moving parts to minimize chafing. Replace aging connectors and damaged wiring promptly to maintain integrity. When installing accessories, use proper splicing techniques with insulated terminals and avoid exposed wires. Additionally, always utilize fuses rated correctly for your vintage model to protect circuits from overloads. Regularly clean and reseal connectors with dielectric grease to prevent moisture ingress. Conduct periodic continuity tests with a multimeter to catch potential issues early. Staying vigilant with these measures helps ensure a reliable, safe electrical system, reducing short circuit risks over time.
When to Seek Help From a Vintage Motorcycle Electrical Expert

When electrical issues on your vintage motorcycle become complex or difficult to diagnose, it’s crucial to seek help from an experienced electrical expert. If you notice persistent fuse blows, unexplained electrical behavior, or signs of severe damage like melted insulation or burning smells, don’t push your luck. Attempting repairs beyond your skill level can worsen the problem or cause safety hazards. Additionally, if you’re unsure about wiring modifications, installing aftermarket parts, or diagnosing intermittent shorts, a professional’s expertise ensures safety and proper function. Vintage electrical systems can be intricate, and specialized knowledge is often required to identify hidden faults or perform reliable repairs. Recognizing when to call in a pro prevents costly mistakes and helps keep your motorcycle safe and reliable.
Frequently Asked Questions
How Can I Identify a Parasitic Drain Caused by a Short Circuit?
To identify a parasitic drain caused by a short circuit, start by disconnecting the battery and then checking for a persistent drain with a multimeter set to measure current. If the meter shows a continuous current draw when everything’s off, trace the wiring to find any shorted or faulty components. Look for signs like melting insulation, corrosion, or chafed wires, which indicate a short circuit causing the drain.
What Are the Best Tools for Diagnosing Wiring Shorts in Vintage Bikes?
You need a good multimeter to diagnose wiring shorts in vintage bikes. Use it to check continuity, measure voltage, and test fuses. A test light can help locate live wires during troubleshooting. A wiring diagram aids in understanding circuits, while a magnifying glass helps spot physical damage. Insulated tools are essential for safety. These tools help you pinpoint shorts accurately and safely, making repairs more effective.
How Do I Safely Disconnect the Battery During a Wiring Inspection?
You should start by turning off the ignition switch to cut power. Then, locate your motorcycle’s battery, usually under the seat or side panel. Use insulated tools to disconnect the negative terminal first, followed by the positive terminal to prevent sparks. Always wear gloves and eye protection. Once disconnected, you can safely inspect and work on the wiring without risk of electrical shock or short circuits.
Can Aftermarket Accessories Cause Short Circuits on Vintage Motorcycles?
Yes, aftermarket accessories can cause short circuits on vintage motorcycles. Poor installation, improper splicing, or using incorrect wiring can expose live wires or create unintended connections. This increases the risk of shorts, fuse blows, or electrical damage. To prevent this, always use proper connectors, insulate splices thoroughly, and follow manufacturer instructions. Regularly inspect added accessories for wear, corrosion, or loose connections to keep your motorcycle safe and reliable.
What Are Signs That a Wiring Harness Needs Complete Replacement Instead of Repair?
You notice frequent fuse blows, persistent electrical issues, or visible damage like cracked insulation and corrosion. If wires are brittle, melted, or chafed beyond simple repair, it’s time to replace the entire harness. Resealing connectors isn’t enough when corrosion or damaged wiring jeopardize safety. You should consider a full replacement if repairs become too complex or unreliable, preventing future shorts and ensuring your vintage motorcycle’s electrical system stays safe and dependable.
Conclusion
Taming vintage wiring gremlins takes patience and a keen eye, but with the right approach, you can mend the electrical maze. Think of it as unraveling a tangled knot—careful, deliberate, and persistent. By recognizing signs early and following solid repair strategies, you keep your motorcycle’s heart beating strong. Stay vigilant, and your vintage bike will sing its roaring song for miles to come, free of hidden electrical ghosts.