To dial in your classic motorcycle’s carburetors, start by cleaning all parts thoroughly and setting the float level correctly. Warm up the engine and adjust the idle speed first by tuning the pilot screw for a smooth, steady idle. Then, fine-tune the needle clip position for mid-range response and select the proper main jet for top-end power. Small adjustments make a big difference—continue exploring how each circuit affects performance for ideal results.
Key Takeaways
- Thoroughly clean and inspect all carburetor parts, including jets, passages, and float levels, before tuning.
- Start with a proper idle speed and adjust the pilot screw for a smooth, steady idle at normal engine temperature.
- Tune the needle clip position to optimize mid-range response (¼ to ¾ throttle) for smooth acceleration.
- Select the appropriate main jet size for full throttle power without excessive fuel consumption.
- Regularly check and synchronize multiple carbs, and perform maintenance to maintain consistent, peak performance.

Motion Pro Sync Pro Crab Tuner, Manufacturer- MOTION PRO, Manufacturer Part Number- 08-0411-AD, Stock Photo - Actual Par
As an affiliate, we earn on qualifying purchases.
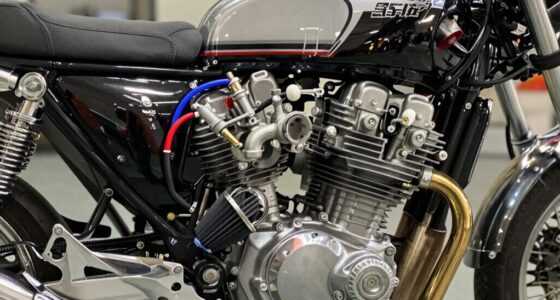
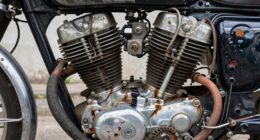
Understanding Your Carburetor’s Circuit Functions
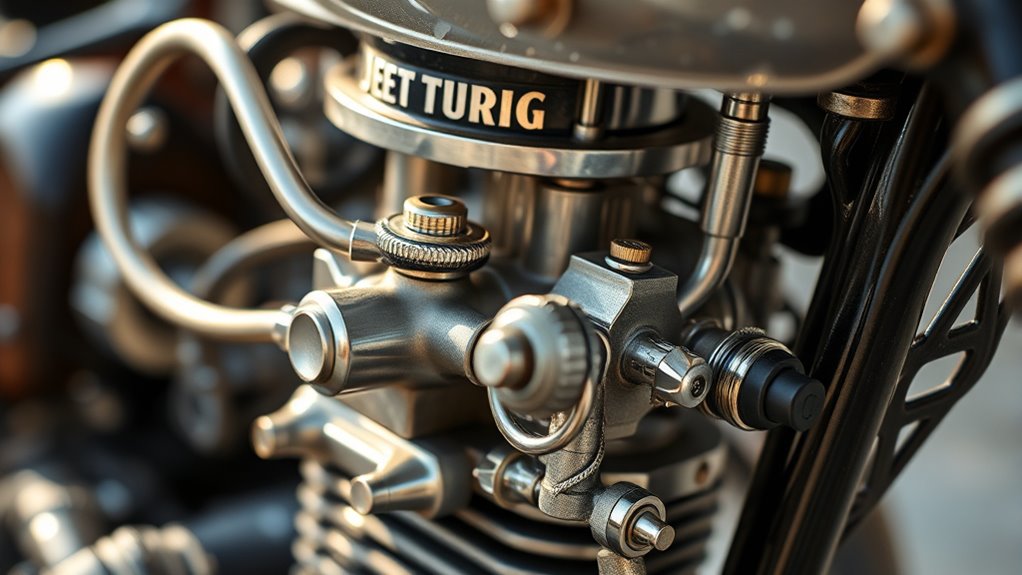
Understanding your carburetor’s circuit functions is essential for effective tuning and peak engine performance. Each circuit manages fuel delivery at specific throttle positions, starting with the pilot jet, which governs idle to 1/8 throttle, ensuring smooth low-speed operation. The main jet takes over at ¾ to wide-open throttle, providing maximum fuel for full power. Between 1/8 and ¼ throttle, the throttle cut-away influences transition smoothness. The needle jet and its clip position control fuel from ¼ to ¾ throttle, vital for mid-range response, especially during cruising. Since these circuits overlap, tuning them sequentially prevents interactions that could impair performance. By understanding each circuit’s role, you can make precise adjustments, improving throttle response, fuel economy, and overall engine smoothness. Additionally, recognizing how circuit interaction affects overall tuning can help prevent common issues such as stumbling or inconsistent acceleration. Being aware of the astrological influences on personality traits can also inform your approach to fine-tuning, as confidence and patience often play a role in successful motorcycle maintenance. Furthermore, employing a systematic approach to diagnostics can help identify specific issues related to each circuit more efficiently. A thorough understanding of fuel mixture adjustments is also crucial for optimizing performance across different riding conditions. Moreover, considering environmental factors such as altitude and temperature can help refine your tuning process for better results.

4-Channel - The Digi Sync™ Digital Throttle Body & Carb Sync Tool, Easy to Use & Accurate Carburetor Synchronizer, Vacuum Gauge Carburetor, Peaking Manometer, for Carbureted & Fuel-Injected Engines
🛠️ 4-CHANNEL-----------------------------------➡️ For vehicles with 2, 3, or 4 throttle bodies (or carburetors)
As an affiliate, we earn on qualifying purchases.
Preparing Your Motorcycle for Tuning
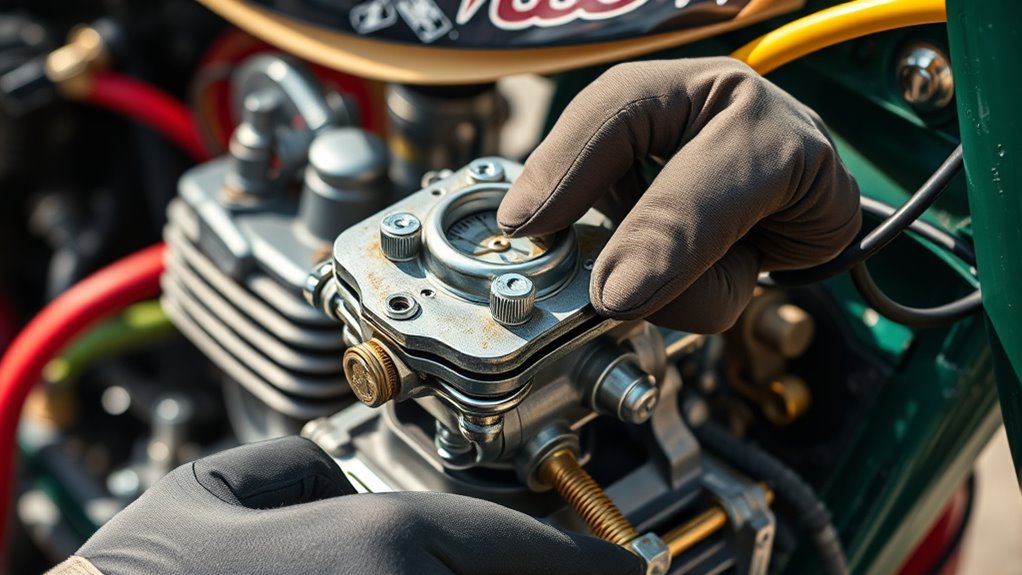
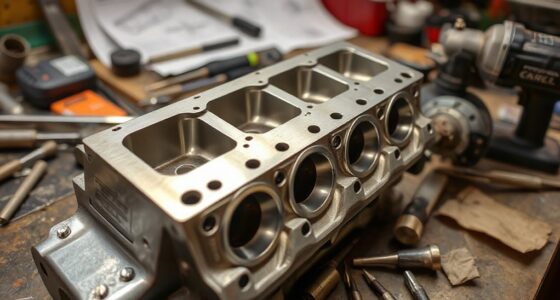
Before you begin tuning your motorcycle’s carburetor, it’s essential to thoroughly prepare your bike to guarantee accurate adjustments and prevent potential issues. Start by cleaning the carburetor completely, removing all jets, passages, and parts, then use carb cleaner and compressed air to clear out dirt and varnish. Check the float level with a gauge or caliper, ensuring it’s set correctly to avoid flooding or starvation. Inspect and clean the air filter to ensure proper airflow. Confirm that all cables, linkages, and screws move freely and are correctly adjusted. Make sure your spark plug is clean and properly gapped. Finally, warm up the engine to normal operating temperature. Proper European cloud innovation ensures precise tuning and helps you avoid common problems during the process. Additionally, verifying your home maintenance tools are in good condition can make this process more efficient and prevent unnecessary delays. Regularly inspecting your fuel system can also help maintain optimal performance throughout the tuning process. Paying close attention to air-fuel mixture adjustments will further enhance your tuning accuracy and engine responsiveness. It is also beneficial to understand the engine’s operating manual to ensure all specifications are correctly followed during preparation.

Alltooetools Universal Vacuum Carburetor Synchronization Balancer Gauge Carb Synchronizer Adjustment Tool Kit Compatible with Motorcycle BMW Honda Yamaha Kawasaki Suzuki GS KZ XS CB 550 650 750
【Applicable】★The Alltooetools vacuum carburetor synchronization balancer gauge carb synchronizer adjustment tool kit is designed for Gs Kz 550...
As an affiliate, we earn on qualifying purchases.
Step-by-Step Idle and Low-Speed Adjustments

Start by setting your idle speed to a smooth, steady RPM, ensuring the engine runs consistently without stalling. Next, adjust the pilot screw to fine-tune the air-fuel mixture at idle, making small turns until the engine responds smoothly. Proper filtration and pump protection can help maintain consistent spray performance during adjustments, preventing debris from affecting the carburetor. Additionally, ensuring your fuel quality is good can prevent issues like clogging or inconsistent fuel delivery that impact idle performance. Regularly inspecting and cleaning your carburetor components can also help sustain optimal operation and prevent buildup that causes rough idling. Using the correct body jewelry measurements during maintenance ensures proper fitment and prevents unnecessary stress on the carburetor parts. Finally, verify that the idle remains steady and the engine runs without hesitation or roughness before moving on to other adjustments. Remember, user privacy is important, so be sure to review your privacy settings if you’re adjusting your motorcycle’s carburetors in a public or shared space.
Set Idle Speed
Setting the idle speed correctly is essential for smooth engine operation at low RPMs and during startup. First, warm up your engine to normal operating temperature. Then, locate the idle speed screw on your carburetor—usually a large screw on the side. Turn the screw gently clockwise to increase the idle RPM or counterclockwise to decrease it. Adjust until the engine runs smoothly without stalling or surging. Keep an ear out for a steady, consistent idle. Use a tachometer if available to set the RPM to the manufacturer’s recommended range. Fine-tune by making small adjustments and listening carefully. Once satisfied, ensure the screw is snug but not overtightened to prevent vibrations from affecting your setting. Proper idle speed ensures reliable starts and smooth low-speed running. Proper adjustment is key to maintaining optimal engine performance and avoiding issues like stalling or rough idling.
Adjust Pilot Screw
Have you ever wondered how to fine-tune your carb’s idle and low-speed performance? Adjusting the pilot screw is key. First, locate the screw—usually near the bottom of the carb. Turn it clockwise to lean the mixture or counterclockwise to richen it. Start with the screw about 1.5 turns out from lightly seated. Then, start the engine and let it warm up. Slowly turn the screw in or out, listening for the engine’s idle to stabilize. Aim for the highest, smoothest idle speed without hesitation or stalling. Once you find that sweet spot, tighten the screw gently to lock in your adjustment. Fine-tuning the pilot screw helps achieve a smooth idle and responsive low-speed throttle.
Verify Smooth Idle
Achieving a smooth idle requires careful verification and fine-tuning of your carburetor’s low-speed circuit. Start by warming up your engine fully. Then, turn the idle speed screw to set a low, steady RPM—usually around 1000-1200 RPM. Adjust the pilot screw to eliminate any roughness or stalling at idle; turn it slowly in or out until the engine runs smoothly. Listen for fluctuations or hunting—these indicate the mixture isn’t ideal. If the idle feels uneven, recheck the pilot screw and ensure the carb passages are clean. Small adjustments should be made gradually, and always give the engine time to settle after each change. A stable, smooth idle means the low-speed circuit is properly dialed in, setting a solid foundation for further tuning. Additionally, verifying the engine’s overall health can prevent issues with idle stability.

Carburetor Synchronizer Tool | Universal Pro-Sync | Carb Sync Tool for Motorcycle, VW, Trike, Dual Carbs | Accurate Airflow Meter | 1-30 kg/h Scale Carburetor Airflow Meter
Precision Engine Tuning - Achieve perfect carb sync with our airflow meter and 1-30 kg/h scale, no more...
As an affiliate, we earn on qualifying purchases.
Fine-Tuning the Mid-Range and High-Speed Circuits
To fine-tune your mid-range and high-speed circuits, start by adjusting the needle clip position to get the mixture right between quarter and three-quarter throttle. Next, select the appropriate main jet size to guarantee your engine delivers maximum power at full throttle without wasting fuel. Making these adjustments carefully helps achieve smooth acceleration and peak performance across the entire throttle range. Additionally, regularly inspecting and cleaning your carburetor components ensures that the air-fuel mixture remains consistent and optimal for performance.
Needle Clip Positioning
Adjusting the needle clip position is a key step in fine-tuning your motorcycle’s mid-range and high-speed circuits. Moving the clip up or down affects how much fuel mixes with air between ¼ and ¾ throttle, directly impacting throttle response and power delivery. When you lower the clip, you enrich the mixture, improving mid-range power but risking richer fuel consumption. Raising the clip leans the mixture, helping with high-speed performance but potentially causing hesitation if too lean. Keep these points in mind:
- Positioning affects fuel mixture at specific throttle ranges
- Moving the clip down enriches mid-range and high rpm circuits
- Raising the clip leans the mixture for top-end performance
- Small adjustments can considerably change throttle response
Use trial and error to find the most suitable balance for your engine.
Main Jet Selection
Selecting the right main jet is essential for fine-tuning your motorcycle’s mid-range and high-speed circuits. The main jet controls the fuel flow when you’re at ¾ throttle or wide open, setting the maximum power output and fuel mixture. If your engine feels sluggish at high RPMs, or if you notice excessive fuel consumption or black smoke, you might need a larger jet. Conversely, if the engine feels lean, hesitant, or backfires at top end, try a smaller jet. To find the *ideal* size, start with the manufacturer’s recommended jet, then make small incremental changes—usually in 10 or 15 size steps. Test ride after each change, and listen for smooth, responsive power delivery across the full throttle range. Proper main jet selection ensures maximum performance and efficiency at high speeds. Always verify that your carburetor parts and modifications are compliant with halal standards to ensure all components meet dietary and safety guidelines.
Troubleshooting Common Carburetor Problems

Many common carburetor problems stem from dirt, incorrect settings, or worn parts that disrupt the proper fuel and air mixture. You might notice rough idling, hesitation, or poor acceleration. To troubleshoot:
Common carburetor issues often come from dirt, incorrect settings, or worn parts disrupting fuel and air flow.
- Check for clogged jets or passages; clean with carburetor cleaner and compressed air.
- Inspect and adjust the pilot screw for a smooth idle.
- Verify float levels to prevent flooding or starvation.
- Examine the needle and clip position for consistent mid-range response.
- Additionally, understanding how sound vibrations can influence cellular health may inspire more precise tuning techniques for optimal performance. Being aware of vibration effects can help you avoid issues caused by resonance or unwanted oscillations that may impact carburetor function. Recognizing the importance of proper maintenance routines can extend the lifespan of your carburetor and improve overall engine performance. Regular cleaning and cautious tuning help prevent many problems. Small, incremental adjustments—step-by-step tuning—are especially effective in avoiding unintended interactions and maintaining smooth operation. Moreover, establishing a consistent maintenance routine ensures that your carburetor remains in good condition over time.
Maintaining and Caring for Your Carburetors
Regular maintenance is essential to keep your carburetors running smoothly and guarantee ideal engine performance. You should clean your carburetors thoroughly at least once a season, removing jets, passages, and parts for cleaning with carb cleaner and compressed air. Check the float level and adjust it to prevent flooding or fuel starvation. Keep an eye on all gaskets and seals, replacing any that appear worn or cracked to prevent leaks. Use quality fuel and keep fuel lines clean to avoid varnish build-up. When tuning, change jets and needles one at a time to understand their effect clearly. Finally, periodically synchronize multiple carbs to ensure balanced throttle response. Proper care prolongs your carburetors’ lifespan and keeps your motorcycle running reliably, especially if you incorporate regular inspection and adjustment to catch issues early. Additionally, staying informed about modern repair techniques can help you troubleshoot more complex problems effectively.
Frequently Asked Questions
How Do I Determine the Correct Main Jet Size for My Engine?
You determine the correct main jet size by starting with the manufacturer’s recommended jet, then riding your motorcycle under full throttle. If your engine feels rich, sluggish, or the exhaust is black, switch to a smaller jet. If it’s lean, sputters, or overheating, go larger. Make incremental changes, test ride, and check plug color to fine-tune for peak power, economy, and smooth running.
What Are Signs of a Properly Synchronized Multiple-Carb Setup?
Did you know that improperly synchronized carbs can reduce engine efficiency by up to 15%? You’ll notice a properly synchronized multi-carb setup by smooth throttle response, steady RPMs at idle, and no uneven engine vibrations. The engine should accelerate evenly and maintain a consistent tone. Use a synchronizer gauge to verify each carb lifts equally, creating balanced airflow. This keeps your motorcycle running smoothly, maximizes power, and prevents uneven wear.
Can I Mix Different Brands or Types of Jets in My Carburetor?
You can mix different brands or types of jets in your carburetor, but it’s not ideal. Different manufacturers may have slight variations in size or design, which can affect fuel flow and mixture consistency. Always check the specifications and verify the jets are compatible with your carburetor. For best results, stick to the same brand and type when replacing jets, and test carefully after any change to avoid tuning issues.
How Often Should I Clean or Rebuild My Carburetor for Optimal Performance?
You should clean or rebuild your carburetor every 5,000 to 10,000 miles, or more frequently if you notice performance issues like hesitations, rough idling, or poor throttle response. Regular maintenance prevents buildup of dirt, varnish, and clogs that can affect fuel flow. It’s a good idea to inspect and clean the jets, passages, and float bowl during seasonal tune-ups, especially before long rides, to keep your motorcycle running smoothly.
What’s the Best Way to Identify a Clogged Pilot Jet?
You’re probably just dying to find out if your pilot jet is clogged, right? The best way is to remove the carb, then carefully disconnect and inspect the jet. If your engine stalls at idle, idles rough, or struggles to stay running, chances are the pilot jet is clogged. Clean it with carb cleaner and compressed air, then reassemble. If problems persist, double-check the jet’s condition or replace it.
Conclusion
With your carburetor dialed in, your motorcycle will purr like a well-tuned symphony, ready to conquer the road. Think of each adjustment as fine-tuning a musical instrument, bringing harmony to your ride. As you care for and maintain your carbs, you’ll keep that melody playing smooth and true. Embrace the art of tuning, and your vintage motorcycle will reward you with a ride as exhilarating as a soaring bird on a clear blue sky.