To restore a vintage motorcycle seat, start by carefully disassembling the old upholstery, inspecting for rust or damage. Next, reshape or replace the foam for comfort and support, then fit a new cover, ensuring it’s pulled tight and aligned properly. Repair any cracks or tears in leather or vinyl surfaces using appropriate fillers or paints. Finally, check all fastenings and condition the surface. If you want detailed steps and tips, keep exploring for a full guide.
Key Takeaways
- Thoroughly evaluate and disassemble the old seat, inspecting for rust, tears, or damage to plan restoration steps.
- Restores and contours foam with coarse grit sanding, adding comfort layers and securing them for a seamless fit.
- Fit the new or repaired seat cover carefully, smoothing wrinkles and pulling tight with clamps for even tension.
- Clean, repair, and dye or paint leather or vinyl components, ensuring compatibility and durability.
- Conduct a final inspection for security, comfort, and appearance, and perform regular maintenance for longevity.
Assessing and Disassembling the Old Seat
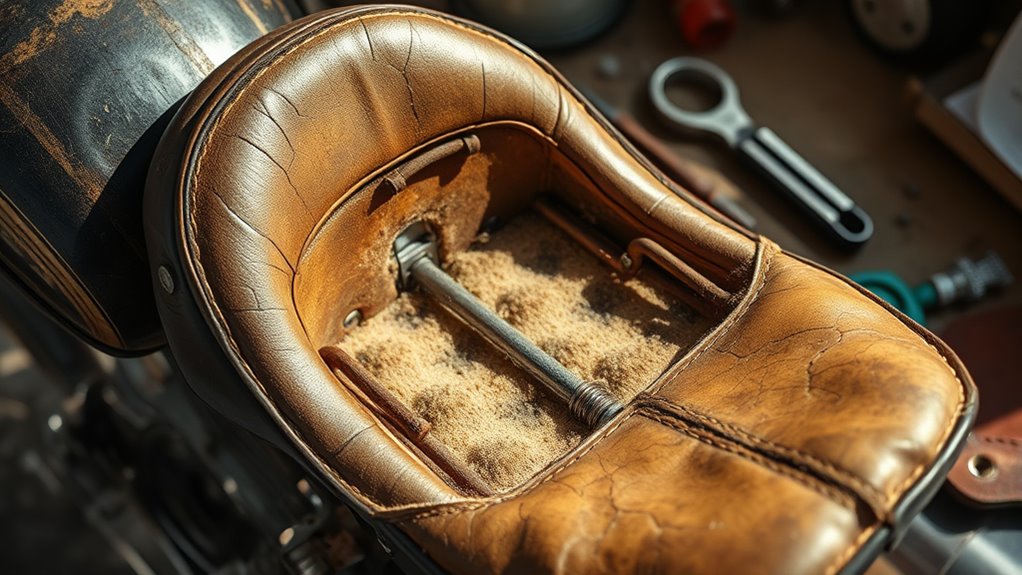
Before you begin disassembling your old seat, thoroughly evaluate its condition to identify any damage or areas that need repair. Check the seat cover for tears, excessive wear, or fading. Carefully examine the foam padding; look for crumbling, hard spots, or mold. Remove any old staples, clips, or bands with a staple remover or pliers, taking care not to damage the seat pan or mounting hardware. Keep track of all hardware for reuse or replacement. Inspect the metal seat pan for rust, cracks, or holes. If rust is present, plan to clean or strip it before repainting. Removing the cover and foam carefully preserves reusable parts and ensures you won’t miss hidden damage. Proper assessment saves time and helps plan your restoration process effectively. Remember that a thorough assessment can reveal hidden issues and prevent future problems during reupholstering. Conducting a detailed inspection of the seat components can also help determine the appropriate tools and materials needed for repair or replacement. Additionally, understanding the materials involved can guide your choice of repair techniques and supplies. Being aware of potential infection risks that could affect your workspace or materials can help maintain a safe environment during restoration.
Restoring and Shaping the Foam Core
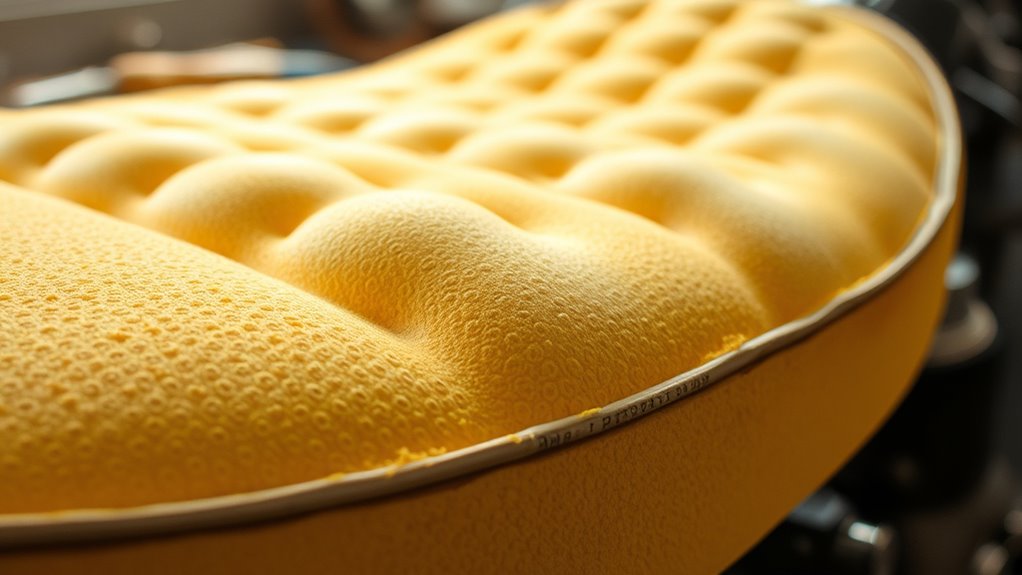
Restoring and shaping the foam core is a crucial step to guarantee your seat offers both comfort and the original profile. You’ll want to evaluate the foam’s condition and replace or reuse it accordingly. Use coarse grit sanding discs (like 80 grit) to sculpt and contour the foam, ensuring it matches the vintage seat shape. To improve comfort, consider adding memory foam layers or gel pads beneath the original foam. Secure the reshaped foam with adhesive to prevent shifting during upholstery. Here’s a quick reference:
| Step | Action |
|---|---|
| 1 | Assess foam condition |
| 2 | Reshape with coarse grit |
| 3 | Add comfort layers |
| 4 | Attach securely with glue |
This process restores the seat’s ergonomic form and aesthetic integrity, and understanding proper automotive repair techniques can help ensure a durable and professional finish. Additionally, considering the vintage motorcycle origin of the seat can guide your restoration approach to maintain authenticity. Being familiar with foam restoration techniques can also assist in achieving a seamless look and feel, and exploring different foam shaping methods can further enhance your results. It is also beneficial to test fit the foam periodically as you work to ensure accurate shaping.
Preparing and Fitting the Seat Cover
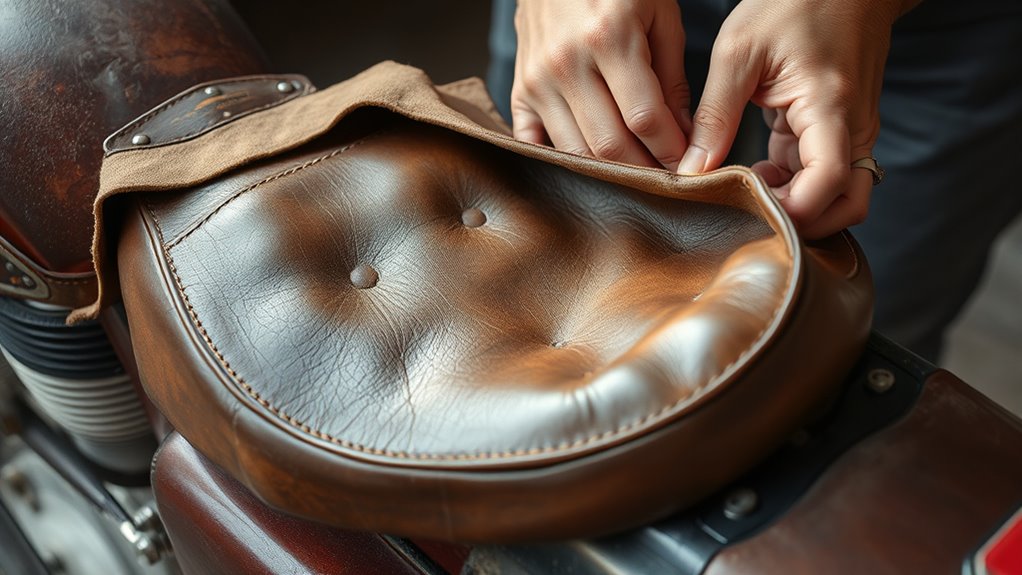
Once you’ve shaped and secured the foam, it’s time to fit the new seat cover. Drape the cover over the seat, ensuring it aligns with the edges and contours. Smooth out any wrinkles or folds, working from the front to the back and sides. Use pincer clamps to temporarily hold the cover in place, pulling tight to avoid slack or sagging. Check the fit frequently, adjusting as needed for a snug, even appearance. Pay special attention to corners and edges, making sure they’re smooth and secure. Proper tensioning techniques are essential to achieve a professional look and ensure the longevity of your upholstery. Incorporate natural materials and environmentally conscious practices to enhance durability and sustainability. Using appropriate tools can help ensure the cover is fitted correctly and evenly. Allow any adhesives to dry thoroughly before proceeding to the next step. Managing documents can help keep your project organized and ensure you don’t lose track of important supplies or steps.
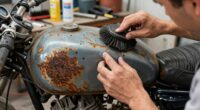
Repairing and Refinishing Leather or Vinyl Components

To effectively repair and refinish leather or vinyl components, start by thoroughly cleaning the surface to remove dirt, oils, and any residues that could interfere with adhesion. Use a gentle leather cleaner or mild soap solution, and dry completely before proceeding. Once clean, assess the damage: small tears or cracks can be filled with leather filler or patch kits designed for durability. For color restoration, apply leather dye or vinyl paint in thin, even coats—multiple layers may be necessary for uniform coverage. To enhance appearance and longevity, condition the leather regularly with a quality conditioner. Proper finishing guarantees a smooth, durable surface that maintains the vintage look. Additionally, understanding the chemical properties of the repair products can help ensure compatibility and better results. Being aware of material compatibility can further improve the durability of your restoration, especially when considering the long-term effects of different repair materials on vintage surfaces. Recognizing advanced technology in repair products can also contribute to achieving seamless restoration results.
Final Inspection and Maintenance Tips

After completing repairs and refinishing, it’s important to perform a thorough final inspection to guarantee everything is secure and looks right. Check all attachment points, ensuring staples, glue, and fasteners are tight and evenly fitted. Inspect the leather or vinyl for wrinkles, tears, or loose areas; re-tighten or re-glue as needed. Confirm the foam provides even cushioning without lumps or gaps, and verify the seat shape remains ergonomic. Test the seat’s stability by gently pressing on different areas to identify any shifts or weak spots. Clean the surface with a mild leather or vinyl cleaner to remove fingerprints or dust. Finally, apply a conditioner to keep the material supple and protected. Regular maintenance, like cleaning and conditioning, extends the seat’s lifespan. Additionally, understanding proper safety precautions during the restoration process helps prevent accidents and ensures a durable result. Incorporating proper inspection techniques ensures you catch potential issues early and maintain the seat’s integrity over time. Monitoring the market trends related to vintage parts can also help you source quality materials and tools for future projects. Staying informed about vintage market fluctuations can optimize your restoration investments and material choices. Regularly reviewing warranty guidelines provided by suppliers can also safeguard your work and materials.
Frequently Asked Questions
How Do I Identify Compatible Foam Replacements for My Vintage Seat?
To identify compatible foam replacements, measure your original foam’s thickness, density, and shape carefully. Check your seat’s model and compare it with available foam options designed for vintage motorcycles or similar bikes. Look for high-density foam that offers both comfort and support, and verify the dimensions match your seat pan. When in doubt, consult with upholstery suppliers or forums specializing in vintage motorcycle restoration for expert advice.
What Safety Precautions Are Necessary During Seat Pan Welding or Fiberglass Repairs?
When welding or doing fiberglass repairs, you need to prioritize safety. Always wear protective gear like gloves, goggles, and a respirator to avoid burns, fumes, and debris. Work in a well-ventilated area to prevent inhaling harmful fumes. Keep a fire extinguisher nearby, and make certain your workspace is free of flammable materials. Follow manufacturer instructions carefully, and never rush the process to prevent accidents or compromised repairs.
How Can I Match New Leather Dye Color Precisely to Original Seat Color?
Think of your leather as a mirror reflecting history. To match the dye precisely, start by testing small amounts on hidden areas, blending shades gradually like mixing colors on an artist’s palette. Use multiple thin coats, allowing each to dry thoroughly, and compare under natural light. Keep notes of your mixture ratios, so you can replicate the perfect hue, ensuring your restored seat looks authentic and harmonious.
What Are the Best Methods to Prevent Future Rust on the Seat Frame?
To prevent future rust on the seat frame, first thoroughly clean all rust using a wire wheel or sandblaster, then apply a rust preventative paint or primer designed for metal surfaces. Make sure to coat all exposed areas evenly. Afterward, consider sealing the frame with a clear protective coating for added durability. Regular inspections and touch-ups will help catch any early signs of corrosion and keep your seat frame rust-free.
How Often Should I Condition Restored Leather to Maintain Its Quality?
You should condition your restored leather every 3 to 6 months to keep it soft and prevent cracking. Studies show that regular conditioning can extend leather lifespan by up to 50%. By maintaining this routine, you preserve the leather’s natural oils, keeping it supple and looking like new. Consistent care not only enhances appearance but also protects your seat from environmental damage, ensuring it stays comfortable and durable for years to come.
Conclusion
Now, with a gentle touch and keen eye, you’ve brought new life to your vintage motorcycle seat. Like tending a delicate bloom, your careful work has nurtured its character and charm. As you sit back and admire your craftsmanship, remember it’s the subtle details that make it truly special. With ongoing care, your restored seat will continue to tell its story, inviting you to enjoy many more rides filled with nostalgia and adventure.