To bring faded chrome back to life, start by evaluating its condition for cracks, rust, or damage. Clean the surface thoroughly with degreasers and wash with a water break test; a sheet indicates it’s ready for polishing. Use fine abrasives and polishing compounds to restore shine, or opt for professional rechroming if damage is severe. Proper preparation, polishing, and care are key—continue exploring for detailed steps to achieve flawless, long-lasting results.
Key Takeaways
- Thoroughly clean and remove oxidation, grease, and rust using alkaline degreasers, acid etching, and mechanical methods like sandblasting.
- Polish the surface with high-quality abrasives and fine compounds to restore shine before applying chrome.
- Replate with electrochroming, ensuring proper surface activation and adhesion through acid etching and electrical charge.
- Use protective sealants or chrome-specific wax to maintain the restored finish and prevent future tarnishing.
- Regularly clean and buff the chrome surface to preserve its shine and extend its lifespan.
Assessing the Condition of Your Chrome Surface
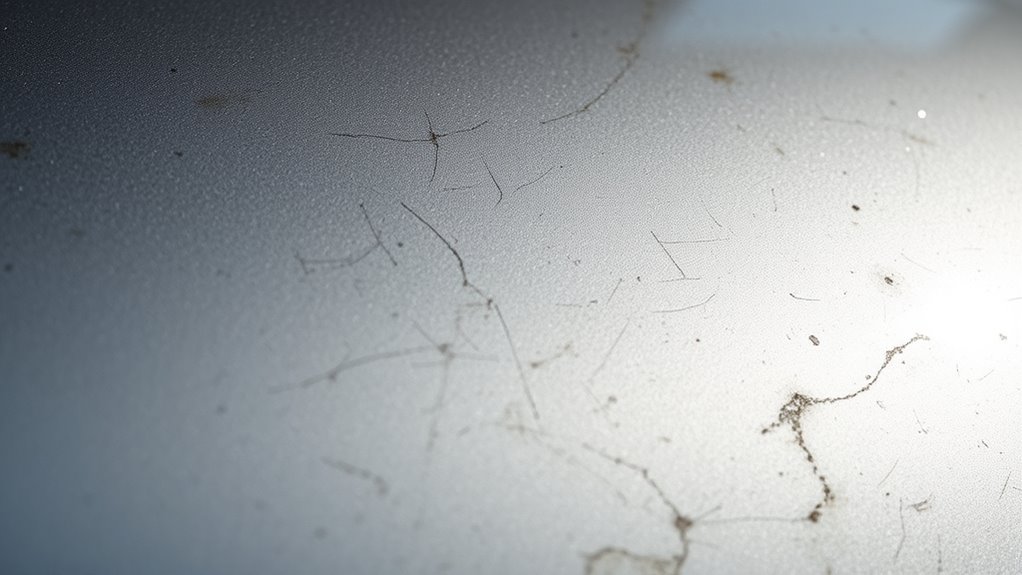
Before beginning any restoration, you need to carefully evaluate the current state of your chrome surface. Check for visible damage like cracks, dents, or corrosion, which may require repairs before proceeding. Look for signs of peeling or flaking chrome, indicating underlying rust or old coatings that need removal. Assess the surface’s gloss; dullness or water spots suggest surface contamination or oxidation. Use a water break test—rinse the surface with water; if it beads up, it’s dirty, but if it sheets smoothly, it’s relatively clean. Inspect for pitting or scratches, which could affect the final finish. Understanding these issues helps you plan the appropriate cleaning and preparation steps, ensuring you don’t overlook underlying problems that could compromise the quality of the restoration. Recognizing the importance of surface assessment can motivate careful evaluation, as it can lead to a more satisfying and creative restoration process. Additionally, a thorough assessment can help identify potential corrosion, allowing for targeted treatment before restoration begins. Proper identification of surface conditions also helps determine the appropriate cleaning methods and whether any surface damage repairs are necessary prior to polishing or rechroming. Being aware of Free Floating issues can help prevent future deterioration and extend the longevity of your chrome finish.
Proper Surface Cleaning and Preparation Techniques

To restore chrome effectively, start by thoroughly cleaning the surface with degreasing agents like alkaline solutions to remove grease and contaminants. Mechanical methods such as sandblasting or abrasive blasting can then strip away rust and old coatings, ensuring a clean base. Additionally, applying proper surface preparation techniques like acid etching and activating the surface with an acid wash can significantly enhance adhesion. Preparing the surface with proper cleaning protocols can help prevent future corrosion and ensure a longer-lasting finish. Incorporating vetted cleaning procedures and maintaining consistent surface conditions are essential steps in achieving a durable and high-quality chrome finish. Finally, activate the surface with acid etching and consider applying an electrical charge to improve adhesion before moving on to plating.
Effective Cleaning Methods
Effective cleaning is essential for achieving a durable and high-quality chrome finish. You need to remove grease, dirt, and oxidation thoroughly before any polishing or plating. Start with degreasing using alkaline solutions to eliminate contaminants. Mechanical cleaning like sandblasting can strip rust and old coatings, preparing the surface for subsequent steps. Water break tests verify cleanliness—when water sheets, the surface is ready; beading indicates residue. Use the following table for guidance:
| Cleaning Method | Purpose | Tips |
|---|---|---|
| Alkaline Degreasing | Remove oils and grease | Use proper dilution |
| Mechanical Abrasion | Eliminate rust and old coatings | Keep abrasive clean |
| Water Rinse | Verify surface cleanliness | Water sheets = clean |
| Acid Etching | Remove oxidation, enhance adhesion | Follow safety protocols |
Additionally, proper surface preparation is crucial for ensuring the longevity and shine of the chrome finish. Proper surface preparation ensures adhesion of the chrome layer and helps prevent peeling or corrosion over time. Employing advanced cleaning techniques can further improve surface conditions for optimal results. Incorporating professional polishing methods can also contribute to achieving a mirror-like chrome surface that lasts longer.
Surface Activation Techniques
Surface activation is a critical step that guarantees your chrome surface bonds properly during plating. Proper preparation removes residual oxidation, grease, and old coatings, creating an ideal foundation. You’ll use acid etching with phosphoric acid (~30%) to strip oxidation and improve adhesion. Applying an electrical charge during the acid dip can further boost chemical activity, ensuring a stronger bond. To verify cleanliness, perform a water break test—if water sheets smoothly, your surface is ready; if it beads, clean further. Incorporating professional-grade chemicals ensures optimal results and consistency in your process. The use of acid etching not only prepares the surface but also increases surface energy, which is essential for a durable chrome finish. Utilizing proper surface cleaning techniques can significantly enhance the effectiveness of your process. Increasing your understanding of surface activation techniques can help you achieve more reliable and long-lasting results. Additionally, understanding the importance of surface preparation can lead to more consistent and professional results. Embrace these techniques to ignite confidence in your process:
- Feel the satisfaction of a pristine, ready surface
- Experience the assurance of excellent adhesion
- Witness your chrome restore with flawless, durable results
Polishing Chrome for a Flawless Finish
To achieve a flawless chrome finish, you need to focus on proper surface preparation techniques that remove scratches and imperfections. Using the right polishing materials, like fine abrasives and non-abrasive compounds, guarantees a smooth, mirror-like shine without damaging the surface. Proper surface preparation is essential for ensuring the longevity and brilliance of the chrome, especially when combined with advanced polishing techniques that can further enhance the durability and brilliance of the chrome surface. Additionally, understanding emotional regulation can help maintain patience and precision during the polishing process, leading to a more consistent and high-quality finish. Developing techniques for surface assessment can greatly improve the effectiveness of your polishing process. Moreover, selecting the appropriate protective coatings and sealants can significantly extend the lifespan and maintain the luster of the chrome. Finally, applying protective coatings and sealants helps maintain the gloss and prevents future corrosion or tarnishing.
Surface Preparation Techniques
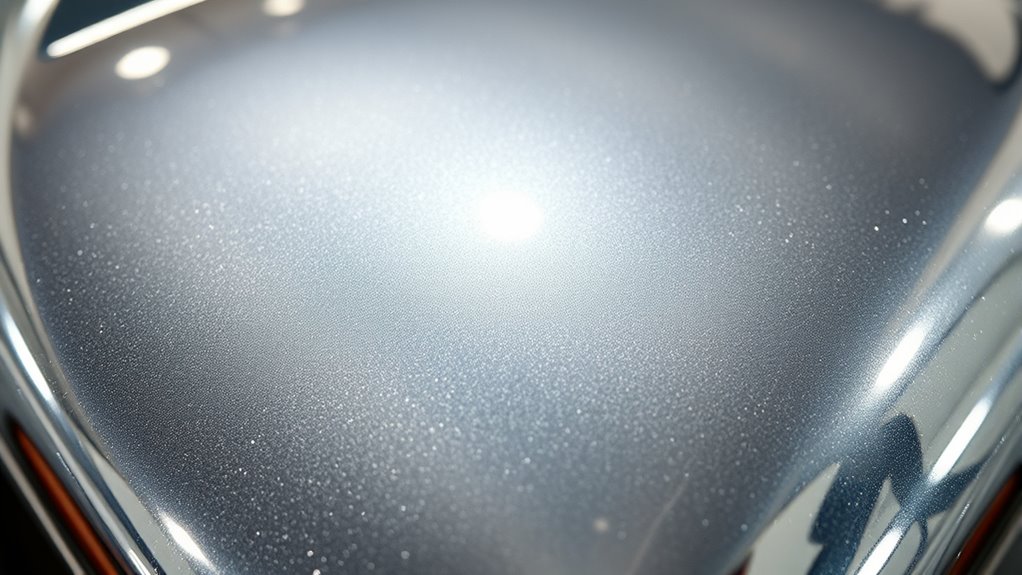
Achieving a flawless chrome finish starts with meticulous polishing to remove imperfections and create a smooth, reflective surface. Proper surface preparation guarantees the chrome adheres evenly and shines brilliantly. Begin by cleaning the surface thoroughly to eliminate grease, dirt, and oxidation. Mechanical cleaning, like sandblasting, removes rust and old coatings, while acid etching enhances adhesion. During this process, ensure the surface is completely clean and free of residues. Proper preparation prevents flaws, uneven plating, and dull spots. When done right, your chrome will have a mirror-like finish that lasts. Surface preparation is a crucial step in ensuring the durability and brilliance of the finish.
- Feel the satisfaction of a perfectly prepared surface, ready for stunning chrome.
- Experience confidence knowing every detail is primed for flawless adhesion.
- Witness your work transform into a dazzling, reflective masterpiece.
Proper Polishing Materials
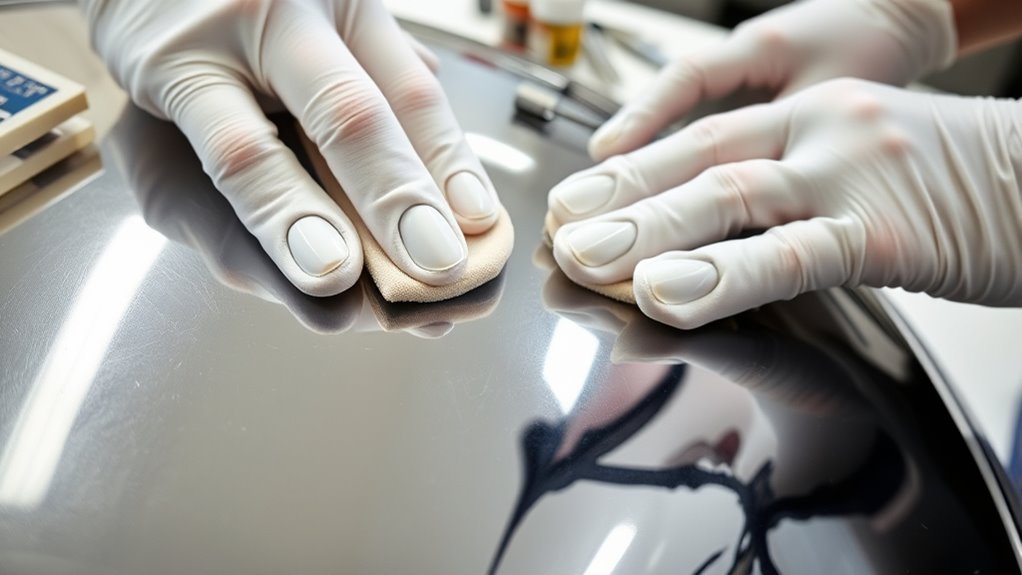
Using the right polishing materials is essential for achieving a flawless chrome finish. Start with a high-quality, fine abrasive like aluminum oxide or cerium oxide to remove minor imperfections without scratching the surface. Progressively switch to finer polishing compounds to enhance the shine and smoothness. Use soft, non-abrasive wheels or foam pads designed for chrome to prevent damage. For delicate areas, ultra-fine steel wool (#0000) or microfiber cloths work best for applying polish gently. Always choose products formulated specifically for chrome surfaces to avoid corrosion or residue buildup. After polishing, use a clean microfiber cloth to buff the surface, removing any leftover compound and revealing a mirror-like, flawless finish. Proper material selection ensures durability and a professional-level shine. Additionally, maintaining the chrome finish regularly can prevent tarnishing and keep the surface looking pristine over time.
Finishing and Protection
After applying the appropriate polishing materials, the focus shifts to finishing and protection to guarantee a flawless chrome surface. You want your work to shine brightly and last long, so proper sealing and safeguarding are essential. Use a high-quality chrome polish or wax to add a protective barrier that repels water, dirt, and oxidation. Buff the surface gently to enhance the mirror-like finish and ensure every detail gleams. Applying a clear protective coating or sealant will preserve your work, preventing future corrosion or tarnish. Remember, a well-protected chrome surface not only looks stunning but also endures the test of time.
- Feel the satisfaction of a perfectly polished, mirror-like finish.
- Experience the pride of lasting protection against the elements.
- Enjoy the confidence of a flawless, long-lasting shine.
The Chrome Plating Process Explained

The chrome plating process involves depositing a thin, durable layer of chromium onto a prepared metal surface through electrochemical means. First, you clean and prepare the surface thoroughly, removing grease, rust, and oxidation to guarantee proper adhesion. After polishing to a smooth, reflective finish, the part is submerged in an electroplating bath containing chromic acid with hexavalent chromium ions. When electrical current passes through the bath, chromium ions are reduced and deposited onto the activated surface, forming a thin, protective layer. The layer’s thickness builds over several hours, and sometimes a nickel layer is added beforehand for extra durability and shine. Once the desired coating is achieved, the part is carefully rinsed and dried, ready for further finishing or assembly.
Post-Plating Care and Finishing Touches
Once the plating process is complete, proper post-plating care guarantees your chrome surface looks its best and lasts longer. You’ll want to rinse the part thoroughly to remove any residual chemicals, then dry it carefully to prevent water spots. Applying a light buff with a clean microfiber cloth enhances the shine and smoothness. To protect your finish, consider using a chrome-specific wax or sealant, which adds a protective barrier against corrosion and dirt. Regular maintenance keeps your chrome looking pristine and prevents tarnishing or pitting.
- Feel the satisfaction of a flawless, mirror-like surface every time you glance at your work
- Experience the pride of preserving your restoration’s durability and beauty
- Enjoy the confidence that comes from knowing your chrome will stand the test of time
Restoring and Rechroming Damaged Chrome Parts
Restoring and rechroming damaged chrome parts requires careful preparation to guarantee a durable and smooth finish. Begin by inspecting the part for cracks, dents, or corrosion, and repair these issues with appropriate fillers like brass or lead. Once repairs are solid, strip the old chrome layer using chemical or electrolytic methods, ensuring all residue is removed. If the chrome is faded or uneven, sandblast or bead blast the surface to create a clean, matte base for rechroming. After cleaning and surface activation, ensure the part is free of debris and oxidation. Properly prepared parts will promote adhesion and achieve a high-quality, long-lasting chrome finish. This meticulous process helps restore the part’s appearance and structural integrity, setting the stage for successful rechroming.
Safety Tips and Quality Checks for Chrome Restoration
Safety is paramount when restoring chrome parts, especially given the toxic chemicals involved in cleaning and plating processes. You must handle acids, chromic acid, and hexavalent chromium with care to prevent health risks. Always wear proper PPE, including gloves, goggles, and respirators, and work in well-ventilated areas. Regularly check your work for quality issues like uneven coating or contamination, which can compromise durability and appearance. Remember, a small mistake can lead to costly rework or safety hazards. Stay vigilant during each step, from cleaning to final inspection.
- Protect your health by using PPE and ensuring proper ventilation.
- Conduct thorough visual and dimensional inspections to catch flaws early.
- Follow strict protocols to avoid contamination or incomplete plating, ensuring a flawless finish.
Frequently Asked Questions
How Long Does a Typical Chrome Rechroming Process Usually Take?
A typical chrome rechroming process usually takes between 10 to 20 hours, depending on the complexity and size of the item. You’ll start with stripping the old chrome, then proceed through cleaning, surface preparation, and polishing. The actual electroplating stage, which deposits the new chrome layer, often lasts several hours. Keep in mind that additional time may be required for inspection, drying, and any touch-up work to guarantee a flawless finish.
What Are the Signs That Chrome Needs to Be Stripped or Replaced?
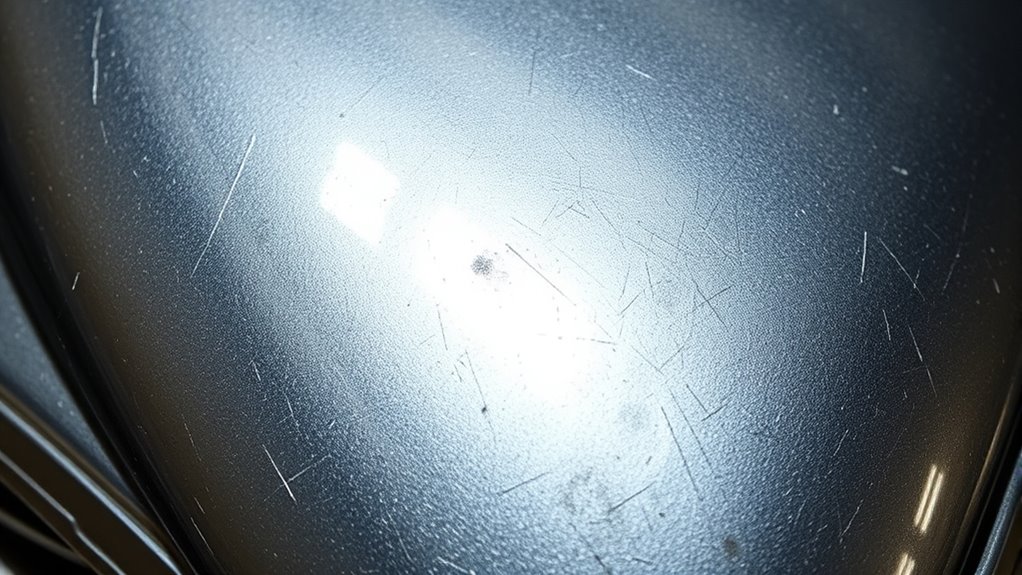
If your chrome starts peeling, bubbling, or shows dull patches that refuse to shine, it’s time to strip or replace it. Cracks, corrosion, and extensive pitting are obvious signs you can’t buff away. When the surface feels rough or uneven despite polishing, it’s a clear indication the underlying layer’s gone bad. Don’t wait for the whole thing to fall apart—your chrome’s crying out for a refresh before it’s beyond saving.
Can DIY Polishing and Plating Match Professional-Quality Results?
You can achieve professional-quality results with DIY polishing and plating if you follow proper techniques and use quality materials. Focus on thorough cleaning, precise polishing with appropriate abrasives, and careful control of plating conditions. However, keep in mind that professional equipment and experience often produce more consistent, durable finishes. If you’re patient and meticulous, your DIY efforts can look impressive, but for flawless, long-lasting results, consulting a professional might still be the best choice.
How Do Environmental Conditions Affect Chrome Restoration Quality?
Environmental conditions can substantially impact your chrome restoration quality. You might think you can work anywhere, but high humidity or dust can cause oxidation, blemishes, or poor adhesion during plating. To get the best results, work in a controlled, clean environment with stable temperature and low humidity. Proper ventilation is essential to avoid chemical fumes, and protecting your work area from dust ensures a smooth, durable finish.
What Are the Most Common Mistakes to Avoid During Chrome Polishing?
You should avoid using harsh abrasives or overly aggressive polishing techniques that can scratch or damage the chrome surface. Don’t rush the process; use the right, fine abrasive materials and gentle buffing to prevent swirl marks or uneven finishes. Also, steer clear of neglecting proper cleaning beforehand, as dirt and contaminants can cause imperfections. Always finish with a microfiber cloth to remove residue and achieve a smooth, reflective shine.
Conclusion
With the right techniques, you’ll turn your dull, faded chrome into a mirror-like masterpiece that could blind passersby! Whether you’re polishing, rechroming, or restoring, your patience and care will make your surfaces look like they just rolled off the factory floor—faster than you can say “showroom shine.” Get ready to dazzle everyone with your unbeatable chrome revival skills, transforming your project into a stunning masterpiece that’s impossible to ignore!